background image

OUTDOOR INSTALLATION 

(Mast Sold Separately)

1

PARTS LIST

WARNINGS:

•  Read this manual carefully and completely before 

attempting to assemble, install or operate this product. 

Winegard

®

 recommends the installation of this 

equipment be done by a professional technician. 

•  Save these instructions.
•  Do not paint any portion of the Winegard

®

 Extreme

Painting the system could damage the system and will 

void the warranty.

•  When first setting up the Winegard Extreme it is 

recommended to check for software updates the first 

time the system is connected to an internet signal. It is 

also recommended to check for updates every couple 

months for fixes and added features.

•  PoE must be installed indoors.

The RW-2035 antenna may be installed inside or 

outside on any mast or pole.


DO NOT MOUNT UPSIDE DOWN OR OVER 

CHIMNEY OPENINGS

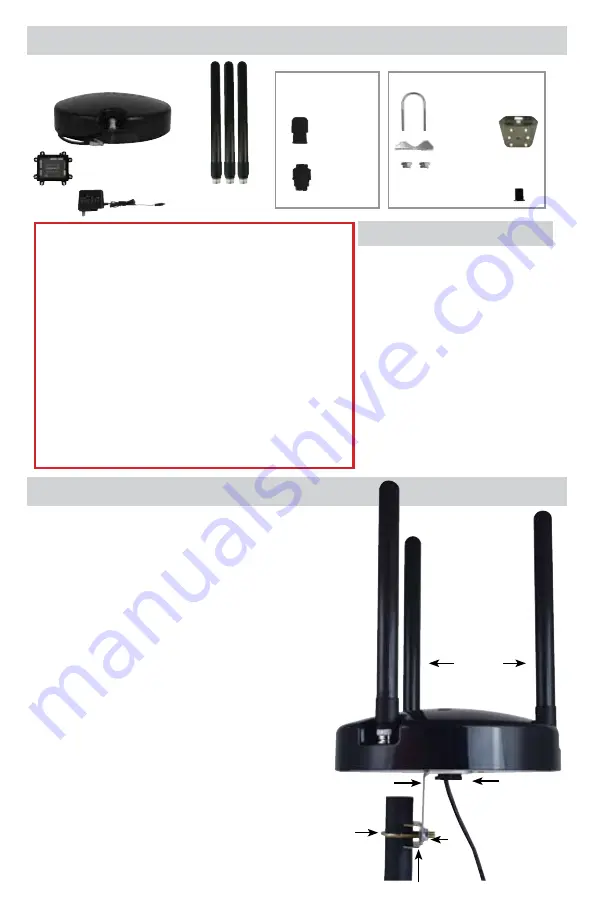
1) 

Remove each antenna from the protective bag and 

screw it into the correct open port on the outdoor 

unit (ODU). 

Figure 1.


2) 

Firmly tighten each antenna by hand. If using a 

wrench, do not overtighten as the antennas or 

housing may become damaged. The antennas 

should be tightened to 20–25 inch pounds of 

torque. 

3) 

Slide the cable from the antenna through the 

mounting bracket and nylon bolt. Screw the 

nylon bolt into the hole on the bottom of the 

antenna until the mounting bracket is firm 

against the bottom of the antenna. 

Figure 1. 

4) 

Insert “U” bolt through mast clamp and 

mounting bracket and start hex nuts onto “U” bolt. 

See Figure 1

. Slide mast thru “U” bolt and tighten 

hex nuts with 7/16” wrench.


SPECS

•  Dimensions: 10.3

 diameter, 12.4


tall, 3.75 lbs.

•  Wireless Standard: 802.11a/b/g/n 

•  Frequency Band: 2.4GHz 

•  Amplifiers: (3) 2.4GHZ Amplifiers

•  Antennas: (3) detachable high gain 

5dBi antennas

•  Wireless Security: WEP, WPA, WPA2, 

WPA mixed

•  Ports: (1) RJ45 10/100

•  Power Rating: Switching, AC Input 

100-240v, 1.5A

Outdoor 2.4ghz 

Antennas (3)

Extreme

 Outdoor Unit (ODU)

Figure 1

Power Supply

Power Inserter 

(PoE)

Outdoor Ethernet 

Connector Kit :

Barrel

Nut (2)  

Crimp (2) 

Seal (2)

Mast 

Clamp

Nylon Bolt

Mounting Bracket

U-Bolt

Hex 

Nut

Mast or pipe  

(not provided)

ODU

Antennas

Hardware Bag:

Mast 

Clamp

Nylon 

Bolt

Mounting 

Bracket

U-Bolt

Hex Nut (2)

Mast Diameter Range:  

¾” – 1.25” O.D.

Ethernet Cable required, not included (85 ft. maximum)

Содержание Extreme RW2035W

Страница 1: ... available FREE WINEGARD Extreme OUTDOOR WIFI EXTENDER RW 2035 RW2035W Installation Operation Manual For help email help winegard com or call 1 800 320 9992 2452414 Rev5 3 21 www winegard com extreme Manuel disponible en français au www winegard com extreme Manual disponible en español en www winegard com extreme Winegard App CONNECTED Quickly set up your Winegard Extreme system ...

Страница 2: ...t overtighten as the antennas or housing may become damaged The antennas should be tightened to 20 25 inch pounds of torque 3 Slide the cable from the antenna through the mounting bracket and nylon bolt Screw the nylon bolt into the hole on the bottom of the antenna until the mounting bracket is firm against the bottom of the antenna Figure 1 4 Insert U bolt through mast clamp and mounting bracket...

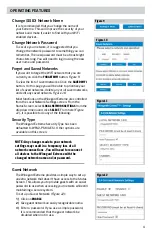
Страница 3: ...e connector into the barrel and make sure that you hear it click Slide the crimp until you can thread it snugly onto the barrel and screw the nut back onto the crimp and tighten until snug 5 Repeat this process with the ethernet cable not provided that runs into the building This cable should not exceed 85 feet Figure 2 OUTDOOR INSTALLATION Mast sold separately cont INTERIOR INSTALLATION Figure 3 ...

Страница 4: ...onnected open an internet browser and type 10 11 12 1 into the address bar and press Enter Figure 5 This will take you to the Admin Login screen Figure 6 Login using Username admin Password admin To connect to a WiFi network go to Step 4 4 To connect to a WiFi network select WiFi and then click on SCAN FOR WiFi Figure 7 This will bring up a list of all WiFi signals in range this should take about ...

Страница 5: ...tings screen From the Status Screen select LOCAL NETWORK SETTINGS from the drop down menu and click SELECT From here Figure 11 it is possible to do any of the following Security Type The Winegard Extreme Security Type has been defaulted to WPA2 PSK AES Other options are available on this screen Guest Network The Winegard Extreme provides a simple way to set up an extra network that doesn t have ac...

Страница 6: ...ion normally Figure 14 NOTE During this reset your device may switch to a local remembered WiFi network This will not allow you to return to the Extreme setup screens If this happens simplyreconnectmanuallytothe Extreme sSSIDagainfromyourdevice Connected Devices This displays the name of each device currently connected wirelessly to the Winegard Extreme Change Network Address Change Admin Password...

Страница 7: ...it to the original factory settings Then you may log in using the factory SSID and password located on the front of this manual or on the ODU What do I do if 10 11 12 1 does not bring up the login screen One of several things has happened The first thing to check is the WiFi signal that your model is connected to If this is not the Winegard Extreme SSID this address isn t valid If you are indeed c...

Страница 8: ...mitationsonhowlonganimpliedwarrantylasts ortheexclusionoflimitationofincidentalorconsequentialdamages sothe abovelimitationsorexclusionsmaynotapplytoyou ThiswarrantygivesCustomerspecificlegalrights Customermayalsohaveotherrightsthatmayvaryfromstatetostate WS MOBWARREV3 Rev 10 14 FCCSTATEMENT ThisdevicecomplieswithPart15oftheFCCRules Operationissubjecttothefollowingtwoconditions 1 This devicemaynot...

Отзывы: