


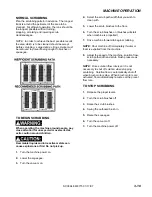
HAZARD INTENSITY LEVEL
SCX364 86037150 1/17/07
2-2
The following symbols are used throughout this guide as indicated in their descriptions:
HAZARD INTENSITY LEVEL
There are three levels of hazard intensity identified by signal words -
WARNING
and
CAUTION
and
FOR
SAFETY.
The level of hazard intensity is determined by the following definitions:
WARNING
- Hazards or unsafe practices which COULD result in severe personal injury or death.
CAUTION
- Hazards or unsafe practices which could result in minor personal injury or product or property
damage.
FOR SAFETY: To Identify actions which must be followed for safe operation of equipment.
Report machine damage or faulty operation immediately. Do not use the machine if it is not in proper
operating condition.
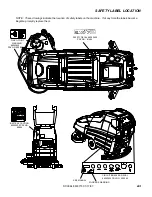
Following is information that signals some potentially dangerous conditions to the
operator or the equipment. Read this information carefully. Know when these conditions can exist. Locate
all safety devices on the machine. Please take the necessary steps to train the machine operating
personnel.
FOR SAFETY:
DO NOT OPERATE MACHINE:
Unless Trained and Authorized.
Unless Operation Guide is Read and understood.
In Flammable or Explosive areas.
In areas with possible falling objects.
WHEN SERVICING MACHINE:
Avoid moving parts. Do not wear loose clothing; jackets, shirts, or sleeves when working on the
machine. Use Windsor approved replacement parts.
Batteries emit hydrogen gas. Explosion or fire can result. Keep sparks and open flame away. Keep
top cover in raised position when charging. Keep sparks and flames away from the batteries. Do
not smoke around batteries.
Disconnect batteries before working on machine. Only qualified personnel should work inside
machine. Always wear eye protection and protective clothing when working on or near batteries.
Avoid skin contact with the acid contained in the batteries.
Never allow metal to lie across battery tops.