


MACHINE OPERATION
SCX364 86037150 1/17/07
3-9
PRE-RUN MACHINE INSPECTION
Do a pre-run inspection to find possible problems
that could cause poor performance or lost time from
breakdown. Follow the same procedure each time to
avoid missing steps.
NOTE: See maintenance section for pre-run
machine inspection checklist items.
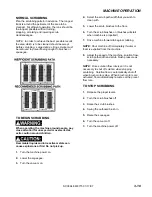
STARTING MACHINE
NOTE: Perform pre-run machine check before
operating machine.
FOR SAFETY: Before starting machine, make
sure that all safety devices are in place and
operating properly.
1.
Turn the machine power on.
2.
Release the parking brake, if your machine is
equipped with this option.
3.
Engage the direction propel levers for the
desired direction.
EMERGENCY STOP PROCEDURES
1.
Release the propel levers.
2.
Turn machine power off with key switch.
3.
If an electrical problem is suspected push in
emergency stop button, if machine is equipped
with this option.
4.
Apply brakes, if your machine is equipped with
this option.
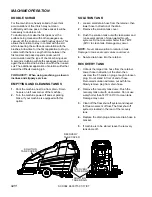
FILLING SOLUTION TANK
FOR SAFETY: Before leaving or servicing
machine; stop on level surface, turn off machine
and remove key.
1.
Turn the machine power off.
2.
Set the parking brake if your machine is
equipped with this option.
3.
Remove solution tank cover.
4.
Fill the solution tank with clean water, leaving
enough room for the required amount of
cleaning solution. The solution tank capacity
filled to 2” (5 cm) from bottom of fill inlet is 23
gallons (87 liters). The water must not be hotter
than 140
°
F (60
°
C) to prevent damage to the
tank.
5.
Measure the chemical into the solution tank.
Liquid chemicals should be added to the
solution tank after filling with water. Dry
chemicals should be thoroughly mixed before
being added into solution tank. Commercially
available, high alkaline floor cleaners, are
suitable for use in the
solution system.
NOTE: Read the chemical manufacturers
recommended proportion instructions.
6.
Replace solution tank cover.
Flammable materials can cause an explosion or
fire. Do not use flammable materials in the
tanks.