en
Maintenance and repair
76
WILO SE 2021-10
5. Coat the interior hexagonal head screw with the thread-locking fluid, insert the
washer and screw it into the shaft.
6. Tighten the propeller attachment. Max. tightening torque: see appendix.
7. Turn the propeller by hand and check that it rotates easily.
▶ Propeller is changed. Check the oil in the seal housing and fill up if required.
9.6.4
Replacing the mechanical seal on
the fluid side
1
2
3
4
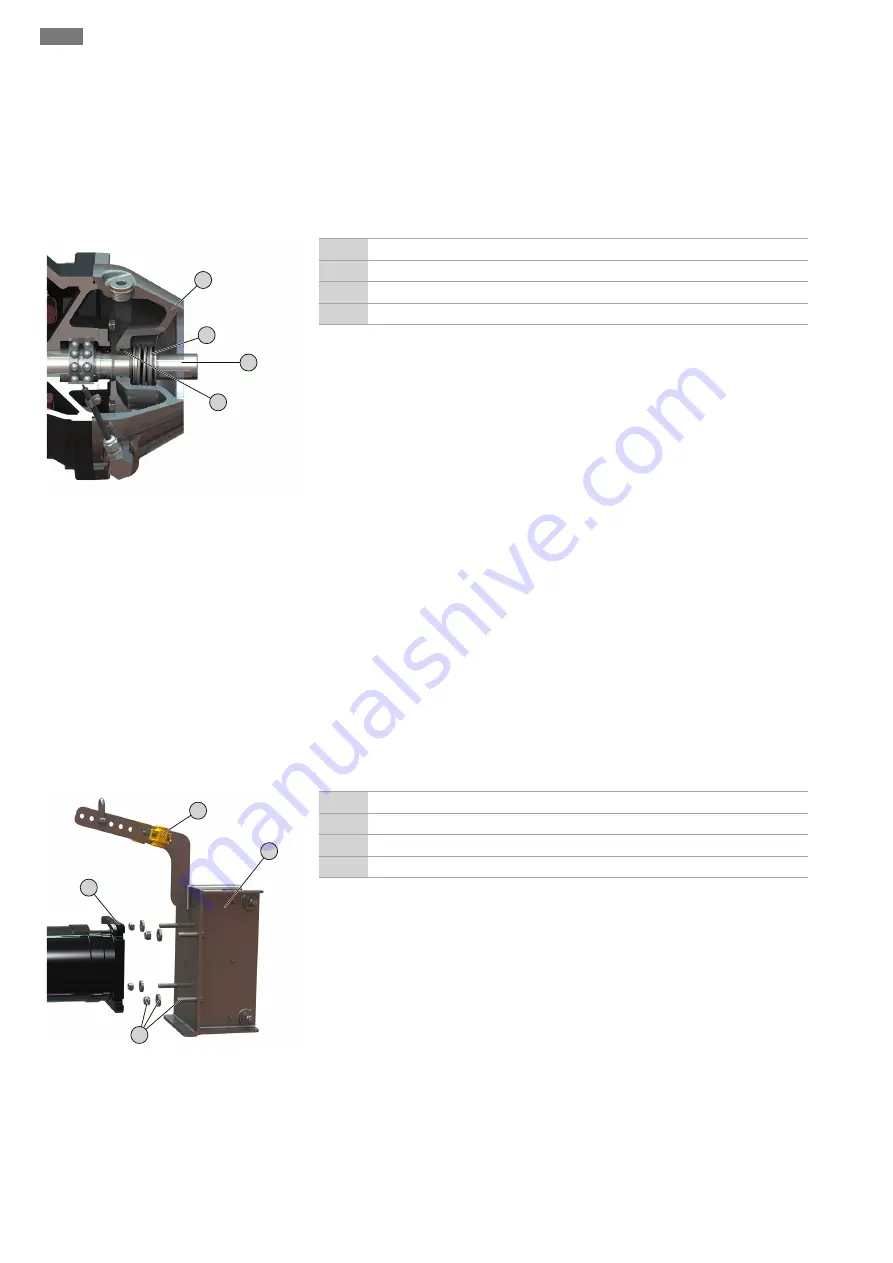
Fig. 14:
Replacing mechanical seals
1
Shaft
2
Mechanical seal: Spring
3
Mechanical seal: Stationary ring
4
Seal housing
‡
Mixer set down on a firm surface and secured.
‡
Tools are ready for use.
‡
Oil drained from seal housing.
‡
Propeller removed.
1. Remove key from the shaft.
2. Remove the spring of the mechanical seal with support washer from the shaft.
3. Push the stationary ring of the mechanical seal out of its seating and remove from
the shaft.
4. Clean the shaft and check for wear and corrosion.
WARNING! Contact customer
service if the shaft has been damaged!
5. Lubricate the shaft using wetted water or detergent.
CAUTION! Do not use oil or
grease as lubricants!
6. Press in a new stationary ring for the mechanical seal into the housing using an as-
sembly unit.
CAUTION! Do not tilt the stationary ring when pushing it in. If the
stationary ring is tilted or installed at an angle when it is pushed in, the station-
ary ring will fracture. The mechanical seal can then no longer be used!
7. Insert new spring of the mechanical seal with support washer onto the shaft.
8. Clean the key and lay it in the groove of the shaft.
9. Mount the propeller.
▶ Mechanical seal is replaced. Fill oil in the seal housing.
9.6.5
Replacing the frame
1
2
3
4
Fig. 15:
Replacing the frame
1
Frame
2
4x fixation material: Hexagon head screw, washer, hexagon nut
3
Motor flange
4
Cable brackets for strain relief
‡
Mixer set down on a firm surface and secured.
‡
Motor supported in such a way that the frame can easily be changed.
‡
Tools are ready for use.
1. Open the cable brackets and take out the connection cable.
2. Undo and remove hexagon nuts.
3. Remove washers from the hexagon head screws.
4. Remove the frame from the motor flange.
5. Clean dirt from the motor flange, e.g. deposits, old sealing material.
6. Remove hexagon head screws from the frame and insert them in the new frame.
7. Coat the hexagon head screws with thread-locking fluid.
8. Place the new frame on the motor flange.
9. Place washers on the hexagon head screws.
10.Attach and firmly tighten hexagon nuts. Max. tightening torque: see appendix.


