background image


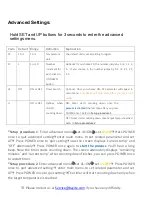
Advanced Settings:  
 

Hold SET and UP buttons for 3 seconds to enter the advanced 
settings menu. 
 

Code 

Default   Range 

Definition 

Explanation 

CF 

F or C 

F or C 

Temperature 

unit 

The default unit is set according to region. 

ST 

1 or 10 

Number 

increment for 

each click on 

UP/DOWN 

button 

Optional

. If you choose 10, the number jumps by 1. IE: 1, 2, 3, 

4….  If  you  choose  1,  the  number  jumps  by  0.1.  IE:  2.1,  2.2, 

2.3… 

dL 

OFF 

ON or OFF 

Timer Switch 

Optional

.  Once  you  choose  ON,  AT  parameter  will appear  in 

main  menu. 

And  timer  will  only  work  after  you  set  an  AT 

value. 


ON or OFF 

Defines  when 

to start  

counting down 

ON:  timer  starts  counting  down  once  the 

process is started 

(the last step after you press 

POWER once). Refer to 

Setup procedure 1


OFF: timer starts counting down once target temp is reached. 

Refer to 

Setup procedure 2


*Setup  procedure  1

:  Enter  advanced  menu

set  dL=ON

  set


U=ON

Press  POWER 

once  to  quit  advanced  setting

enter  main  menu  to  set  related  parameter  and  set 

AT

  Press POWER once to  quit setting

now the screen displays  ‘current temp’ and 

‘OFF’  alternately

  Press  POWER  once  again  to 

start  the  process

.  You’ll  hear  a  long 

beep. Now the timer starts counting down. The screen alternately displays ‘remaining 
minutes’ and ‘current temp’. After counting down finishes, you can press POWER once 
to restart timer. 

*Setup procedure 2

: Enter advanced menu

set dL=ON

 set


U=OFF

 Press POWER 

once  to  quit  advanced  setting

  enter  main  menu  to  set  related  parameter  and  set 

AT

 Press POWER once to quit setting

The timer will start counting down only when 

the target temperature is reached.  


 Please contact us a

[email protected]

 if you have any difficulty. 


Содержание WH1436A

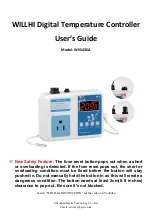
Страница 1: ...ut when a short or overloading is detected If the fuse reset pops out the short or overloading condition must be fixed before the button will stay pushed in Do not manually hold the button in as this will create a dangerous condition The button needs at least 2cm 0 8 inches clearance to pop out Be sure it s not blocked Search WH1436A INSTRUCTION for the video on YouTube ...

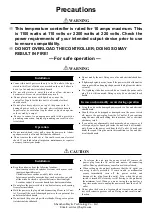
Страница 2: ...unit with a damaged power cord is a fire and electrical shock hazard Should this unit be dropped or damaged turn the power switch off remove the power plug from the AC outlet If you continue using the unit without heeding this instruction fire or electrical shock may result If you notice any abnormality such as smoke odor or noise or if a foreign object or liquid gets inside the unit turn it off i...

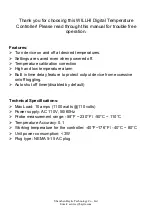
Страница 3: ...red off Temperature calibration correction High and low temperature alarm Built in time delay feature to protect output device from excessive on off toggling Auto shut off timer disabled by default Technical Specifications Max Load 10 amps 1100 watts 110 volts Power supply AC 110V 50 60Hz Probe measurement range 58 F 230 F 50 C 110 C Temperature Accuracy 0 1 Working temperature for the controller ...

Страница 4: ...led if you specify a value for AL or AH Press any button to silence the alarm when it sounds Unplug the unit briefly to enable the alarm function again Quick Start Set two parameters the on and off temperatures These are ON and OFF respectively in the settings menu Set ON to the desired temperature the unit should supply output power and OFF to the desired temperature the unit should shut off outp...

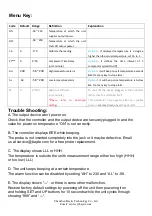
Страница 5: ...t off the device plugged in the controller rather than the controller itself This parameter only appears after you enable timer in advanced menu by setting dL ON Trouble Shooting A The output device won t power on Check that the controller and the output device are securely plugged in and the value for power on temperature ON is set correctly B The controller displays EEE while beeping The probe i...

Страница 6: ...dure 1 OFF timer starts counting down once target temp is reached Refer to Setup procedure 2 Setup procedure 1 Enter advanced menu set dL ON set U ON Press POWER once to quit advanced setting enter main menu to set related parameter and set AT Press POWER once to quit setting now the screen displays current temp and OFF alternately Press POWER once again to start the process You ll hear a long bee...

Отзывы: