


28% Edge 540T Assembly Manual
Step 7.
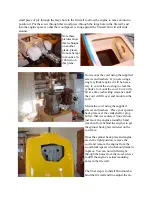
Installing the servos
1. Elevator servos.
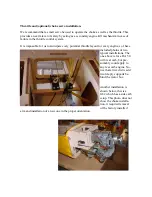
Trim away the covering from the rear sides of the fuselage to expose the two servo trays. At-
tach a servo extension to the servo cord long enough to reach the receiver, and tie this servo
connector together with dental floss or whatever you prefer.
Slide the extension through the servo hole and fish the end through the fuse with a piece of
wire with a hook or whatever you want to use. Servos should be secured with all screws.
There are two fuselage formers that have lightening holes in them. If you run the extensions
through these holes it keeps the wires from flopping around in flight.
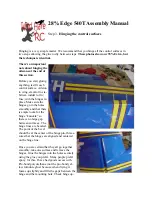
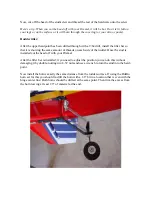
2.
Aileron servos
.
There is a servo wire tunnel through the wing that touches the servo tray. You can use a
piece of wire with a hook to fish through the hole and pull the servo pigtail through. Be sure
the extension is long enough to reach the receiver. Also be sure the servo extension is se-
curely attached to the servo lead. If you bought our hardware kit there are small plastic re-
tainer clips included for this purpose.
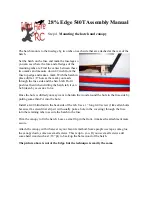
3.
Rudder servo
.
Do this last, after everything else is done and the plane is otherwise ready to fly.
Balance the plane and determine if weight is needed in the tail.
If tail weight is required, mount two servos in the tail below the elevator servos in the same
manner as the elevator servos.
If tail weight is not needed, I suggest that you mount a single powerful digital servo such as
a JR 8611 or Hitec 5945 in the servo tray and use pull-pull cables to actuate the rudder. If
necessary there is a second servo cutout which can be used to gang two servos for the rudder
and still use pull-pull.


