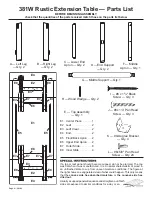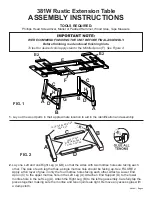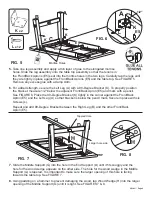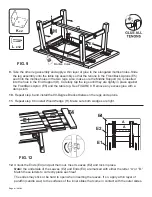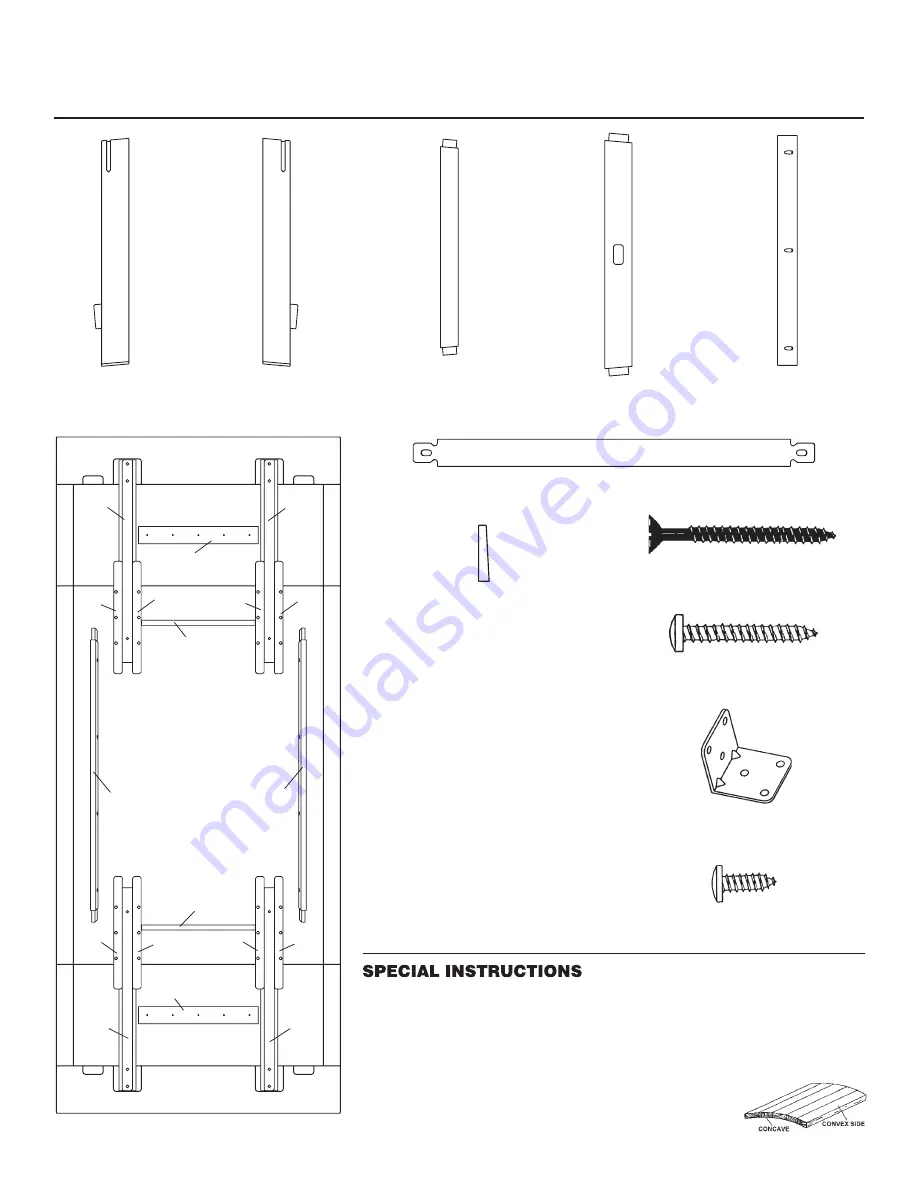
A — Left Leg
— Qty. 2
B — Right Leg
— Qty. 2
C — Lower End
Apron — Qty. 2
E1
E2
E4
E5
E6
E8
E5
E4
E2
E7
E7
E7
E7
E7
E7
E8
E8
E6
E3
E3
E8
E7
E7
Page 2 — 381W
D — End Support
— Qty. 2
F — Middle
Apron — Qty. 1
E — Top Assembly
— Qty. 1
G — Middle Support — Qty. 1
H — Wood Wedge — Qty. 2
E1 Center Piece . . . . . . 1
E2 Leaf . . . . . . . . . . . . . 2
E3 Leaf Cleat . . . . . . . . . 2
E4 End . . . . . . . . . . . . . . 2
E5 Front/Back Apron . . . 2
E6 Upper End Apron . . . 2
E7 Outer Slide . . . . . . . . 8
E8 Inner Slide . . . . . . . . 4
J — #8 x 1¼" Pan Head
Screw — Qty. 3
K — 90-Degree Bracket
— Qty. 4
I — #8 x 1
5
/
8
" Black
Screw — Qty. 4
L — #8 x 5/8" Pan Head
Screw — Qty. 24
If a top or leaf panel should become cupped, do not be alarmed. The top
was flat when it was manufactured. It is a natural characteristic of wood in
an unfinished state to cup from uneven moisture conditions. The figure at
the right shows an exaggerated view of what could happen. This only means
that the
convex side has absorbed moisture,
or
the concave side has
dried out.
Usually a cupped panel will equalize and straighten out if both
sides are exposed to similar conditions for a day or so.
381W Rustic Extension Table — Parts List
BEFORE BEGINNING ASSEMBLY,
check that the quantities of the parts received match those on the parts list below.


