


Page 8 — 1317AFGAC — 0
7
/08
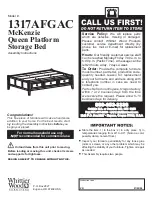
Place Deckboards (P) as shown in Fig. 12. There should be a small gap between
each deckboard. Secure with #8x1¼" Screw (E).
12.
Fig.
E x 24
P
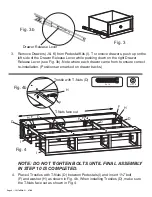
Carefully align drawer slides into the cabinet and gently push the drawers back to
their original positions. Sleep well, and enjoy!
13.
12


