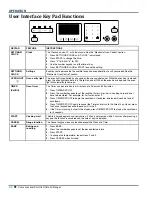
2-10
n
Vesta Gas and Electric Slide-In Ranges
OPERATION
6
FROZEN
BAKE
Prepackaged
food
1.
Position the food on a flat rack in the oven on rack position 4. See the “Positioning Racks and
Bakeware” section.
NOTE:
Cook only 1 package of frozen food at a time when using FrozenBake™ Technology.
2.
Press FROZEN BAKE.
3.
Press the number keypad to select the desired food option.
4.
Press the number keypads to set the temperature as recommended on the food packaging.
5.
Press COOK TIME.
6.
Press the number keypads to set the max cook time as recommended on the food packaging.
7.
Press START. The range will calculate the best cook time based on the current oven
temperature.
NOTE:
The cook time that appears in the display is the estimated required cook time as
calculated by the oven control. It may be different than the time you entered. A beep will alert
you to check the food’s doneness with at least 2 minutes remaining on the timer. Follow the
prompts on the display to select more time if desired.
8.
At the end of the cook time, a beep will alert you to check the food’s doneness. Follow the
prompts on the display to select more time if desired. Unless more time is selected, the bake
element turns off.
9.
Press CANCEL when finished.
BROIL
Broiling
1.
Press BROIL.
2.
Select the broiling temperature by pressing 1 - High or 2 - Low.
3.
Press START and allow the oven to preheat for 2 minutes.
4.
To change the temperature, repeat steps 2 and 3.
5.
Position the cookware in the oven and close the door.
6.
Press CANCEL when finished.
CONVECT
MODES
Convection
cooking
1.
Press CONVECT MODES until the desired convection mode appears in the display.
2.
Press START.
3.
Press the number keypads to set the desired temperature.
4.
Press START.
5.
To change the temperature, repeat steps 3 and 4. Press START or wait for the change to take
effect.
6.
Press CANCEL when finished.
KEEP WARM
Hold warm
Food must be at serving temperature before placing it in the warmed oven.
1.
Press KEEP WARM.
2.
Set the desired temperature between 145°F (63°C) and 190°F (88°C) using the number
keypads. The default temperature is 170°F (75°C).
3.
Press START.
4.
To change the temperature, repeat steps 2 and 3.
5.
Press CANCEL when finished.
DELAY
START
Delayed start
The DELAY START keypad is used to enter the starting time for an oven function with a delayed
start. Delay Start should not be used for foods such as breads and cakes because they may not
bake properly.
To set a Timed Cook or a Delayed Timed Cook, see “Cook Time” section.
COOK TIME
Timed cooking
Timed Cooking allows the oven to be set to turn on at a certain time of day, cook for a set length of
time, and/or shut off automatically.
To set a Timed Cook or a Delayed Timed Cook, see “Cook Time” section.
RAPID
PREHEAT
Rapid oven
preheating
Provides the fastest preheat time for the Bake function. Rapid Preheat is preset for Off, but it can
be changed to On.
1.
Press RAPID PREHEAT.
2.
The current setting will be displayed.
3.
Press the “1” keypad to adjust the setting.
4.
Press START or CANCEL to exit and display the time of day.
IMPORTANT:
This feature should only be used for one-rack baking. Unused racks should be
removed prior to Rapid Preheat. A standard rack should be used for Rapid Preheat.
If preheating for the Bake cycle has already started, Rapid Preheat may be started directly by
pressing RAPID PREHEAT.
KEYPAD
FEATURE
INSTRUCTIONS
7
Electronic Oven Controls
Control Display
The display will flash when powered up or after a power loss. Press
CANCEL to clear. When the oven is not in use, the time of day is
displayed. If the range is in Energy Save mode, the display will be
blank when not in use.
Tones
Tones are audible signals, indicating the following:
One tone
■
Valid pad press
■
Oven is preheated (long tone)
■
Function has been entered
■
Reminder, repeating each minute after the end-of-cycle tones
Three tones
■
Invalid pad press
Four tones
■
End of cycle
Use the Settings/Clock key to change the tone settings.
Energy Save
The Energy Save mode puts the range into sleep mode and
reduces energy consumption.
To Activate the Energy Save Mode:
1.
Press and hold SETTINGS/CLOCK for 3 seconds. “Energy
saver on.” will appear in the display.
2.
The setting will be activated after 5 minutes.
To Deactivate the Energy Save Mode:
1.
Press and hold SETTINGS/CLOCK for 3 seconds. “Energy
saver off.” will appear in the display.
2.
The clock will reappear in the display, and the range can be
operated as usual.
Settings
Many features of the oven control can be adjusted to meet your
personal needs. These changes are made using the Settings/
Clock key.
Use the Settings/Clock key to scroll through the features that can
be changed. Each press of the Settings/Clock key will advance the
display to the next setting. After selecting the feature to be
changed, the control will prompt you for the required input. After
the setting is saved by pressing Start, press CANCEL to exit
Settings and display the time of day. Details of all of the feature
changes are explained in the following sections.
Press CANCEL to exit Settings.
Clock
The Clock can use a 12- or 24-hour cycle.
1.
Press SETTINGS/CLOCK until “CLOCK” is displayed.
2.
Press START to change the time.
3.
Press “3” for AM or “6” for PM.
4.
Use the number keypad to set the time of day.
5.
Press SETTINGS/CLOCK or START to save the setting.
6.
Press CANCEL to exit and display the time of day.
Fahrenheit and Celsius
The temperature is preset at Fahrenheit, but can be changed to
Celsius.
1.
Press SETTINGS/CLOCK until “TEMP UNIT” is displayed.
2.
The current setting will be displayed.
3.
Press the “1” keypad to adjust the setting.
4.
Press START or CANCEL to exit and display the time of day.
Audible Tones Disable
Turns off all tones, including the end of cycle tone and key press
tones. Reminder tones are still active when all tones are disabled.
1.
Press SETTINGS/CLOCK until “SOUND” is displayed.
2.
The current setting will be displayed.
3.
Press the “1” keypad to adjust the setting.
4.
Press START or CANCEL to exit and display the time of day.
Sound Volume
Sets the pitch of the tone to either high or low.
1.
Press SETTINGS/CLOCK until “SOUND VOLUME” is
displayed.
2.
The current setting will be displayed.
3.
Press the “1” keypad to adjust the setting.
4.
Press START or CANCEL to exit and display the time of day.
End of Cycle Tone
Activates or turns off the tones that sound at the end of a cycle.
1.
Press SETTINGS/CLOCK until “END TONE” is displayed.
2.
The current setting will be displayed.
3.
Press the “1” keypad to adjust the setting.
4.
Press START or CANCEL to exit and display the time of day.
AQUALIFT
SELF CLEAN
Clean cycle
See the “Clean Cycle” section.
START
(hold 3 sec
to lock)
Oven control
lockout
1.
Check that the oven is off.
2.
Press and hold START (hold 3 sec to lock) for 3 seconds.
3.
A tone will sound, and “Control Locked” will scroll, then “Locked” will be displayed.
4.
Repeat to unlock. No keypads will function with the controls locked. The cooktop functions
are not affected by the oven control lockout.
ENERGY
SAVE
Puts the range
into sleep mode
to reduce energy
usage
1.
Press and hold SETTINGS/CLOCK for 3 seconds to change status. The display will scroll
“Energy saver on” or “Energy saver off.”
If Energy Save is on, the range will go into sleep mode after 5 minutes of inactivity. Any key
press will activate the display. If Energy Save is off, the display will be on at all times.
KEYPAD
FEATURE
INSTRUCTIONS
Содержание IEL730C
Страница 18: ...1 14 n Vesta Gas and Electric Slide In Ranges GENERAL INFORMATION NOTES ...
Страница 21: ...OPERATION Vesta Gas and Electric Slide In Ranges n 2 3 Ͷ ǣ Ǧ ǡ Ȁ Ǥ Ͷ ǣ ȌǤ Ǧ Ǥ ȌǤ Ǥ ȌǤ ͳͲ Ǥ ȌǤ Ǥ ǣ ǡ Ͳ Ǥ ...
Страница 32: ...2 14 n Vesta Gas and Electric Slide In Ranges OPERATION NOTES ...
Страница 66: ......

