background image

8-1

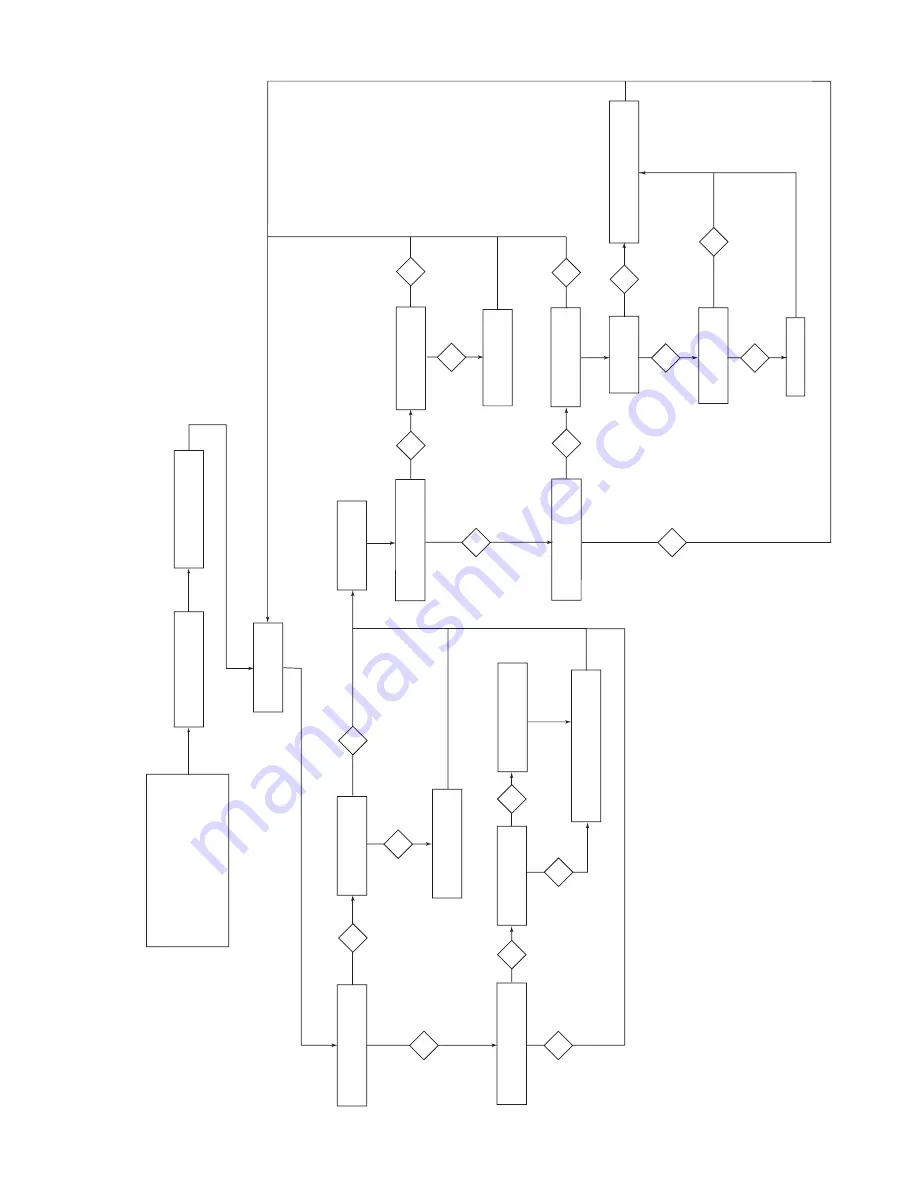
DUO COOKING SYSTEM FLOW CHART

Set the Bake parameters:

   • Total Cycle Time

   • Top Element / Burner ON Time

   • Bottom Element / Burner ON Time

   • Top-To-Bottom Sensor Offset

   • Top-To-Bottom Amplitude

   • Bottom Priority ON / OFF

User sets the temperature

and starts the Bake cycle.

Oven preheats (no change 

from current routine)

Read the bottom

sensor temperature.

Read the top

sensor temperature.

Is the temperature above

the high temperature limit?

Is the temperature below

the low temperature limit?

Is the temperature below

the low temperature limit?

Is the bottom 

element / burner OFF?

Is the top 

element / burner ON?

Is the top 

element / burner OFF?

Is the bottom 

element / burner ON?

Is the appliance

electric?

Turn Off the 

bottom element / burner.

Turn Off the 

top element / burner.

Turn Off the 

top element / burner.

Is the temperature above

the high temperature limit?

Cycle the bottom element / burner

relay at the preset duty cycle.

Cycle the top element / burner

relay at the preset duty cycle.

Has the burner purge

time been satisfied?

Purge the burner.

Ye

s

Ye

s

Ye

s

Ye

s

Ye

s

Ye

s

Ye

s

Ye

s

Ye

s

Ye

s

No

No

No

No

No

No

No

No

No

TECH TIPS

Содержание GS460LEK

Страница 1: ...CONSUMER SERVICES TECHNICAL EDUCATION GROUP PRESENTS KR 32 JOB AID Part No 8178025 30 FREESTANDING SELF CLEANING GAS RANGE ...

Страница 2: ...ange The Wiring Diagrams and Strip Circuits used in this Job Aid are typical and should be used for training purposes only Always use the Wiring Diagram supplied with the product when servicing the unit GOALS AND OBJECTIVES The goal of this Job Aid is to provide detailed information that will enable the service technician to properly diagnose malfunctions and repair the Whirlpool 30 Freestanding S...

Страница 3: ...e Cooktop 4 6 Removing The Door Latch The Door Switch 4 7 Removing The Broil Bake Burners Ignitors 4 9 Removing The Warming Drawer Element Temperature Sensor 4 11 Removing The Oven Light Socket Assembly 4 13 Removing The Control Power Supply The Electronic Oven Control The Direct Spark Ignition Control 4 14 Removing The Latch Drive 4 16 Removing The Oven Temperature Sensors 4 17 Removing The Gas D...

Страница 4: ...Page DIAGNOSIS TROUBLESHOOTING 6 1 Failure Error Display Codes Tech Sheet 8522648 6 1 WIRING DIAGRAMS STRIP CIRCUITS 7 1 Wiring Diagram 7 1 Strip Circuits 7 2 TECH TIPS 8 1 Duo Cooking System Flow Chart 8 1 ...

Страница 5: ...ailure may occur at a later date due to ESD stress Use an antistatic wrist strap Connect the wrist strap to a green ground connection point or unpainted metal in the appliance or touch your finger repeatedly to a green groundconnectionpointorunpaintedmetal in the appliance Before removing the part from its pack age touch the antistatic bag to a green groundconnectionpointorunpaintedmetal in the ap...

Страница 6: ...IES FREESTANDING 1996 LATER 2 30 FREESTANDING 1996 LATER 3 30 FREESTANDING 4 40 FREESTANDING 5 36 FREESTANDING 6 30 SET IN RANGES OVEN TYPES 0 THRU 3 STANDARD PORCELAIN 2 THRU 5 CONTINUOUS CLEAN BEFORE 1996 4 THRU 9 PYROLYTIC SELF CLEAN FEATURE VARIATIONS ELECTRIC 0 1 2 5 7 COIL ELEMENTS 4 STANDARD PATTERN CERAMIC 6 8 9 DELUXE PATTERN CERAMIC GAS 0 1 2 3 4 6 OPEN BURNER 5 7 SEALED BURNER DOOR TYPE...

Страница 7: ...1 3 Tech Sheet Location On Top Rear Cover MODEL SERIAL NUMBER LABEL AND TECH SHEET LOCATIONS The Model Serial Number label and Tech Sheet locations are shown below Model Serial Number Location ...

Страница 8: ...h 29 875 29 875 29 875 Approx Shipping Weight 190 183 183 BACKGUARD FEATURES Safety Gas Shutoff No No No Oven Heating Light Indicator in Oven Control in Oven Control in Oven Control COOKTOP FEATURES Burner Type Sealed Sealed Sealed Ignition Electronic Electronic Electronic Gas Valves 270deg 270 deg 270 deg Burner BTU Right Front 9 500 BTU 9 500 BTU 9 500 BTU Burner BTU Left Front PB 13 500 BTU 9 5...

Страница 9: ...tch Yes Rocker No No LOWER PANEL DRAWER Lower Storage Drawer Yes no panel only no panel only Drawer Liner Yes No No Drawer Width 12 7 n a n a Drawer Height 3 0 n a n a Drawer Depth 16 3 n a n a Glides Rollers n a n a Handle Type Drawn Handle n a n a LITERATURE Use Care Guide Yes Yes Yes Tech Sheet Yes Yes Yes Installation Instructions Yes Yes Yes Service Manual 8178025 8178025 8178025 OTHER SPECIF...

Страница 10: ...875 29 875 29 875 Approx Shipping Weight 183 190 190 BACKGUARD FEATURES Safety Gas Shutoff No No No Oven Heating Light Indicator in Oven Control in Oven Control in Oven Control COOKTOP FEATURES Burner Type Sealed Sealed Sealed Ignition Electronic Electronic Electronic Gas Valves 270 deg 270deg 270deg Burner BTU Right Front 9 500 BTU 9 500 BTU 9 500 BTU Burner BTU Left Front 9 500 BTU PB 12 500 BTU...

Страница 11: ...Yes Rocker Yes Rocker LOWER PANEL DRAWER Lower Storage Drawer no panel only Yes Yes Drawer Liner No No Yes Drawer Width 12 7 12 7 12 7 Drawer Height 3 0 3 0 3 0 Drawer Depth 16 3 16 3 16 3 Glides Nylon Rollers Rollers Handle Type Drawn Handle Drawn Handle Drawn Handle LITERATURE Use Care Guide Yes Yes Yes Tech Sheet Yes Yes Yes Installation Instructions Yes Yes Yes Service Manual 8178025 8178025 8...

Страница 12: ...t 190 190 190 BACKGUARD FEATURES Safety Gas Shutoff No No No Oven Heating Light Indicator in Oven Control in Oven Control in Oven Control COOKTOP FEATURES Cooktop Type High UpSwp Porc High UpSwp Porc High UpSwp Porc Burner Type Sealed Sealed Sealed Ignition Electronic Electronic Electronic Burner BTU Right Front 9 500 BTU 9 500 BTU 9 500 BTU Burner BTU Left Front PB 13 500 BTU PB 13 500 BTU PB 13 ...

Страница 13: ... Touch Yes Touch LOWER PANEL DRAWER Lower Storage Drawer Yes Yes Yes Drawer Liner Yes Yes Yes Drawer Width 12 7 12 7 12 7 Drawer Height 3 0 3 0 3 0 Drawer Depth 16 3 16 3 16 3 Glides Rollers Rollers Rollers Warming Drawer No No No Handle Type Drawn Handle Drawn Handle Drawn Handle LITERATURE Use Care Guide Yes Yes Yes Tech Sheet Yes Yes Yes Installation Instructions Yes Yes Yes Service Manual 8178...

Страница 14: ...5 25 Depth to Manifold Panel 25 0 25 0 Width 29 875 29 875 Approx Shipping Weight 196 196 BACKGUARD FEATURES Safety Gas Shutoff No No Oven Heating Light Indicator in Oven Control in Oven Control COOKTOP FEATURES Cooktop Type High UpSwp Porc High UpSwp Porc Burner Type Sealed Sealed Ignition Electronic Electronic Burner BTU Right Front 9 500 BTU 9 500 BTU Burner BTU Left Front PB 13 500 BTU PB 13 5...

Страница 15: ... Cavity Yes Yes Auto Oven Light Switch Yes Yes Manual Oven Light Switch Yes Touch Yes Touch LOWER PANEL DRAWER Lower Storage Drawer Yes Yes Drawer Liner Yes Yes Drawer Width 12 7 12 7 Drawer Height 3 0 3 0 Drawer Depth 16 3 16 3 Glides Rollers Rollers Warming Drawer No No Handle Type Drawn Handle Drawn Handle LITERATURE Use Care Guide Yes Yes Tech Sheet Yes Yes Installation Instructions Yes Yes Se...

Страница 16: ...25 25 Depth to Manifold Panel 25 0 25 0 Width 29 875 29 875 Approx Shipping Weight 196 196 BACKGUARD FEATURES Safety Gas Shutoff No No Oven Heating Light Indicator in Oven Control in Oven Control COOKTOP FEATURES Cooktop Type High UpSwp Porc High UpSwp Porc Burner Type Sealed Sealed Ignition Electronic Electronic Burner BTU Right Front 9 500 BTU 9 500 BTU Burner BTU Left Front PB 13 500 BTU PB 13 ...

Страница 17: ...s Yes Auto Oven Light Switch Yes Yes Manual Oven Light Switch Yes Touch Yes Touch LOWER PANEL DRAWER Lower Storage Drawer Yes Yes Drawer Liner Yes Yes Drawer Width 12 7 12 7 Drawer Height 3 0 3 0 Drawer Depth 16 3 16 3 Glides Warming AccuRide Warming AccuRide Warming Drawer Yes Yes Handle Type Drawn Handle Drawn Handle LITERATURE Use Care Guide Yes Yes Tech Sheet Yes Yes Installation Instructions ...

Страница 18: ...ved by Whirlpool E Repairs to parts or systems resulting from unau thorized modifications made to the appliance F Replacement parts or repair labor costs for units operated outside the United States WHIRLPOOL CORPORATION SHALL NOT BE LIABLE FOR INCIDENTAL OR CONSEQUEN TIAL DAMAGES Some states do not allow the exclusion or limitation of incidental or conse quential damages so this exclusion or limi...

Страница 19: ...Burner Cap Burner Head Screws b Remove the two screws from each of the burner heads and lift the heads off the cooktop Continued on the next page FIRE HAZARD Shut off gas supply line valve Make all conversions before turning gas supply valve back on Failure to follow these instructions could result in explosion fire or other injury NOTE Gas conversion from Natural to L P gas must be done by a qual...

Страница 20: ...fices are contained in a small plastic bag which is located inside the literature bag e Place the natural gas orifices in the plas tic bag for possible use later Surface Burner Orifice 8mm Socket Orifice Bag Surface Propane Rate Orifice Color Burner B T U Hr Number Marking Left Rear 8 000 L80 Green Lt Blue Left Front 11 000 L99 Green Yellow Right Front 8 000 L80 Green Lt Blue Right Rear 5 000 L65 ...

Страница 21: ... gas a Remove the storage warming drawer see page 4 11 for the procedure b Remove the screw from the distribution valve access cover at the back of the storage warming drawer area Access Cover Screw c Use a 1 2 open end wrench and turn the bake burner orifice hood down snug onto the pin approximately 2 1 2 turns DO NOT OVERTIGHTEN THE ORI FICE The burner flame cannot be prop erly adjusted if this ...

Страница 22: ... cap over the natural gas side of the conversion cap d Install the plastic cap and the conver sion cap on the gas distribution valve with the L P side facing up you will see LP stamped inside the cap as shown below 6 Reinstall the distribution valve access cover and storage warming drawer on the range 7 Turn the gas supply valve handle on Plastic Cap Conversion Cap Set For Use With L P Gas Plastic...

Страница 23: ...ge opening so that the top edge is against the wall molding or cabi net and the bracket template is in the location where the anti tip bracket will be installed Installation Instructions 3 Tape the sheet to the floor Continued on the next page PERSONAL INJURY HAZARD To prevent tipping install range anti tip bracket Savetheinstallationinstructions Iftherange ismovedtoanewlocation theanti tipbracket...

Страница 24: ...rilled b Use a 3 16 drill bit and drill the two holes c Remove the instruction sheet from the floor d Tap the two plastic anchors into the mounting holes with a hammer e Line up the two mounting holes in the anti tip bracket with the two holes you just drilled in the floor f Use the two screws that were supplied and fasten the anti tip bracket to the floor 6 Move the range close to the cabinet ope...

Страница 25: ...roil elements work simul taneously to maintain proper heat The AccuBake Duo system which will be used on Whirlpool Gold Series models uses a second temperature sensor to provide a more uniform temperature distribution throughout the oven cavity The AccuBake Duo system uses two electronic temperature sensors in side the oven cavity to help control tempera tures but the sensors work independently to...

Страница 26: ...oven The Choice Bake feature is not available during the Broil mode The cooking results on an AccuBake Duo gas range will be noticeably different than on any previously manufactured gas range due to an added top heat feature Thebroilelementwillnotcycleon eventhough it may sense cooler temperatures until the lower element has cycled off NOTE During a normal 350 Bake cycle the top element may not tu...

Страница 27: ...emperature of the drawer is controlled by a sensor that is similar to the main oven sensors The warming drawer sensor resistance is approximately 100 KΩ at room temperature NOTE To cancel the warming drawer opera tion press the DRAWER OFF keypad The warming drawer is supplied with an insu lated liner that maintains the proper tempera turewithinthedrawer Thechart shownabove indicates the warming dr...

Страница 28: ...d will remain in that position until it is pushed closed When the door is pushed an oil filled cylinderwilldampentheclosingaction andthe door will close softly against the front of the range The concept is similar to that which is used on screen doors or on the hatchbacks of cars The oil filled cylinder is part of one of the range hinge assemblies and can be mounted on either side SOFT CLOSE DOOR ...

Страница 29: ...irect Spark Ignition Control Control Power Supply Latch Drive Sealed Burner Door Switch Oven Light Broil Burner Bake Burner Electronic Oven Control Warming Drawer Temperature Sensor Door Latch Gas Valve Ignition Switch Gas Distribution Valve Warming Drawer Element Broil Burner Ignitor Ignitor Bake Burner Ignitor Top Oven Temperature Sensor Bottom Oven Temperature Sensor ...

Страница 30: ...Remove the two screws from each burner head and lift the heads off the cooktop Grate Burner Cap FIRE HAZARD Shut off gas supply line valve before servic ing the range Check all gas line connections and replace all panels before operating the range Failuretodosocouldresultinexplosion fire or other injury 5 Unclip the cooktop by grasping the front sides and sliding it to the right while lifting the ...

Страница 31: ...racket and remove the ignitor from the sealed burner 7 Disconnect the wire from the ignitor con nector REASSEMBLY NOTE When you reinstall the sealed burner make sure that you keep the burner straight so that the ignitor is aligned in the cooktop hole when it is lowered Also do not cross thread the hex nut or overtighten it Ignitor Screw 16 mm Hex Nut Sealed Burner Gas Line Ignitor Wire ...

Страница 32: ...nobs from the control panelbypullingthemoffthecontrolshafts CAUTION When you work on the gas range becarefulwhenhandlingthesheetmetalparts Sharp edges may be present and you can cut yourself if you are not careful WARNING FIRE HAZARD Shut off gas supply line valve before servic ing the range Check all gas line connections and replace all panels before operating the range Failuretodosocouldresultin...

Страница 33: ...e you are removing REASSEMBLY NOTES 1 When installing a new gas valve make surethattherubbergrommetisinplaceon the valve see above 2 Do not overtighten the gas valve mounting screw b Pull the range away from the wall and remove the top rear cover 4 screws Back Of Range Gas Valve Gas Line Mounting Screw Gas Manifold Rubber Grommet c Disconnect the red and black ignition switch wires from the two ha...

Страница 34: ...edges may be present and you can cut yourself if you are not careful WARNING FIRE HAZARD Shut off gas supply line valve before servic ing the range Check all gas line connections and replace all panels before operating the range Failuretodosocouldresultinexplosion fire or other injury 3 Removetheburnerheadsfromthecooktop see page 4 2 4 Unclip the cooktop see page 4 2 and raise it up Move the cookt...

Страница 35: ...k on the gas range becarefulwhenhandlingthesheetmetalparts Sharp edges may be present and you can cut yourself if you are not careful WARNING FIRE HAZARD Shut off gas supply line valve before servic ing the range Check all gas line connections and replace all panels before operating the range Failuretodosocouldresultinexplosion fire or other injury Manifold Bracket 1 Screw Burner Box Cover Vent Co...

Страница 36: ...nd prop it up see page 4 2 for the procedure b Push the switch body out of the mount ing hole in the chassis To do this place the end of a 1 4 socket or something similar against the end of the door switch body between the wire connec tors and tap it out of the mounting hole with a hammer Actuating Rod Unhook Actuating Rod Screw Rubber Bumper c Disconnect the wires from the termi nals Door Switch ...

Страница 37: ...nt and you can cut yourself if you are not careful WARNING FIRE HAZARD Shut off gas supply line valve before servic ing the range Check all gas line connections and replace all panels before operating the range Failuretodosocouldresultinexplosion fire or other injury b Loosen the screw slightly and rotate the bracket on the rear of the oven liner to the left away from the broil ignitor insulator c...

Страница 38: ...just far enough to discon nect the wire from the bake ignitor and remove the burner assembly c Remove the two screws from the front of the burner shield d Slide the burner shield forward so the two tabs at the back are free of the liner then lift the two front tabs out of the slots and remove the shield Oven Floor Screws g Remove the two screws from the bake burner ignitor bracket and remove the i...

Страница 39: ...ange Failuretodosocouldresultinexplosion fire or other injury 1 Turn off the gas to the range and discon nect the power cord from the wall outlet 2 Slide the warming drawer out as far as it will go press on the release arms located on the side rails of the drawer and remove the drawer b Remove the two front element bracket screws 3 To remove the warming drawer ele ment a Remove the front cover by ...

Страница 40: ... If not already done remove the warm ing drawer see step 2 on page 4 11 for the procedure c Pull the sensor forward and unplug the connectors Warming Drawer Area b Remove the two mounting screws from the sensor bracket Warming Drawer Temperature Sensor Screws ...

Страница 41: ...ultinexplosion fire or other injury 1 Turn off the gas to the range and discon nect the power cord from the wall outlet 2 Remove the racks from inside the oven 3 Unscrew the lens and bulb from the oven light socket assembly and remove them CAUTION Be careful not to scratch or chip the oven liner paint when you remove the oven light socket in the next step 4 Use a screwdriver and bend the clips on ...

Страница 42: ...ls before operating the range Failuretodosocouldresultinexplosion fire or other injury 1 Turn off the gas to the range and discon nect the power cord from the wall outlet 2 Pull the range away from the wall so you can access the back of the unit 3 Remove the four screws from the top cover and remove the cover 4 To remove the control power supply a Disconnect plugs P1 and P2 b Remove the two screws...

Страница 43: ... direct spark ignition control a Disconnect plugs J1 through J8 b Remove the mounting screw c Slide the board up and remove it from the top corner bracket slots Slot J1 Screw J5 J8 J2 J4 Direct Spark Ignition Control Slot ...

Страница 44: ...inexplosion fire or other injury 1 Turn off the gas to the range and discon nect the power cord from the wall outlet 2 Pull the range away from the wall so you can access the back of the unit 3 Remove the indicated top and bottom cover screws loosen the two indicated bottom cover screws and remove the covers 5 Disconnect the wires from the latch drive motorandswitches removethetwomount ing screws ...

Страница 45: ...ions and replace all panels before operating the range Failuretodosocouldresultinexplosion fire or other injury 4 To remove an oven temperature sensor remove the two screws and disconnect the connector from the main harness 1 Turn off the gas to the range and discon nect the power cord from the wall outlet 2 Pull the range away from the wall so you can access the back of the unit 3 Remove the indi...

Страница 46: ... all gas line connections and replace all panels before operating the range Failuretodosocouldresultinexplosion fire or other injury 1 Turn off the gas to the range and discon nect the power cord from the wall outlet 2 Pull the range away from the wall so you can access the back of the unit 3 Remove the gas outlet lines from the gas distribution valve with a 9 16 open end wrench 4 Remove the four ...

Страница 47: ... ing the range Check all gas line connections and replace all panels before operating the range Failuretodosocouldresultinexplosion fire or other injury 1 Turn off the gas to the range and discon nect the power cord from the wall outlet 2 Pull the range away from the wall so you can access the power cord on the back of the unit 3 Remove the clamp and the ground wire screws from the power cord 4 Us...

Страница 48: ...rts Sharp edges may be present and you can cut yourself if you are not careful To remove the oven door 1 Open the oven door to its fully down posi tion 2 Remove the two door stop clips from the oven door slots 4 Close the oven door as far as the two pins will allow 5 Graspthesidesofthedoorandliftthedoor until it stops then pull the hinge hangers out of the slots 3 Install a pin in the hole of each...

Страница 49: ...d may be off center To seat the hinge hangers open the door slightly and push in on the bottom until the hangers are fully seated 4 Open the oven door to its fully open posi tion and remove the two hinge hanger pins 5 Install the two door stop clips in the top of the door slots with the angled side facing up Angled Side up 6 Closetheovendoorcompletelyandcheck it for proper operation and alignment ...

Страница 50: ...panels before operating the range Failuretodosocouldresultinexplosion fire or other injury 1 Remove the oven door from the range see page 4 20 2 Place the oven door on a padded work surface with the front glass facing down 3 Remove the two top door liner screws Top Liner Screws 4 Remove the three bottom screws from the door liner 5 Lift the liner assembly off the front glass and set it aside 6 To ...

Страница 51: ...e step 8 b Lift the insulation retainer off the door liner d Lift the inner oven door glass and bracket assembly out of the door liner c Remove the insulation from around the oven door glass assembly REASSEMBLY NOTE When you reinstall the insulation around the oven door glass make sure that the insulation is not visible in the glass after the door is reassembled Unhook Tab From Slot Hinge Hanger S...

Страница 52: ...ange becarefulwhenhandlingthesheetmetalparts Sharp edges may be present and you can cut yourself if you are not careful 1 Open the oven door to its fully down posi tion 2 Pull the oven door gasket clips out of the liner holes until all of the clips are re moved REASSEMBLY NOTE When you install the new gasket make sure that all of the clips are seated in their liner holes and that the ends of thega...

Страница 53: ...d discon nect the power cord from the wall outlet 2 Remove the grates and burner caps from the cooktop 3 Remove the cooktop from the range see page 4 6 4 Remove all of the knobs from the control panelbypullingthemoffthecontrolshafts 5 Remove the oven door from the range see page 4 20 for the procedure 6 Remove the three screws and flat wash ers from the bottom of the control panel then remove the ...

Страница 54: ...remove the left panel is shown below 12 Pull the back of the side panel out from the range approximately 45 13 Push forward to unhook the three front tabs from the chassis slots and remove the side panel Pull Back Of Panel Out 45 Unhook 3 Front Tabs From Slots Side Panel Screws 1 of 5 ...

Страница 55: ...ng Failure to do so could result in death or electrical shock WARNING IGNITION SWITCHES Refer to page 4 4 for the procedure for servic ing the ignition switches 1 Disconnect the electrical power to the range 2 Pull the range away from the wall and remove the top rear cover 3 At the back of the control panel near the direct spark ignition control disconnect the ignition wires from the main harness ...

Страница 56: ...al shock WARNING Refer to page 4 11 for the procedure for servic ing the warming drawer element 1 Disconnect the electrical power to the range 2 Set the ohmmeter to the R x 1 scale 3 From the back of the control panel touch one of the ohmmeter leads to the control power supply plug P1 pin 4 P1 4 white wire Touch the other meter test lead to the electronic oven control plug P3 pin 2 P3 2 org blk wi...

Страница 57: ...ate approximately 3100 Ω 5 To test the door latch switch a Touch the ohmmeter leads to the ter minals The meter should indicate an open circuit infinite b Press the switch actuator and touch the ohmmeter leads to the terminals The meter should indicate continuity 0 Ω LATCH DRIVE OVEN WARMING DRAWER TEMPERATURE SENSORS Motor Switch Terminals Actuator Motor Terminals Refer to page 4 17 for the proce...

Страница 58: ...lenoid for that function is activated and the valve opens to allow gas flow to the burner The electrical connections at the valve consist of three terminals each one sized differently to prevent incorrect wir ing TEST PROCEDURE Solenoid Resistance Tests Refer to page 4 18 for the procedure for servic ing the gas distribution valve 1 Disconnect the electrical power to the range 2 Pull the range awa...

Страница 59: ...wire damage refer to step 3 3 Disconnect power longer than 30 seconds 4 Re apply power and observe for longer than 1 minute 5 If failure remains disconnect power replace control then go back to step 4 E1 Oven sensor shorted Top E2 Bake range over temperature E3 Clean range over temperature E4 Oven sensor opened Top E5 Oven sensor shorted Top F3 E6 Warming drawer sensor open 1 Same corrective actio...

Страница 60: ...6 2 NOTES ...

Страница 61: ... R BAKE BROIL OR BK BU W R W OR BU Y 2 5 4 6 7 X 1 1 2 3 4 5 X 7 P1 4 Y Y L1 N POWER SUPPLY OVEN CONTROL WARMING SENSOR LOWER OVEN TEMP SENSOR OVEN LIGHT DOOR SWITCH SURFACE BURNER IGNITION SWITCHES DOOR LATCH SWITCH WARMING DRAWER GAS DISTRIBUTION SYSTEM ELEMENT 850 W LATCH DRIVE UPPER OVEN TEMP SENSOR M N O COM DIRECT SPARK IGNITION CONTROL DSI TOP BURNERS NOTE SCHEMATIC SHOWS DOOR LATCH SWITCH ...

Страница 62: ...CT SPARK IGNITION CONTROL DSI BK BK TOP BURNERS L1 N W OVEN CONTROL P3 3 P3 1 1 2 3 4 6 7 9 10 J1 GND BROIL BAKE DIRECT SPARK IGNITION CONTROL DSI BROIL VALVE BU W BK BK TOP BURNERS L1 N W OVEN CONTROL P3 4 P3 1 1 2 3 4 6 7 9 10 J1 GND BROIL BAKE DIRECT SPARK IGNITION CONTROL DSI BAKE VALVE R W BK BK TOP BURNERS L1 N W ...

Страница 63: ...P4 3 P4 4 1 2 3 4 6 7 9 10 J1 GND BROIL BAKE DIRECT SPARK IGNITION CONTROL DSI BAKE VALVE DOOR LATCH SWITCH R R W BR BU GY GY Y Y TAN TAN TAN VLT LOWER OVEN TEMP SENSOR UPPER OVEN TEMP SENSOR N O COM DOOR SWITCH OVEN LIGHT OVEN CONTROL TOP BURNERS BK BK BK W W BK L1 N ...

Страница 64: ...7 4 POWER SUPPLY BOARD WARMING DRAWER IF APPLICABLE BROWN WIRE CONTAINS NON RESETTABLE FUSE OVEN CONTROL WARMING DRAWER ELEMENT 850W P3 1 P3 2 OR BK BK W ...

Страница 65: ... below the low temperature limit Is the temperature below the low temperature limit Is the bottom element burner OFF Is the top element burner ON Is the top element burner OFF Is the bottom element burner ON Is the appliance electric Turn Off the bottom element burner Turn Off the top element burner Turn Off the top element burner Is the temperature above the high temperature limit Cycle the botto...

Страница 66: ...8 2 NOTES ...

Страница 67: ...R READY TO IDENTIFY YOU AS AN AUTHORIZED SERVICER FOR LITERATURE ORDERS PHONE 1 800 851 4605 IN CANADA FOR PRODUCT SPECIFICATIONS AND WARRANTY INFORMATION CALL 1 800 461 5681 FOR TECHNICAL ASSISTANCE WHILE AT THE CUSTOMER S HOME CALL THE TECHNICAL ASSISTANCE LINE 1 800 488 4791 HAVE YOUR STORE NUMBER READY TO IDENTIFY YOU AS AN AUTHORIZED SERVICER FOR WHIRLPOOL PRODUCTS 1 800 253 1301 FOR KITCHENA...

Страница 68: ...CORPORATION ...

Отзывы: