G O -
4 E V O p e r a t o r ’ s M a n u a l
| 17
Contact Westward Industries for Manuals and Documentation. Do not copy.
3.1.3 Setup Screens
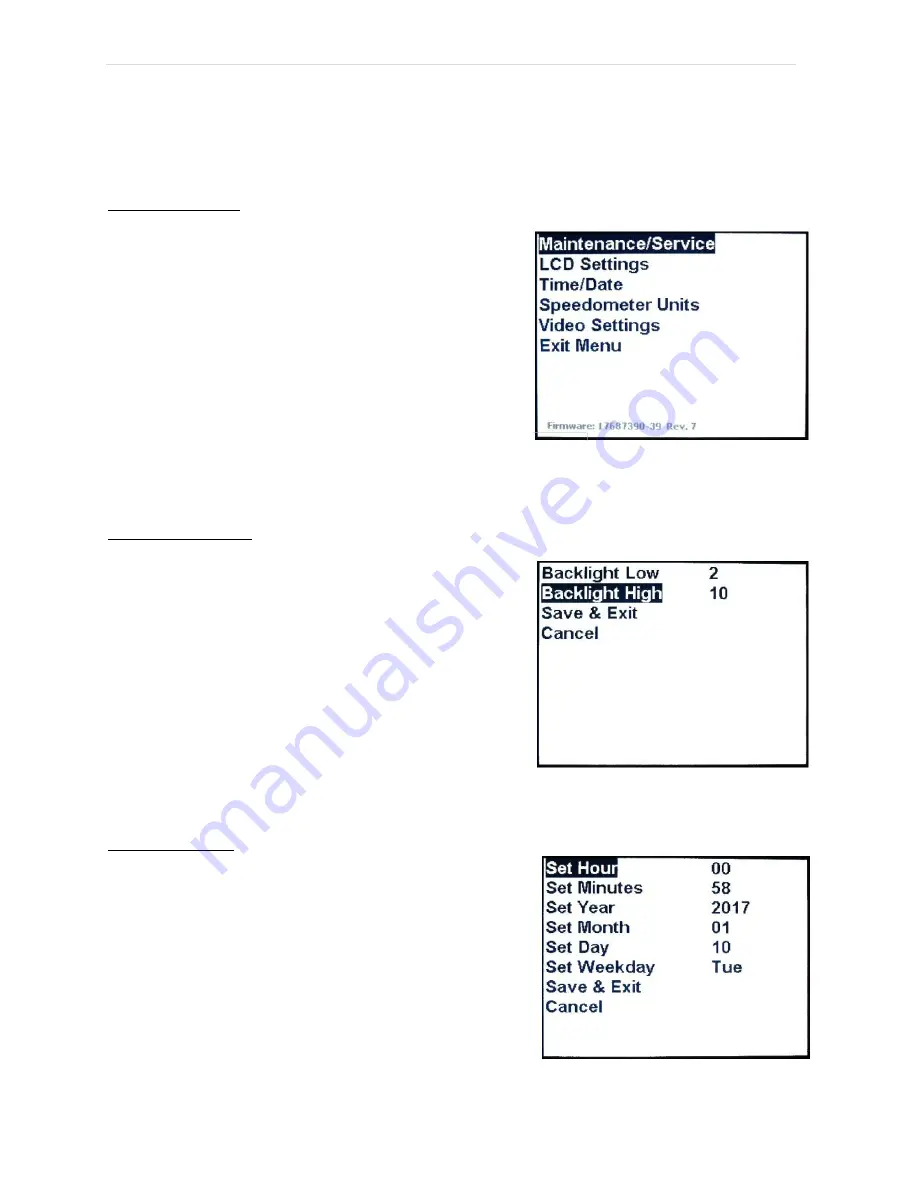
The setup screens allow the operator to view and modify various digital display settings. To access the
main setup screen, press the enter/select
● button.
Main Setup Screen:
Use the up (
▲
) and down (
▼
) display buttons to highlight
the
menu item.
Press enter/select (
●) to enter the screen for the
highlighted
menu item.
Highlight and select “Exit Menu” to return to the
instrumentation screen.
Note:
Cycle the ignition switch from “ON” to “LOCK” or “ACC”
and back to “ON” to regain ability to use the
right (
►
)
display
button to cycle through the instrumentation and diagnostic
screens.
CAUTION:
The maintenance/service and video settings screens are to be accessed by certified
technicians only.
LCD Settings Screen:
Use the up (
▲
), down (
▼
), left (
◄
), right (
►
) and
select/enter
(
●
) display buttons to navigate, view and
modify settings.
The LCD Settings screen sets the display
’
s backlight
brightness. Setting “1” is the dimmest lighting and “10” is the
brightest.
“Backlight Low” setting is activated when the headlight
high
beams
are turned on. “Backlight High” setting is for all driving
conditions.
After setting the desired brightness, select “Save & Exit” to
retain modified settings.
Select “Cancel” if no modifications are required.
Time/Date Screen
:
Note:
In an effort to reduce draw on the 12 volt auxiliary
battery, power to the digital display is cut when the ignition
switch is in the lock position. As a result, time and date
settings will be reset on each vehicle startup.
Use the up (
▲
), down (
▼
), left (
◄
), right (
►
) and
select/enter
(
●
) display buttons to navigate, view and
modify settings.
After setting the desired time and date, select “Save & Exit”
to
retain modified settings.
Select “Cancel” if no modifications are required.
Figure 4: Main Setup Screen
Figure 5: LCD Settings Screen
Figure 6: Time/Date Screen


