18
MAINTENANCE
To ensure that the wood glides smoothly across the work surface, periodically apply a coat of paste wax (sold sepa-
rately) to the surface of the worktable. If the power cord is worn out or damaged in any way, replace it immediately.
Do not attempt to oil the motor bearings or service the motor’s internal parts.
WARNING!
Always turn the switch OFF and unplug the power cord from the outlet before maintaining or
lubricating the scroll saw.
CARBON BRUSH REPLACEMENT
The wear on the carbon brushes depends on how frequently and
how heavily the tool is used. To maintain maximum efficiency of
the motor, we recommend inspecting the two carbon brushes
every 60 hours of operation or when the tool stops working. New
carbon brushes are available for purchase from
wenproducts.
com
(part number
LL2156-006.1
).
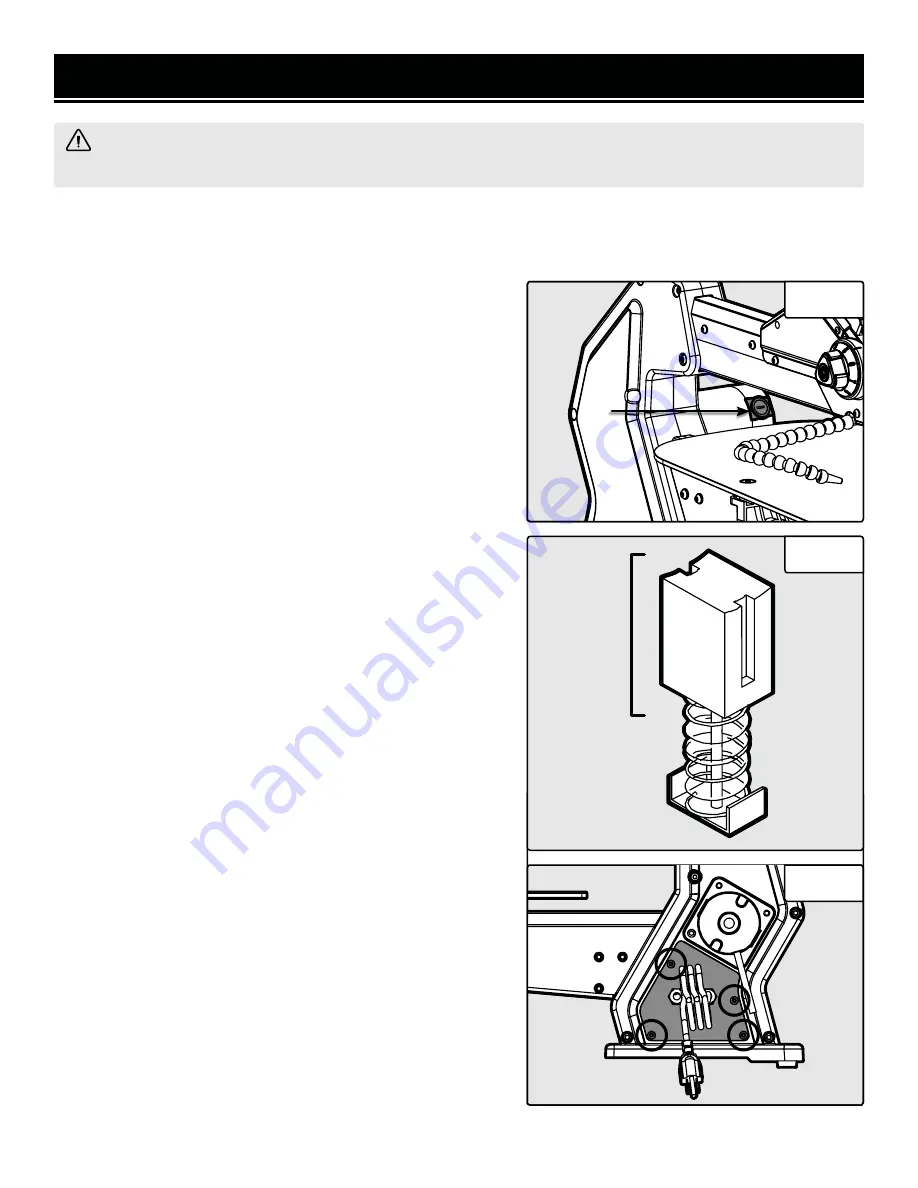
1. Unplug the saw. To access the carbon brushes, remove the
carbon brush cover (Fig. 16 - 1) with a flat-head screwdriver
(not included).
2. Carefully remove the old carbon brushes. Keep track of which
orientation the old carbon brushes were in to prevent unneces-
sary wear if they will be reinstalled.
3. Measure the length of the brushes. Install the new set of car-
bon brushes if either carbon brush length is worn down to 3/16”
or less. Reinstall the old carbon brushes (in their original orien-
tation) if your brushes are not worn down to 3/16” or less. Both
carbon brushes should be replaced at the same time (Fig. 17).
4. Replace the carbon brush cover.
NOTE:
New carbon brushes tend to spark for a few minutes dur-
ing the first use as they wear down.
OVERLOAD PROTECTION
Your scroll saw is equipped with a 5A fuse to protect the motor
and electronics. If your scroll saw stops operating, turn off and
unplug the saw. To check for a blown fuse:
1. Remove four screws from circuit board cover. Remove cover.
2. Gently slide the circuit board out.
3. Flip up the cover on the fuse compartment (black box on the
right side of the board). See Fig. 18.
4. Remove fuse. Replace it with an identical 5A, 250V glass fuse,
5mm x 20mm. Fuse designation is F5AL250V, and is available for
purchase at
wenproducts.com
under
part no. LL2156-016.1.
5. Replace the fuse. Follow steps 1 – 3 in reverse to re-assemble
the saw.
1
Fig. 16
Fig. 17
Fig. 18
3/16"
or less


