OM-235 816 Page 4
SECTION 3 − INSTALLATION
3-1.
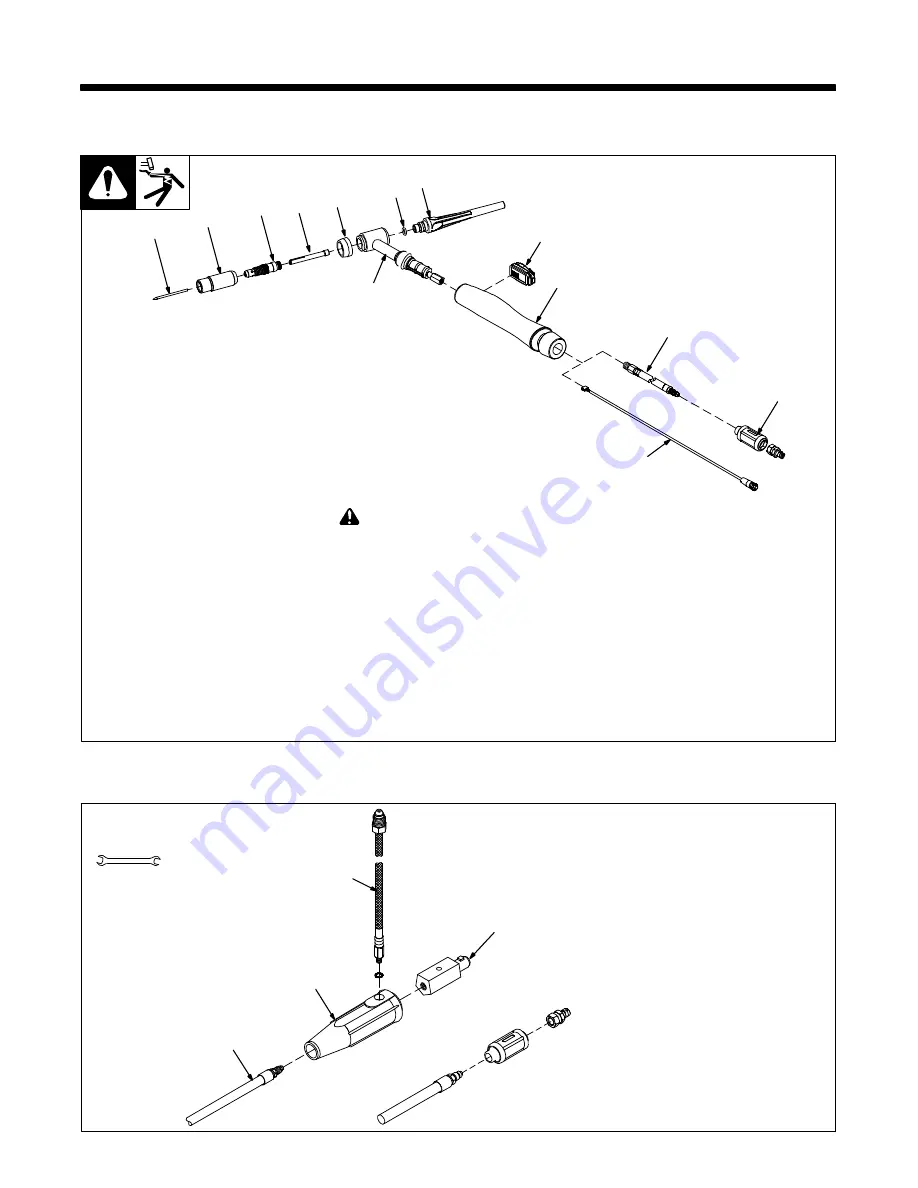
Required Torch Parts And Torch Assembly
805 060-C
1
Cup
2
Collet Body
3
Collet
4
Heat Shield
5
O-Ring
6
Backcap
7
Torch Body/Torch Head
!
Before welding, insure that the torch
head is firmly attached to the torch
body.
8
Switch Assembly
9
Handle
10 One-Piece Power Cable
11 International Style Flow-Through
Adapter
.
Adapter needed if torch is equipped with
one-piece cable.
12 6-Pin Plug And Cord
Assembling Torch Body
Keep connections tight. Replace cup, heat
shield, and backcap as needed.
13 Tungsten Electrode (See Section 6)
Installing Tungsten
To adjust tungsten position, loosen
backcap.
1
2
3
4
5
9
6
13
11
7
10
8
12
3-2.
International Style Connector Assembly
1
Weld Output Cable
2
Connector Body
3
Insulating Boot
4
Short Gas Hose
Slide power cable through insulat-
ing boot, and connect to connector
body.
Connect short gas hose.
805 092-B
Tools Needed:
1
2
4
3
9/16, 7/8 in.
Содержание Legacy 257107
Страница 1: ...OM 235 816G 2013 07 257107 Hand Held Air Cooled TIG GTAW Torches File TIG GTAW Owner s Manual ...
Страница 13: ...OM 235 816 Page 11 Notes ...
Страница 17: ...OM 235 816 Page 15 Notes ...
Страница 18: ...OM 235 816 Page 16 Notes ...
Страница 19: ...OM 235 816 Page 17 Notes ...

