Webb WER410HP Скачать руководство пользователя страница 20

 20

INSTRUCTION MANUAL


REMOVE ENGINE OIL 


CAUTION 

Used oil is a hazardous waste product and must be disposed of properly. Do not discard with household 

waste. Check with your local authorities, service center, or dealer for safe disposal/recycling facilities. 


WARNING 

Before draining any oil, ensure the fuel tank is empty. Fuel can leak out and result in a fire or explosion.  To 

empty the fuel tank, run the engine until it stops from lack of fuel. 


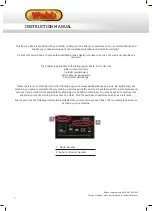
Draining the oil can only be undertaken from the oil filler neck. 


Turn off the engine. 


Remove the spark plug cap and keep away from the spark plug. 


Drain while the engine is still warm to assure rapid and complete drainage. 


Remove the oil filler cap with dipstick. 


Place an approved container below the machine. 


Ensure you keep the spark plug end of the engine up.


Install Oil drain plug and wrench tighten.  


Refill with the recommended oil and check its level as required, following instructions within this manual. 

Oil capacity: See Specification section of this manual. 

Wash your hands with soap and water after touching used oil. 

NOTE: Please dispose of used motor oil in a manner that is compatible with the environment. We suggest 

you put it in a sealed container to your local service for reclamation. Do not throw it away into the refuge 

collection or pour it on the ground or in drains. 


AIR FILTER 

A dirty air filter will block air flow into the carburettor. To prevent carburettor malfunction, service the air filter 

regularly. Service more frequently when operating the engine in extremely dusty areas.  

1.


Remove the air filter cover. Remove the filter. Carefully check both for holes and tears and replace it if 

damaged. 

2.


Foam element: clean in warm soapy water, rinse and allow to dry thoroughly or clean in high flash-point 

solvent and allow to dry. Dip the element in clean engine oil and squeeze out all the excess. The engine 

will smoke during initial start-up if too much oil is left in the foam. 


WARNING 

Never use gasoline or low flash point solvents to clean the air cleaner element. A fire or explosion 

could occur. 


CAUTION 

Never run the engine without air filter or rapid engine wear will be the result. 


is damaged. Take the machine to a local Approved Service Dealer for inspection if necessary. 

Repairs of this nature are not covered under the Manufacturer’s warranty.  

-


If the mower vibrates in an abnormal way, find the reasons why, and take your mower to a local 

Approved Service Dealer. 


WARNING 

After the engine has stopped, the blade will still rotate a couple of seconds. 


CAUTION 

Operating on gradients could cause the machine to tip over. 

Allowing anyone to operate this machine without proper instruction may result in injury. 

Wear sturdy, full coverage footwear. Operating this machine with bare feet, or with open toe shoes or 

sandals increases your risk of injury. 

Do not use the machine at night or in poor light. 

Be sure to transport the machine from one place to another with the engine off. 

Be sure to wear heavy gloves when cleaning underside of the deck or handling the blade. 

To prevent damage, check the machine for any signs of damage or other faults when operated. 


MAINTENANCE, CLEANING & STORAGE 


WARNING 

Improper maintenance & storage of the machine may void your warranty. Keep the machine clean for better 

and safer performance. 

Turn off the engine before performing any maintenance. If the engine must be run, make sure the area is 

well ventilated. The exhaust emits dangerous carbon monoxide gases. 


MAINTENANCE  

Use only original equipment replacement parts. Other parts may not perform as well, may damage the unit 

and may result in injury. In addition, use of other parts may invalidate your warranty. 


Before each use, check all nuts & bolts to be sure they are sufficiently tightened. 


We recommend only manufacturer original parts are used when maintaining this machine. Failure to do so 

could invalidate your manufacturer’s warranty. 


The engine must be switched off, with the spark plug cap removed, before the machine is unassembled, 

cleaned, serviced or maintained. 


LUBRICATION 


WHEELS - Lubricate the ball bearings in each wheel at least once a season with a light oil. 


Содержание WER410HP

Страница 1: ...or machine in danger Whilst every e ort has been made to ensure the accuracy of information contained in this manual our policy of continuous improvement determines the right to make modi cations with...

Страница 2: ...rsonal educational use only Commercial copying redistribution hiring or lending is prohibited No part of this publication may be stored in a retrieval system or transmitted in any other form or means...

Страница 3: ...e Before mowing remove all foreign objects from the lawn which may be thrown by the machine stay alert for any foreign objects which may have been missed These operating instructions must be kept and...

Страница 4: ...eath Do not expose to rain or damp conditions No smoking Do not use near a flame or sparks Hot Surface Running engines produce heat Engine parts especially the exhaust become extremely hot Severe ther...

Страница 5: ...perator or user is responsible for accidents or hazards occurring to other people or their property SAFETY INSTRUCTIONS FOR WORKING WITH TILLER 1 Do not leave engines running in enclosed spaces where...

Страница 6: ...lery Keep your hair clothing gloves away from moving parts Loose clothes jewellery or long hair can be caught in moving parts Wear foot protection or sensible shoes when using the machine 9 Prolonged...

Страница 7: ...come in contact with your skin Keep petrol and oil away from the eyes If petrol or oil come into contact with the eyes wash them immediately with clean water If irritation is still present see a docto...

Страница 8: ...l 7in 8in Engine Petrol 4 Stroke Air Cooled Engine Displacement 141cc Rated Engine Power 2 5kw Rated Engine Speed 2800rpm min Oil Tank Capacity 0 4L Guaranteed Noise Power Level LWA 96 dB A Emission S...

Страница 9: ...6 Lower Handle 7 Grass Collector 8 Fuel Tank Cap 9 Engine Primer Bulb 10 Bumper Not on WER460SP 11 Single Height Adjuster Lever 12 Rear Wheel 13 Engine Oil Filler Cap Dipstick 14 Side Discharge Cover...

Страница 10: ...repairs or maintenance operations DO NOT attempt to start this machine without it first being FULLY assembled DO NOT attempt to start this mower without first adding 4 stroke SAE30 or 10W 30 air coole...

Страница 11: ...ould be on your right side 6 Position the handlebar over the lower handles just below the lower handlebar aligning the holes in the upper handle with those in the lower handles Insert the two locking...

Страница 12: ...ition and place the grass collector hooks over the springs and place into position 2 Lower the grass collector flap to sit onto the grass collector RECOIL STARTER HANDLE 1 To ease starting of the mach...

Страница 13: ...t away from the gauge 1 and then lift or lower the lever to the required height of cut 2 Moving the lever forward will lower the height of cut Min 25mm Moving the lever back will raise the height of c...

Страница 14: ...mend you use SURE START FUEL ADDITIVE HP 199 from Handy Parts A fuel additive added to your fuel at the time of purchase will help make your machine easier to start extend the shelf life of your fuel...

Страница 15: ...screwing into the filler neck to ensure the oil level remains between the minimum and maximum marks on the dipstick 4 Replace and tighten the oil filler cap with built in dipstick NOTE Below 40F 4 C...

Страница 16: ...ave operated the starter several times the engine may be flooded with excess fuel Use the following procedure to clear and start a flooded engine 1 Release the OPC Brake lever 2 Remove the spark plug...

Страница 17: ...ngine may be flooded with excess fuel Use following procedure to clear and start a flooded engine 1 Release the OPC Brake lever 2 Remove the spark plug dry it and then reinstall it NOTE Install the sp...

Страница 18: ...Start the engine and allow it to run and warm up See Starting the Engine section of the manual 3 Keep a firm grip on the upper handle with OPC Brake lever always engaged when attempting to cut 4 Pull...

Страница 19: ...for the first cut of the season or in drought conditions 6 Do not remove grass debris in the mower deck or on the blade by hand or with your feet Instead use suitable tools such as a brush or broom 7...

Страница 20: ...the blade To prevent damage check the machine for any signs of damage or other faults when operated MAINTENANCE CLEANING STORAGE WARNING Improper maintenance storage of the machine may void your warra...

Страница 21: ...section of this manual Wash your hands with soap and water after touching used oil NOTE Please dispose of used motor oil in a manner that is compatible with the environment We suggest you put it in a...

Страница 22: ...nting a new spark plug you should screw 1 2 more thread with the wrench after the washer is compressed If you are mounting an old one you should only screw 1 8 1 4 more thread CAUTION The spark plug m...

Страница 23: ...ngine and let it run until any remaining petrol has been used up 3 Change the oil at the end of every season See removing oil within this manual 4 Clean the cooling fins of the cylinder and the housin...

Страница 24: ...UAL Spark plug loose Tighten spark plug Spark plug wire loose or disconnected from plug Install spark plug wire on spark plug Spark plug gap is incorrect Set correct gap between electrodes Spark plug...

Страница 25: ...ts lists and drawings for your machine Should you require a replacement part please call our Spares Team on 01793 333212 option 1 for assistance Webb recommends the use of Handy Parts oils fuel additi...

Страница 26: ...26 INSTRUCTION MANUAL PARTS DIAGRAM DVO140 PARTS LIS...

Страница 27: ...0 Governor Arm Shaft Seal 1 44 WE151 243902 Lock Pin 1 45 WE151 314001 Governor Arm 1 PARTS LIST DVO140 PT 2 Item No Webb Part No Webb Description Qty 46 WE151 91066 Recoil Stud Bolt 2 1 47 WE155 9001...

Страница 28: ...28 INSTRUCTION MANUAL PARTS DIAGRAM WER460SP 1938220001 PARTS L PARTS LIS...

Страница 29: ...4001 Side Discharge Spring 1 65 WE158 604012 Side Discharge Bracket 1 66 WE158 604010 Side Discharge Axle 1 67 WE158 91406 Bolt M6x14 2 68 WE158 604009 Side Discharge Cover 1 69 WE149 90057 Nut M10x1...

Страница 30: ...2017 Outdoor Noise Directive 2000 14 EC 2005 88 EC Guaranteed Noise Power Level LWA 96 dB A According to 2000 14 EC Emission Sound Pressure Level LPA 83 dB A Vibration ahv 7 38 m s2 uncertainty K 1 5...

Страница 31: ...Notes...

Страница 32: ...Notes...

Страница 33: ...Notes...

Страница 34: ...egister your machine using the following pages or at www webbgardenpower co uk By registering your machine you agree to maintain the machine in accordance with the service schedules speci ed in this m...

Страница 35: ...lts Brake clutch friction components Control cable starter cords Fluids lubricants Spark plugs Blades Lawnmowers Brushcutters Cutter bars Hedgecutters Drive clutch cable surfaces Nylon Lines Line Trim...

Страница 36: ...safely e ciently and therefore reducing the environmental impact It is the owner s responsibility to ensure that their Webb machine is maintained at speci c intervals Any approved Webb service dealer...

Страница 37: ...e actions have been completed PLEASE ENSURE THE SERVICE BOOK IS AVAILABLE FOR THE DEALER DURING SERVICE WORK 1st Service This must be stamped by an approved service dealer to qualify for a free second...

Страница 38: ...Service Record 48 Months Date Date Date Date Date Date Date Date 72 Months 96 Months 120 Months 60 Months 84 Months 108 Months 132 Months...

Страница 39: ...regarding our products services o ers or just opinions which may be used for marketing research or analysis purposes If you wish to be contacted by any of the following methods please tick the relevan...

Страница 40: ...Webb Lawnmowers Murdock Road Dorcan Swindon Wiltshire SN3 5HY...

Отзывы: