2
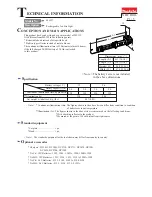
Installation Procedure
1) Switch off the mains electrical supply.
2) Cut cable to the corresponding height of the pole and
connect cable to the connector
A
as follows:
- Strip the conductor by approx. 60 mm (
fig. 1
).
-
Class I
: For a lagging PE connection, loop the PE
conductor around the live conductors (
fig. 2
).
If a violent force is exerted on the conductor the PE
conductor will be the last cable pulled out of the
terminal.
- Insert the cable into the gland nut and fix the cables
(see wiring diagram for cable connector) to the con-
ductor support of the splice (
fig. 3
).
Cut off the wires with a diagonal cutter, flush with
the splice (
fig. 4
).
Compare the local voltage and frequency with date
mentioned on the label of the luminaire.
- Screw the gland nut together, tightening to a torque
of 5 Nm (
fig. 5
).
- As a guide for setting the gland nut, numerals I, II
and III can be found on the connection (
fig. 6
).
In the case of thin cables, the nut can generally be
tightened further than with thicker cables. The con-
tact point is made when the nut is screwed on and
the contact point lies just in front of the numeral I.
The gland nut has to be screwed on tightly so that it
cannot be opened again by hand.
-
A
shows the setting
I
for a cable diameter of 12-
14 mm,
B
shows the setting
III
for a cable diameter
of 9-10 mm.
Vorgehensweise
1) Spannungsfreiheit der Anschlussleitung herstellen.
2) Entsprechend der Masthöhe zugeschnittene Anschluss -
leitung an den Leitungsverbinder
A
wie folgt anschließen:
- Manteln Sie die Leitung ca. 60 mm ab. (
Abb. 1
)
-
Schutzklasse I
: Für die Realisierung eines nacheilen-
den PE-Anschlusses ist der PE-Leiter um die
spannungs führenden Leiter zu schlingen (
Abb. 2
).
Bei einem gewaltsamen Zug auf die Leitung wird der
PE-Leiter dadurch als Letztes aus der Klemme gezogen.
-
Führen Sie die Leitung in die Überwurfmutter ein und
fixieren Sie die Adern (siehe Anschlussplan Leitungs -
verbinder) in der Leiteraufnahme des Spleißbodies
(
Abb. 3
).
Schneiden Sie die Adern mit einem Seitenschneider
bündig am Spleißbody ab (
Abb. 4
).
Vergleichen Sie die örtliche Spannung und Frequenz
mit den Daten auf dem Leistungsschild.
- Verschrauben Sie die Überwurfmutter mit einem
Anzugs drehmoment von 5 Nm (
Abb. 5
).
- Als Orientierung zur Anschraubweite der Überwurf -
mutter finden Sie auf dem Anschluss die Ziffern I, II
und III (
Abb. 6
).
Bei dünnen Leitungen lässt sich die Mutter tenden-
ziell weiter anschrauben als bei dicken Leitungen. In
jedem Fall muss beim Anschrauben der Mutter der
Kontak tie rungs punkt überwunden werden und der
liegt noch vor der Ziffer I. Die Überwurfmutter muss
auch so fest angeschraubt werden, dass sie sich von
Hand nicht wieder öffnen lässt.
-
A
zeigt die Anschraubweite
I
bei einem
Leitungsdurch messer von 12-14 mm,
B
zeigt die Anschraubweite
III
bei einem
Leitungsdurch messer von 9-10 mm.