21
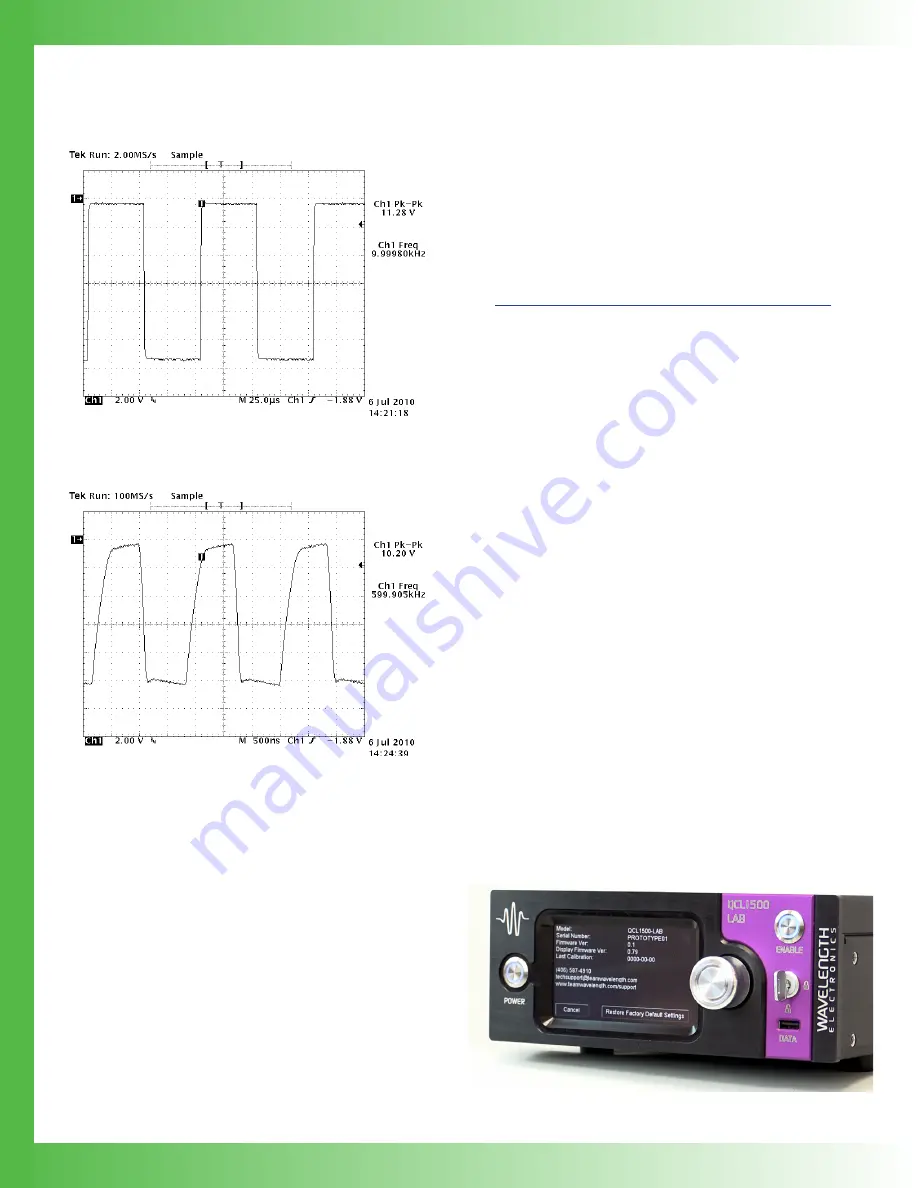
SQUARE WAVE RESPONSE
and
illustrate the modulation response
of the QCL1500 driven at 1.15 A into a 10 Ω test load.
Figure 23. 10 kHz Output Plot
QCL1500 at 1.15 A with 10 Ω Test Load
Figure 24. 600 kHz Output Plot
QCL1500 at 1.15 A with 10 Ω Test Load
REMOVE THE BAIL AND FEET FROM
AN INSTRUMENT
To make sure there is the proper clearance between stacked
instruments when rack mounting, the feet and bail must be
removed.
On the underside of the instrument, using a Phillips head
screwdriver, unscrew the four rubber feet.
UPDATE THE INSTRUMENT
FIRMWARE
Updates to the instrument firmware are available on the
Wavelength website.
1.
Turn the instrument completely off at both the front and
rear panels.
2.
On the Wavelength website, download the ZIP file that is
specific to your QCL Laboratory Series model and save
the update file to a flash drive.
The file is found at:
www.teamwavelength.com/support/software-downloads/
3.
Extract the file on the flash drive. It should contain the
following files:
\INSTALL.INI
\QCLxx\ABL.IMG
\QCLxx\APP.IMG
\QCLxx\INSTALL.INI
NOTE: “QCLxx” is replaced with the instrument model number,
such as QCL2000.
4.
Insert the flash drive into the front DATA port on the
instrument. Turn rear panel power on. The update
automatically begins installation.
5. At the
Apply the firmware
screen, press
Yes
. The
firmware update installs. Remove the flash drive.
6. Once the update is complete, press
OK
and reboot the
instrument by turning off the front and rear panel power
buttons and turning them back on again.
If you are upgrading from version 0.79 to version 1.5+, all
calibration and user data will be converted and saved. If you
downgrade from version 1.5+ to version 0.79, all existing
calibration data will be lost.
DETERMINE WHICH FIRMWARE
VERSION IS INSTALLED
With the rear and front panel power switches on, swipe the
touchscreen from left to right to show the System Information
screen.
Figure 25. System Information Screen


