


IS-HF-M100+-29293 Rev 4
10
Operation
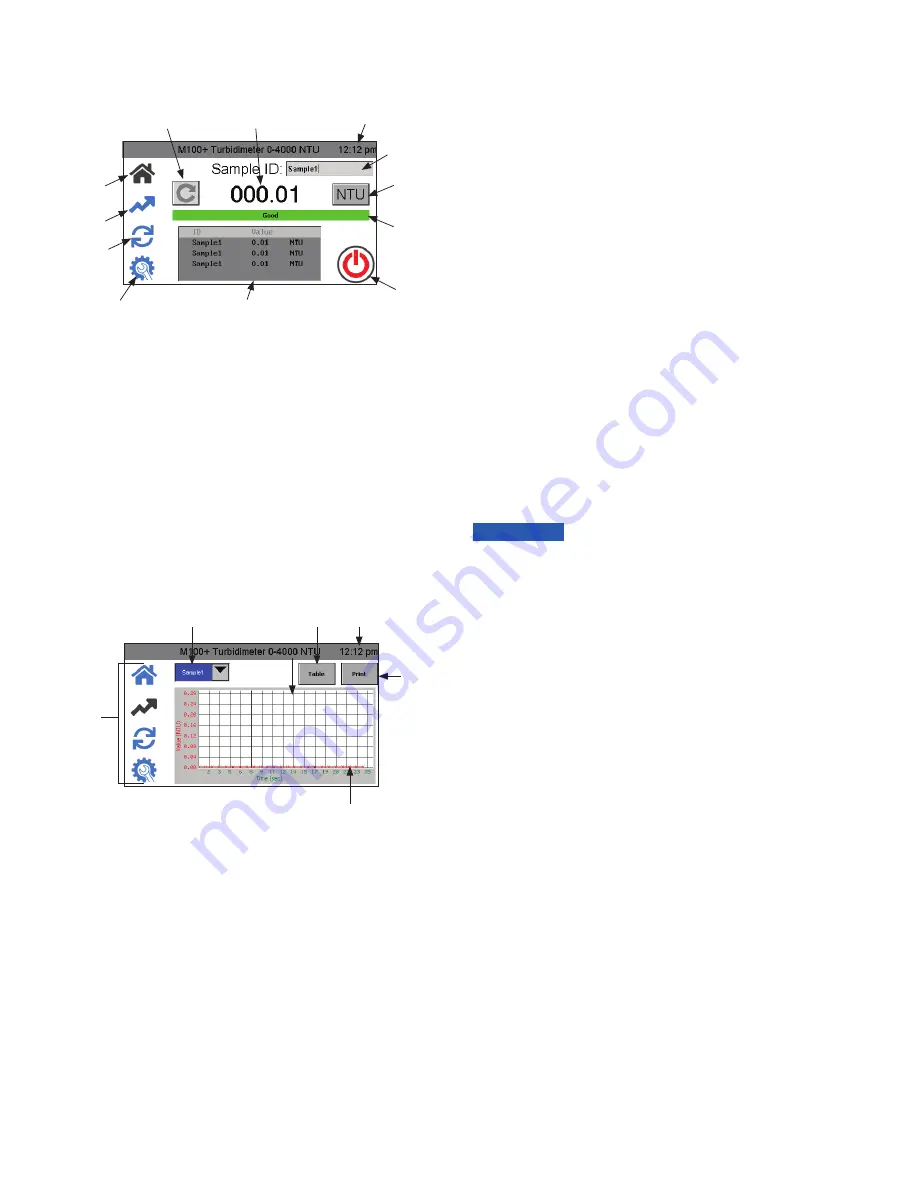
Home Screen
All operations start on the Home screen. Refer to the above figure for
all operations.
• When the instrument is in Automatic Readings, Update Reading
button will not show. This is only used for manual updates.
• The current reading is always shown in the large number format.
• Toggle between NTU and FNU by touching the button.
• Pressing Sample ID brings up a key pad to allow you to provide
a name.
• Sample ID shows up to five previous readings. 100 readings
per Sample ID are saved. Once logging is complete, the
Home
screen will say "100 points captured." See
Trend
screen below
for more information.
• The instrument can be turned off manually even if Auto Power
Down is selected.
Trend Screen
• Select Sample ID first.
• After a reading session in the Home screen, if Trend screen is
selected, the Reading List from the Home screen is saved under
the Sample ID in the Trend screen and cleared from the Home
screen. If a new session is started in the Home screen under the
same Sample ID, the readings will be appended to the session
readings.
• If a USB memory stick is connected, Session Readings shown will
be transferred to the memory stick after pressing
Download/Print
.
• If the USB printer is connected, Sessions Readings shown will be
printed after pressing
Download/Print
.
• Sample ID will be saved until deleted. See Delete Samples
section for more information.
Update Reading
Current Reading
Time
Sample ID
(Name)
NTU/FNU
Diagnostic
Banner
On/Off
Reading List
Setup
Calibration
Trend
Home
Data Retrieval
• Data logging can only save 100 points per Sample ID.
• All data is saved in CSV format and is date and time stamped.
• Sample ID Data can be downloaded to a USB memory stick or
printed in the
Trend
screen after pressing
Download/Print
.
• Calibration data can be downloaded to a USB memory stick in
the Calibration Download menu by pressing the
button. See
Calibration Download section for more information.
• Logged data can be downloaded to a USB memory stick in the
Log Download menu by pressing the
button.
USB Connection
The M100+ has two USB connections: a USB-A on the side and a
USB-B on the back. Only the side connection is active at this time. The
USB-B on the back of the instrument may be used in a future firmware
update.
The USB-A connection can be used to upload new software or
download logged data and calibration reports via a USB memory stick.
Firmware updates can be made by loading the firmware onto a USB
memory stick and inserting it into the USB-A connector. The update
will not affect configurations or stored data, however it is always
advisable to check the configuration after an update as menus may
have changed.
Be sure to check our website, www.hfscientific.com, for software
updates.
Screen
Selection
Sample ID
Selection
To get session
readings
Time
Download/
Graph
To keep the USB contacts from getting contaminated, a USB
plug cover is provided. It is not recommended that this cover is
replaced whenever the USB is not being used. The USB-B plug
on the back is not active at this time and the USB plug cover
should remain in place to prevent damage.
NOTICE


