background image

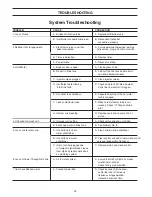
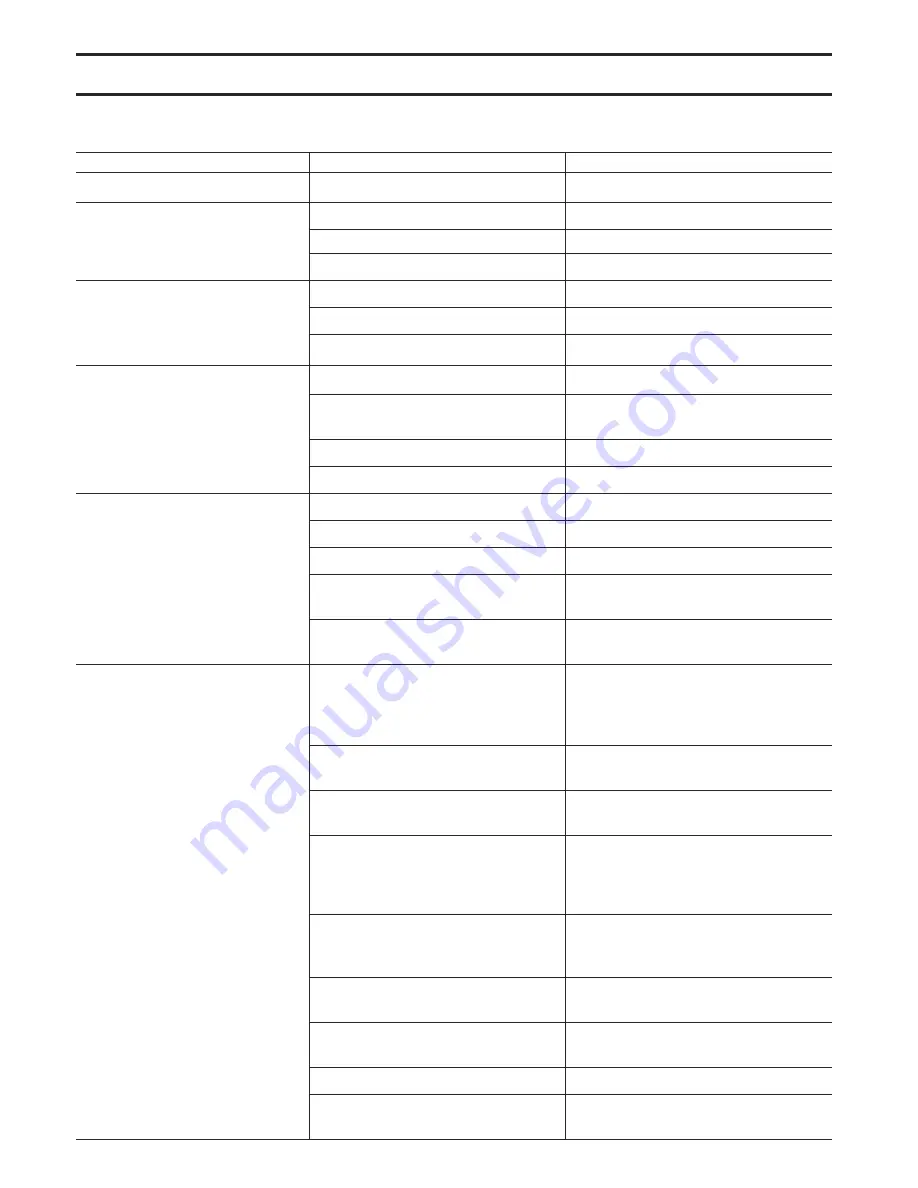
TROUBLESHOOTING

Troubleshooting Programming

PROBLEM POSSIBLE 

CAUSE 

SOLUTION

1. Timer does not display time of day 

a. Transformer unplugged 

a. Connect power

b. No electric power at outlet b. Repair outlet or use working outle

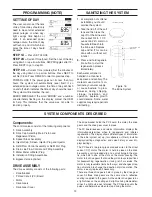
t.

c. Defective transformer 

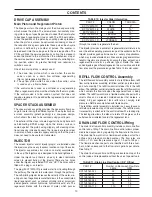
c. Replace transformer

d. Defective PC board 

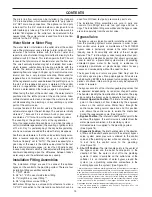
d. Replace PC board

a. Switched outlet 

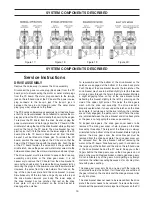
a. Use uninterrupted outlet

b. Power outage 

b. Reset time of day

c. Defective PC board 

c. Replace PC board

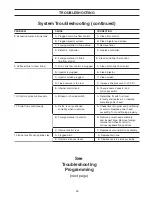
a. Bypass valve in bypass position 

a. Put bypass valve in service position

c. Restricted/stalled meter turbine 

c. Remove meter and check for

rotation or foreign material

d. Defective meter 

d. Replace meter

e. Defective PC board 

e. Replace PC board

a. Power outages

a. Reset control valve to correct time

b. Time of day not set correctly 

b. Reset to correct time of day

c. Time of regeneration incorrect

c. Reset regeneration time

d. Control valve set at “on 0”

d. Check control valve set-up

(immediate regeneration)

procedure regeneration time option

e. Control valve set at NORMAL on 0 

e. Check control valve set-up

procedure regeneration time option

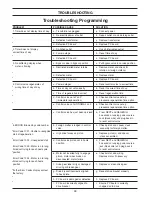
a. Control valve has just been serviced 

a. Press NEXT and REGEN for

3 seconds or unplug power source
Jack (black wire) and plug back in
to reset control valve

b. Foreign matter is lodged in control 

b. Check piston and spacer stack

valve.                                                       

assembly for foreign matter

.


c. High drive forces on piston

c. Replace piston(s) and spacer

stack assembled.

d. Control valve piston not in home 

d. Press NEXT and REGEN for

position 

3 seconds or unplug power source
jack (black wire) and plug back in
to reset control valve

e. Motor not inserted fully to engage 

e. Check motor and wiring.

pinion, motor wires broken or 

Replace motor if necessary

disconnected, motor failure

f. Drive gear label dirty or damaged 

f. Replace or clean drive gear

missing or broken gear

g. Drive bracket incorrectly aligned 

g. Reseat drive bracket properly

to back plate

h. PC board is damaged or defective 

h. Replace PC board

i. PC board incorrectly aligned to 

i.

Ensure PC board is correctly

drive bracket 

snapped on to drive

26

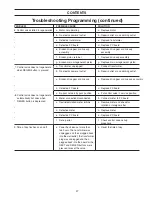
2. Timer does not display 
correct time of day

3. No softening display when

water is flowing

4. Control valve regenerates at 

wrong time of day of day

5. ERROR followed by code number

Error Code 1001 -Unable to recognize
start of regeneration

Error Code 1002 - Unexpected stall

Error Code 1003 - Motor ran to long,
timed out trying to reach next cycle
position

Error Code 1004 - Motor ran to long,
timed out trying to reach home 
position

If other Error Codes display contact
the factory.

Содержание M3011-W100SM

Страница 1: ...OPERATING MANUAL WATER CONDITIONER with WM100SM valve WATER QUALITY CONDITIONING PRODUCTS...

Страница 2: ...tting Assemblies 31 Bypass Valve 32 Flow Diagrams Service and Backwash 33 Flow Diagrams Downflow and Upflow 34 Flow Diagrams Rinse and Fill 35 WS1 Wrench 36 System Troubleshooting 37 38 Valve Troubles...

Страница 3: ...ture often called ionized impurities which means they have an electrical charge The ion exchange process is based on the fact that like charges repel one another and unlike charges attract Calcium and...

Страница 4: ...et b 3 4 1 PVC solvent weld fitting c 1 straight brass sweat fitting d 3 4 straight brass sweat fitting Distributor Tube Opening 1 05 Diameter 3 4 U S PVC Pipe Size Tank Thread 2 1 2 8 NPSM Control Va...

Страница 5: ...does not need batteries When the control valve is used as a down flow softener two backwashes always occur The softener will start regenerant prefill before regeneration the prefill starts two hours b...

Страница 6: ...k over flow to drain This is a gravity drain designed to divert brine to the drain in the event of a malfunction which would cause overflow of the brine tank Be sure inlet outlet isolating valves are...

Страница 7: ...ling sweat copper follow state and federal codes by using a lead free solder and flux Use a joint compound to seal threaded pipe Some homes use the cold water pipes for an elec trical ground metal onl...

Страница 8: ...nuts on installation fittings Hand tighten only Split ring retainer design holds the nut on and allows load to be spread over the entire nut surface area reducing the chance for leakage The split rin...

Страница 9: ...Mode Figure 13 Bypass Mode Figure 14 Bypass Mode Figure 9 Brine Draw Connection STEP 5 Start up Place the bypass valve in the bypass position or mode see figures 12 14 below Open the main water supply...

Страница 10: ...y reaches zero 2 Pressing and holding the REGEN button for approximately 3 seconds will immediately start the regeneration The user cannot cancel this request except by resetting the control by pressi...

Страница 11: ...isplays is always the current time of day The second display is one of the following days remaining or gallons remaining Days remaining are the number of days left before the system goes through a reg...

Страница 12: ...s may require periodic disinfecting Components The control valve consists of the following components 1 Drive Assembly 2 Drive Cap Assembly Main Piston and Regenerant Piston 3 Spacer Stack Assembly 4...

Страница 13: ...es the velocity of the water cre ating a zone of negative pressure that draws in the concentrated liquid regenerant such as sodium chloride brine potassium permanganate sodium hydroxide hydrochloric a...

Страница 14: ...orts etc The installation fitting assemblies are sold in pairs and consist of two fittings two nuts two split rings and two o rings The installation fitting assemblies and the bypass valve are sold se...

Страница 15: ...te Lift up and outward on the drive bracket to disengage the notches To reassemble seat the bottom of the drive bracket so the notches are engaged at the bottom of the drive back plate Push the top of...

Страница 16: ...assembly Reattach the regenerant piston if needed to the main piston Do not lubricate the piston rod main piston or regenerant piston Lubricant will adversely affect the red or clear lip seals Reinser...

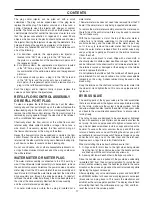
Страница 17: ...plugs If no water meter wire is visible then a plug is installed not a water meter The water meter wire does not need to be removed from the PC board if the water meter is only being inspected and cl...

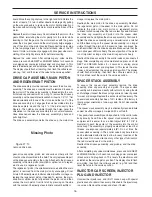
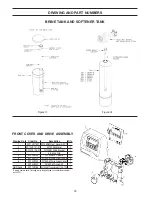
Страница 18: ...Front Cover ASY 1 2 KC12V3107 01 W100SM Motor 1 3 KC12F3106 01 W100SM Drive Bracket 1 Spring Clip 4 KC12V3108 W100SM PC Board 1 5 KC12V3110 W100SM Drive Gear 12x36 3 6 KC12V3109 W100SM Drive Gear Cove...

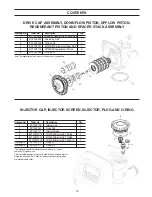
Страница 19: ...ng No Order No Description Qty 1 KC12V3176 Injector Cap 1 2 KC12V3152 O ring 135 1 3 KC12V3177 Injector Screen 1 4 KC12V3010 12 W100SM Injector ASY Z Plug 1 5 KC12V3010 10 W100SM Injector ASY D Red 1...

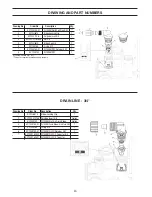
Страница 20: ...etainer ASY 1 8 KC12V3182 W100SM RFC 1 Assembly includes WS1 RFC This part is required for backwash only systems DRAIN LINE 3 4 Drawing No Order No Description Qty 1 KC12H4615 Elbow Locking Clip 1 2 K...

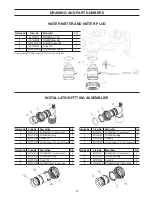
Страница 21: ...0SM Split Ring 2 3 KC12V3105 O ring 215 2 4 KC12V3149 W100SM Fitting 1 PVC Male NPT Elbow 2 Drawing No Order No Description Qty 1 KC12V3151 W100SM Nut 1 Quick Connect 2 2 KC12V3150 W100SM Split Ring 2...

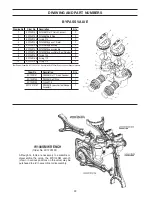
Страница 22: ...10 KC12V3156 O ring 214 2 Not Shown Order No KC12 V3191 01 Description WS100sm Bypass Vertical Adapter Assembly Order No Description Qty KC12V3151 W100SM Nut 1 Quick Connect 1 KC12V3150 W100SM Split R...

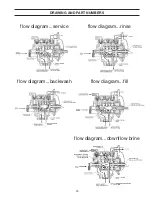
Страница 23: ...23 DRAWING AND PART NUMBERS flow diagram service flow diagram rinse flow diagram backwash flow diagram fill flow diagram downflow brine...

Страница 24: ...nk is required F Leak at distributor tube F Make sure distributor tube is not cracked Check O Ring and tube pilot G Internal valve leaking G Replace seals and spacers and or piston 4 Unit used too muc...

Страница 25: ...rol leak E Change seals spacers and piston assembly 10 Control cycles continuously A Broken or shorted switch A Determine if switch or timer is faulty and replace it or replace complete power head 11...

Страница 26: ...source Jack black wire and plug back in to reset control valve b Foreign matter is lodged in control b Check piston and spacer stack valve assembly for foreign matter c High drive forces on piston c...

Страница 27: ...ve gear or drive cap assembly d Defective PC board d Replace PC board a By pass valve in bypass position a Put control valve in service position b Meter connection disconnected b Connect meter to PC b...

Страница 28: ...Manufactured by Watts Water Quality Conditioning Products 13700 Highway 90 W San Antonio TX USA FORM 0500 200 P N XOSW100SM DISTRIBUTED BY...

Отзывы: