background image

7

Side view right

AUX-IN

OPEN/CLOSE

AC-IN~

15

16

17

19

20

21

22

18

11

2

1

3
4

6
5

10

9
7
8

14

13

12

21

TuNING

 control

22

Detachable power cord

3.  BEFOrE FIrST uSE

3.1  unpacking

  Remove all packaging.

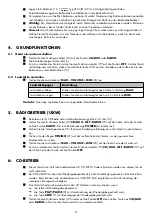
  Check for the presence of all parts and for transport damage. In case of damage or incomplete 

delivery, please contact your dealer (

 Guarantee).

  Please keep the packaging. The appliance can be stored in it if it is not used for a longer period of 

time.

  Place the appliance on a level, stable, clean and dry surface.

  Ensure that there is sufficient ventilation. Keep a minimum distance of 10 cm between the product and 

other objects or walls.

3.2  power supply

  The appliance can either be powered via a wall outlet or by batteries.

  Insert the power cable into the 

AC-IN~

 (12) inlet at the back of the appliance. Connect the power 

plug to a suitable wall outlet. Make sure that the power supply voltage is the same as needed for the 

appliance.

3.3  Battery operation

  Disconnect the power plug from the wall outlet before opening the battery compartment and inserting 

the batteries.

OPEN

OPEN

1.

2.

3.

  Open the battery compartment at the bottom of the appliance.

  Insert 6 batteries (1.5 V 

, type LR14 / R14 / C) (not supplied) according to the polarity markings 

inside the battery compartment and on the batteries.

Содержание RP5900

Страница 1: ...1 RP5900 CD RADIO DE Bedienungsanleitung ...

Страница 2: ...000003786 Hergestellt für Fulltrade International GmbH Schlüterstraße 5 40235 Düsseldorf Hotline 0 800 503 54 18 INHALTSVERZEICHNIS 1 WICHTIGE SICHERHEITSHINWEISE 3 2 Bedienelemente 4 2 1 Lieferumfang 4 3 VOR ERSTER INBETRIEBNAHME 7 3 1 Gerät auspacken 7 3 2 Netzbetrieb 7 3 3 Batteriebetrieb 7 4 GRUNDFUNKTIONEN 8 4 1 Gerät ein und ausschalten 8 4 2 Lautstärke einstellen 8 5 RADIOBETRIEB UKW 8 6 CD...

Страница 3: ...den kann Verletzungen und Beschädigungen verursachen Verwenden Sie deshalb nur Originalzubehör 13 Das Gerät ist nur für die Verwendung in gemäßigten Breitengraden geeignet Verwenden Sie es nicht in den Tropen oder unter feuchten Klimabedingungen 14 Halten Sie das Gerät von allen heißen Flächen und offenen Flammen fern Betreiben Sie das Gerät immer auf einer ebenen stabilen sauberen und trockenen F...

Страница 4: ... Batterien keinen extremen Temperaturen wie etwa direkter Sonneneinstrahlung oder Feuer aus Legen Sie das Gerät nicht auf Heizkörper Auslaufende Batteriesäure kann Schäden verursachen 3 Sollten Batterien einmal ausgelaufen sein entnehmen Sie diese mit einem Tuch aus dem Batteriefach Entsorgen Sie die Batterien bestimmungsgemäß Vermeiden Sie bei ausgelaufener Batteriesäure den Kontakt mit Haut Auge...

Страница 5: ...EAT PROG Taste Wiederholung Programm REPEAT PROG 5 Rechter Lautsprecher 6 POWER Statusanzeige POWER 7 PROG Programmanzeige PROG 8 Linker Lautsprecher 9 RANDOM Taste Zufall RANDOM 10 SKIP DN Taste Rücklauf Sprung zurück SKIP DN 11 STOP Stopptaste STOP Rückansicht AUX IN AC IN 15 16 18 11 2 1 3 4 6 5 10 9 7 8 14 13 12 12 AC IN Netzeingang AC IN 13 Batteriefach unter dem Gerät 14 AUX IN AUX Eingang A...

Страница 6: ... 15 Teleskopantenne 16 Deckel CD Fach 17 OPEN CLOSE Griff zum Öffnen des Deckels des CD Fachs OPEN CLOSE 18 Tragegriff Seitenansicht links AUX IN OPEN CLOSE AC IN 15 16 17 19 20 21 22 18 14 13 12 19 Funktionsumschalter CD AUX OFF RADIO 20 Lautstärkeregler MAX VOLUME MIN ...

Страница 7: ...ät auf eine ebene stabile saubere und trockene Fläche Achten Sie auf eine ausreichende Belüftung Halten Sie einen Mindestabstand von 10 cm zwischen dem Gerät und anderen Gegenständen oder Wänden ein 3 2 Netzbetrieb Das Gerät kann entweder an eine Steckdose angeschlossen oder durch Batterien betrieben werden Schließen Sie das Netzkabel am Eingang AC IN 12 auf der Rückseite des Geräts an Stecken Sie...

Страница 8: ... Sie den Lautstärkeregler nach vorn in Richtung MIN Vorsicht Eine hohe Lautstärke hann zu irreparablen Hörschäden führen 5 RADIOBETRIEB UKW Betreiben Sie Ihr CD Radio netz oder batterieversorgt siehe 3 2 und 3 3 Stellen Sie den Funktionsschalter 19 CD AUX OFF RADIO 19 auf der linken Seite des Geräts auf die Position RADIO Die rote Betriebsanzeige POWER 6 leuchtet auf Ziehen Sie die Teleskopantenne...

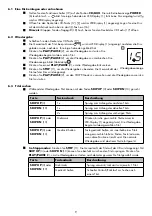
Страница 9: ...t Drücken Sie PLAY PAUSE 2 um den STOPP Modus zu verwerfen und die Wiedergabe vom ersten Titel zu starten 6 3 Titel suchen Während der Wiedergabe Titel können mit den Tasten SKIP UP 3 oder SKIP DN 10 gesucht werden Taste Tastendruck Beschreibung SKIP UP 3 1x Sprung zum Anfang des nächsten Titels SKIP DN 10 1x Sprung zum Anfang des aktuellen Titels 2x Sprung zum Anfang des vorherigen Titels SKIP UP...

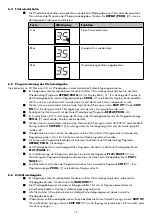
Страница 10: ...s die Taste Vorlauf Sprung vorwärts SKIP UP 3 oder Rücklauf Sprung rückwärts SKIP DN 10 bis der gewünschte Titel angezeigt wird der als zweiter gespielt werden soll Wiederholen Sie diese Schritte bis alle gewünschten Titel auf der CD programmiert sind oder der Programmspeicher voll ist Ein Titel kann auch mehrfach programmiert werden Sie können die Programmreihenfolge mit erneutem Tastendruck auf ...

Страница 11: ...ch aus wenn für 12 18 Minuten kein Signal anliegt 8 REINIGUNG UND PFLEGE Vergewissern Sie sich vor der Reinigung dass das Gerät ausgeschaltet und von der Steckdose getrennt ist Verwenden Sie keine aggressiven Reinigungsmittel oder Lösungsmittel zum Reinigen Damit können Sie die Oberflächen beschädigen Verwenden Sie ebenfalls keine Sprühreiniger Tauchen Sie das Gerät keinesfalls in Wasser oder ande...

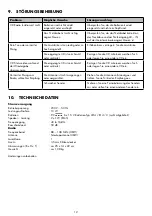
Страница 12: ...während der Wiedergabe übersprungen Die eingelegte CD ist verschmutzt oder verkratzt Reinigen Sie die CD mit einem weichen Tuch oder legen Sie eine andere CD ein Verzerrter Klang vom Radio schlechter Empfang Die Antenne ist nicht ausgezogen oder ausgerichtet Ziehen Sie die Antenne vollständig aus und richten Sie sie für besten Empfang aus Schwacher Sender Nehmen Sie eine Feinabstimmung des Senders...

Страница 13: ...EWÄHRLEISTUNG Für dieses Produkt gilt die gesetzliche Gewährleistung Schäden die durch unsachgemäße Behandlung oder Bedienung durch falsches Aufstellen oder Aufbewahren durch unsachgemäßen Anschluss oder Installation sowie durch höhere Gewalt oder sonstige äußere Einflüsse entstehen fallen nicht unter die Gewährleistung Falls produktspezifische Hinweise beiliegen empfehlen wir dringend diese zu le...

Страница 14: ...1 GB Instruction manual RP5900 CD RADIO ...

Страница 15: ...nt for a long time Have fun with your QA15 0000003786 TABLE OF CONTENTS 1 Important safety instructions 3 2 Parts list 4 2 1 What s in the box 4 3 BEFORE FIRST USE 7 3 1 Unpacking 7 3 2 Power supply 7 3 3 Battery operation 7 4 BASIC FUNCTIONS 8 4 1 Switching the appliance on and off 8 4 2 Volume control 8 5 RADIO OPERATION FM 8 6 CD OPERATION 8 6 1 Inserting and removing a CD 8 6 2 Playing a disc ...

Страница 16: ...t damage the appliance Only use original parts and accessories 13 The appliance is only suitable for use at moderate degrees of latitude Do not use it in the tropics or in particularly humid climates 14 Keep the appliance away from any hot surfaces and open flames Always operate the appliance on a level stable clean and dry surface Protect the appliance against heat and cold dust direct sunlight m...

Страница 17: ...ny heat source Leaking battery acid may cause harm 3 If batteries should leak remove them with a cloth from the battery compartment Dispose of batteries according to the regulations If battery acid has leaked avoid contact to skin eyes and mucous membranes Rinse affected area s immediately after contact with the acid and wash with plenty of clean water Visit a physician 4 Caution Danger of explosi...

Страница 18: ...P button 4 REPEAT PROG REPEAT PROG button 5 Right loudspeaker 6 POWER POWER indicator 7 PROG Program indicator PROG 8 Left loudspeaker 9 RANDOM RANDOM button 10 SKIP DN SKIP DN button 11 STOP STOP button Rear view AUX IN AC IN 15 16 18 11 2 1 3 4 6 5 10 9 7 8 14 13 12 12 AC IN AC IN inlet 13 Battery compartment at the bottom 14 AUX IN AUX IN socket ...

Страница 19: ...18 14 13 12 15 Telescopic antenna 16 CD compartment lid 17 OPEN CLOSE CD compartment grip OPEN CLOSE 18 Carry handle Side view left AUX IN OPEN CLOSE AC IN 15 16 17 19 20 21 22 18 14 13 12 19 Function switch CD AUX OFF RADIO 20 Volume control MAX VOLUME MIN ...

Страница 20: ... 10 cm between the product and other objects or walls 3 2 Power supply The appliance can either be powered via a wall outlet or by batteries Insert the power cable into the AC IN 12 inlet at the back of the appliance Connect the power plug to a suitable wall outlet Make sure that the power supply voltage is the same as needed for the appliance 3 3 Battery operation Disconnect the power plug from t...

Страница 21: ...DIO position The red POWER 6 indicator on the control panel under the display lights up Fold out completely extend and orient the telescopic antenna 15 for best reception Turn the TUNING 21 control on the right side of the device to tune into a radio station Turn the volume control MAX VOLUME MIN 20 on the left side of the device to adjust the volume To turn the radio off by setting the function s...

Страница 22: ...ext track SKIP DN 10 1x Skip to the beginning of the current track 2x Skip to the beginning of the previous track SKIP UP 3 or SKIP DN 10 Several times Press until the desired track number is shown on the LED display 1 The playback starts playing the chosen track SKIP UP 3 or SKIP DN 10 Press and hold Press and hold to fast forward backward in order to find a particular position within a track Let...

Страница 23: ... the programme indicator PROG 7 under the display flashes as well Now press the SKIP UP 3 or SKIP DN 10 button once or several times until the desired track number which is to be played next is displayed Repeat the above steps until all desired tracks on the CD are programmed or until the programme memory is full You can also program a track more than once Press the REPEAT PROG 4 button again to d...

Страница 24: ...ance will goes to OFF mode automatically if no signal input after 12 18 minutes 8 CLEANING AND CARE Before cleaning make sure the appliance is switched off and disconnected from the electrical outlet For cleaning never use corrosive detergents or solvents as this can damage the surfaces Do not use spray cleaners either Never immerse the appliance in water or any other liquid Store the appliance in...

Страница 25: ...0 Hz Power consumption 10 W Batteries 9 V 6 x 1 5 V battery type LR14 R14 C not supplied Speaker output power 2 x 1 W RMS Frequency response 40 to 16 kHz S N ratio 50 dB Radio Frequency band 88 108 MHz FM Antenna Telescopic antenna FM Laser class 1 Aux In jack 3 5 mm jack Dimensions W x H x D approx 25 x 14 x 22 cm Weight approx 1 08 kg Features and technical data are subject to change without pri...

Страница 26: ... by this warranty We recommend careful reading of the operating instructions as it contains important information Note 1 In case this product does not function correctly please firstly check if there are other reasons e g for electrical appliances interruption of the power supply or generally incorrect handling are the cause 2 Please note that where possible the following documents or rather infor...

Отзывы: