background image

6

NSZ/NDZ INSTALLATION MANUAL 

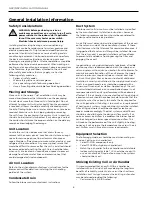
Installing and servicing heating and air conditioning 
equipment can be hazardous due to system pressure and 
electrical components. Only trained and qualified service 
personnel should install, repair or service heating and air 
conditioning equipment. Untrained personnel can perform 
the basic maintenance functions of cleaning coils and 
cleaning and replacing filters. All other operations should be 
performed by trained service personnel. When working on 
heating and air conditioning equipment, observe precautions 
in the literature, tags and labels attached to the unit and 
other safety precautions that may apply, such as the 
following safety measures:

Follow all safety codes.

• 

Wear safety glasses and work gloves.

• 

Use a quenching cloth for brazing operations.

• 

Have a fire extinguisher available for all brazing operations.

• 

Moving and Storage

Move units in the normal “up” orientation. Units may be 
moved and stored per the information on the packaging. 
Do not stack more than three units in total height. Do not 
attempt to move units while stacked. When the equipment 
is received, all items should be carefully checked against 
the bill of lading to be sure all crates and cartons have been 
received. Examine units for shipping damage, removing 
the units from the packaging if necessary. Units in question 
should also be internally inspected. If any damage is noted, 
the carrier should make the proper notation on the delivery 
receipt, acknowledging the damage.

Unit Location 

Locate the unit in an indoor area that allows for easy 
removal of the access panels. Location should have enough 
space for service personnel to perform maintenance or 
repair. Provide sufficient room to make water, electrical  and 
refrigerant line connections. Any access panel screws that 
would be difficult to remove after the unit is installed should 
be removed prior to setting the unit. Care should be taken 
when units are located in unconditioned spaces to prevent 
damage from frozen water lines and excessive heat that 
could damage electrical components.

Air Coil Location

Refer to the air handler manufacturer’s instructions for the 
blower coil unit for details on installing the air handling 
portion of the system.

Condensate Drain

Follow the blower coil manufacturer’s instructions.

WARNING: Before performing service or 
maintenance operations on a system, turn off main 
power switches to the indoor unit. If applicable, 
turn off the accessory heater power switch. 
Electrical shock could cause personal injury.  

Safety Considerations

Duct System

All blower coil units/air coils must be installed as specified 
by the manufacturer’s installation instructions; however, 
the following recommendations should be considered to 
minimize noise and service problems.

An air filter must always be installed upstream of the air coil 
on the return air side of the air handler or furnace. If there 
is limited access to the filter rack for normal maintenance, it 
is suggested that a return air filter grill be installed. Be sure 
that the return duct is properly installed and free of leaks 
to prevent dirt and debris from bypassing the filter and 
plugging the air coil.

In applications using galvanized metal ductwork, a flexible 
duct connector is recommended on both the supply and 
return air plenums to minimize vibration from the blower. To 
maximize sound attenuation of the unit blower, the supply 
and return plenums should include an internal duct liner 
of 1-inch thick glass fiber or be constructed of ductboard. 
Insulation is usually not installed in the supply branch ducts. 
Ducts in unconditioned areas should be wrapped with a 
minimum of 1-inch duct insulation. Application of the unit 
to uninsulated ductwork in an unconditioned space is not 
recommended as the unit’s performance will be adversely 
affected. If the air handler is connected to existing ductwork, 
a previous check should have been made to assure that the 
duct system has the capacity to handle the air required for 
the unit application. If ducting is too small, as in replacement 
of heating only systems, larger ductwork should be installed. 
All existing ductwork should be checked for leaks and 
repairs made accordingly. The duct systems and diffusers 
should be sized to handle the design airflow quietly. If air 
noise or excessive airflow is a problem, the blower speed 
can be changed to a lower speed to reduce airflow. This 
will reduce the performance of the unit slightly in heating; 
however, it will increase the temperature rise across the air 
coil. Airflow must still meet minimum requirements.

Equipment Selection

The following guidelines should be used when mating an 
Envision Split to an air handler/coil.

Select R-410A components only.

• 

Select 13 SEER or higher air handler/coil.

• 

Match the air handler to the air handler coil data table.

• 

Indoor matching adjustable TXV should be used with 

• 

any air handler/coil. Fixed orifice or cap tube systems 
should not be used.

Utilizing Existing Coil or Air Handler

It is recommended that a new R-410A air handler be 
installed with an Envision Split considering the long term 
benefits of reliability, warranty, etc. versus the short term 
installation cost savings. However, the existing air handler 
may be retained provided the following:

Coil currently is R-410A rated

• 

General Installation Information

Содержание NSZ

Страница 1: ...ons Hot Water Generation Connections Electrical Startup Procedures Troubleshooting Preventive Maintenance IM1003SN 05 10 NSZ NDZ Installation Manual Geothermal Water Source Indoor Split Heat Pump 2 to...

Страница 2: ......

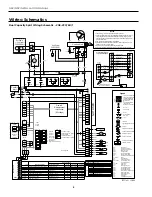
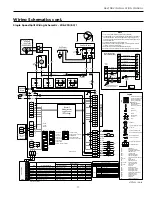
Страница 3: ...e Systems 12 Hot Water Generator Connections 13 14 Electrical Data 15 Thermostat Wiring 15 Wiring Schematics 16 17 Microprocessor Control 18 21 Operation Logic Data 22 DIP Switch Settings 22 Refrigera...

Страница 4: ...59 56 1 59 56 1 59 74 2 1 90 2 55 92 2 61 108 3 06 52 1 47 56 1 59 90 2 55 92 2 61 104 2 95 Coax and Water Piping Water Connections Size Swivel in mm 1 25 4 1 25 4 HWG Connection Size Swivel in mm 1...

Страница 5: ...Model Height Width Depth Water In Water Out Service Valve HWG In HWG Out Low Voltage External Pump Line Voltage Liquid Gas A B C D E F G H J K L M 022 030 19 25 22 50 26 50 1 93 6 93 8 44 11 55 13 43...

Страница 6: ...blower coil units air coils must be installed as specified by the manufacturer s installation instructions however the following recommendations should be considered to minimize noise and service prob...

Страница 7: ...ndlers used with dual capacity units must be capable of operating with a minimum of 2 blower speeds Refer to the manufacturer s instructions for the blower coil unit for details on installing the air...

Страница 8: ...T o Thermostat Up Flow Fossil Fuel Furnace Condensate Drain must be trapped A or Slab Coil Supply Duct Air Temperature Limit Switch to prevent compressor operation when entering air is greater than 9...

Страница 9: ...ion Tighten the connectors by hand then gently snug the fitting with pliers to provide a leak proof joint When connecting to an open loop ground water system thread the 1 in MPT fitting SCH80 PVC or c...

Страница 10: ...olenoid Control Valve Rubber Bladder Pressure Tank Lineset T o Air Handler Flow Regulator Shut Off Valves Water Out Water In From W ell Acc Com Acc NC Acc NO 1 2 3 C R P1 P3 SV Solenoid Valve CC GND C...

Страница 11: ...pm Less than 5 ppm Total Dissolved Solids TDS Less than 1000 ppm 1000 1500 ppm 1000 1500 ppm LSI Index 0 5 to 05 0 5 to 05 0 5 to 05 Iron Fouling Biological Growth Iron Fe2 Ferrous Bacterial Iron Pote...

Страница 12: ...lly 2 5 to 3 GPM of flow per ton of cooling capacity is recommended in earth loop applications Figure 7 Typical Split System Application Closed Loop Earth Coupled Disconnect Thermostat Wire From Air H...

Страница 13: ...ot water generator follow these installation guidelines Turn off the power to the water heater 1 Attach a water hose to the water tank drain connection 2 and run the other end of the hose to an open d...

Страница 14: ...e tank 2 Open a hot water faucet in the building to bleed air 3 from the system Close when full Open the pressure relief valve to bleed any remaining 4 air from the tank then close If so equipped unsc...

Страница 15: ...253 26 0 16 6 82 0 29 0 0 4 5 4 22 4 26 6 40 049 208 230 60 1 197 253 33 0 21 1 96 0 34 0 0 4 5 4 26 9 32 2 50 064 208 230 60 1 197 253 40 0 25 6 118 0 41 0 0 4 5 4 31 4 37 8 60 072 208 230 60 1 197 2...

Страница 16: ...CR1 CR2 CR3 CR4 F1and F2 FD HE HP LP PB1 PB2 PS RV SW1 SW2 SW3 SW4 TS Compressor Contactor Condensate overflow sensor DHW pump relay Loop pump relay Fuses Freeze Detection Sensor Heater element High p...

Страница 17: ...sition for pulsed L lockout signal and in the ON position for constant L lockout signal 5 DHW pump only in models with hot water generation option 6 Connection of remote unit that does not have a loop...

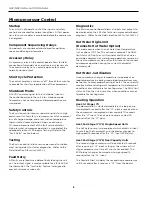
Страница 18: ...n control board allows all inputs and outputs to be displayed on the LEDs for fast and simple control board diagnosis Refer to the Field Selection DIP Switch SW2 1 Hot Water High Limit Domestic Hot Wa...

Страница 19: ...The blower starts and operates on low speed Lockout Conditions During lockout mode the appropriate unit and thermostat lockout LEDs will illuminate The compressor loop pump hot water pump and accesso...

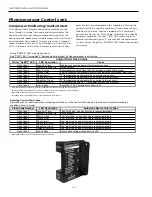
Страница 20: ...cription Automatic Reset of Alert Codes Flash Code 1 Long Run Time Thirty alert free on and off cycles to reset automatically Flash Code 2 System Pressure Trip Not applicable Flash Code 3 Short Cyclin...

Страница 21: ...ckout condition text or error number A slow flash of 1 second on and off means the heat pump microprocessor SW2 1 is configured for Test Mode or thermostat is miswired Lockout code 10 see Comfort Aler...

Страница 22: ...econds Loop Protection 15 F Well Protection 30 F 3 Accessory Relay Allows field selection of the accessory relay to operate with the compressor or fan Fan Comp 4 NOT USED N A N A 5 NOT USED N A N A 6...

Страница 23: ...n should be painted with UV resistant paint or covering to insure long insulation life Refrigeration Replace caps after opening system Service ports for attaching refrigerant gauges Insulated Suction...

Страница 24: ...te for the additional 20 ft line set Additional refrigerant to be added 20 ft x 0 5 oz 10 oz Solution 10 oz should be added to the recommended charge of 86 oz found in the Charge Amount with NAH Air H...

Страница 25: ...izes NOTES The Charge Amount with NAH Air Handler column is based on the charge amount for a NAH Air Handler Compressor Section Split Additional charge will have to be added accordingly for line set l...

Страница 26: ...8 5 586 146 5 108 35 4 228 78 1 348 106 7 468 128 8 588 146 8 110 36 4 230 78 7 350 107 2 470 129 1 590 147 1 112 37 3 232 79 2 352 107 6 472 129 4 592 147 3 114 38 2 234 79 8 354 108 0 474 129 8 594...

Страница 27: ...2 Heating No Hot Water Generator Entering Water Temp F Water Flow GPM Ton NSZ022 thru NSZ060 NSZ070 NSZ022 thru NSZ070 Suction Pressure PSIG Discharge Pressure PSIG Suction Pressure PSIG Discharge Pre...

Страница 28: ...2 2 14 8 12 24 39 3 0 145 160 330 360 140 160 375 425 7 17 7 15 4 9 24 39 Second Stage Operation Cooling No Hot Water Generator Entering Water Temp F Water Flow GPM Ton NDZ026 thru NDZ064 NDZ072 NDZ02...

Страница 29: ...6 0 5 7 5 3 4 9 4 6 21 7 8 7 3 6 8 6 4 5 9 10 2 3 2 1 2 0 1 9 1 7 13 3 6 3 3 3 0 2 8 2 6 16 5 0 4 6 4 3 4 0 3 7 19 6 5 6 2 5 8 5 4 5 0 5 30 06 038 full load 049 part load 064 full load 072 part load...

Страница 30: ...ng set point several degrees and 8 verify high speed blower operation Adjust the cooling setpoint above the room 9 temperature and verify that the compressor and water valve or loop pumps deactivate U...

Страница 31: ...suction temperature here at TXV bulb in cooling modes Cooling Cycle Analysis COOLING TXV ACTIVE RIGHT TO LEFT ClgTXV Measure liquid line temperature and pressure here in both heating and cooling mode...

Страница 32: ...it LED NORMAL DISPLAY MODE DIAGNOSTIC MODES CURRENT FAULT STATUS INPUTS OUTPUTS 1 OUTPUTS 2 Field Selection DIPS SW2 1 On SW2 1 Off SW2 1 NA SW2 1 NA SW2 1 NA SW2 6 On SW2 6 On SW2 6 Off SW2 6 On SW2...

Страница 33: ...erated without a filter Obtaining Parts When ordering service or replacement parts refer to the model number and serial number of the unit as stamped on the serial plate attached to the unit If replac...

Страница 34: ...01 TXV 33P609 01 33P609 03 33P609 05 33P609 06 33P609 01 33P609 03 33P609 05 33P609 06 Reversing Valve 33P506 04 33P503 05 33P526 04 33P506 04 33P503 05 33P526 04 Filter Dryer 36P500B01 36P500B02 36P...

Страница 35: ......

Страница 36: ...Manufactured by WaterFurnace International Inc 9000 Conservation Way Fort Wayne IN 46809 www waterfurnace com 2010 WaterFurnace International Inc 9000 Conservation Way Fort Wayne IN 46809 9794 WaterFu...

Отзывы: