WINCH MANUAL
MAINTENANCE pRECAUTIONS
9
6. The opening pressure of the balancing valve must be 0.1-0.4Mpa
higher than the brake, or the winch will shake when lowering it down.
Our company has tested hoisting and adjusted balancing valves for
every winch before it leaves the factory. Therefore, there is no need
for users/operator to adjust it at all, But if there are special cases
where the users need to adjust it, the users can spiral the adjusting
screw outward, thus making the opening pressure higher, Never
try to adjust the balance valve yourself use a specialist person or
service agent.
7. If there is an abnormal pressure increase in the system, the users
must stop using the winch immediately. Check if there is leakage of
the oil, and if the hydraulic motor is normal. Usually, when hydraulic
motor works under the load, the leaked oil from the pipe must not
surpass 1m/m. Plenty of leakage demonstrates a damaged hydraulic
motor, which must be repaired or replaced immediately. Or, if the
hydraulic motor is in good condition, check other parts inside the
system.
8. Check the operation of the hydraulic winch and its systems regularly
during the work or weekly. In case of abnormal temperature rise,
leakage, abnormal noise and vibration or pressure fluctuation, the
user should stop the winch immediately to check the causes and
overhaul it.
9. Pay attention to the tank’s oil and its level. If there is much foam, the
users should stop immediately to check whether air leaks from the
oil inlet of hydraulic system, the return oil port below the water, and
whether hydraulic oil is emulsified by the entrance of the water.
10. If the winch is showing signs of degraded performance change the
hydraulic oil. Do Not mix old and new oil always replace all.
11. Put 90 # gear oil into the winch speed reducer before using it and
replace the oil after 100 accumulated working hours. First remove
the screw plugs on the drum, then slowly roll the drum to make
drum block hole aim at the block hole on the planetary gear reducer.
Carefully take the plug out with an Allen Key. Drain all the used oil
and add the new oil. Tighten each and every plug.
12. Regularly check the oil filter, which should be cleaned and replaced
regularly.
13. Standing under the winch hook is strictly prohibited.
Overhaul
When the hydraulic winch doesnt work or has malfunctioned is confirmed,
the operator/user can check and repair if qualified to do so. in instances
where user is not able to do this, then do not dismantle or repair. Contact
a professional repair specialist to overhaul. Be careful when dismantling
this hydraulic winch that you dont make scratches or indentations on
precision parts, especially to surfaces of moving and seal parts. Repair or
replace damaged parts immediately. Before assembling, all parts must be
cleaned, and coated with lithium grease (If applicable)
Lifting
These winches are not recommended to be used for lifting, if you use your
winch for hoisting (lifting) then you need to implement a safety factor 5:1.
Ensure when using for lifting there is a minimum of 1 layer on the drum at
any time and pay attention to fixations and drum capacity.
Storage
The Hydraulic winch should be stored in the warehouse where the air is
dry and no corrosive gas. Do not put it under high temperature 50°C or at
a -20°C environment for long-term storage, in case the aging of sealing
parts are accelerated.
If the Hydraulic winch is in a long-term storage, the user should drain all
the oil from it, and fill the machine fully with Turbine Oil with a low acid
value.
LUBRICATION:
–
All moving parts within the Winch having been Lubricated using high
temperature lithium grease at the factory. No internal lubrication is
required.
–
Lubricate Cable Assembly periodically using a light penetrating oil.
CABLE ASSEMBLY REpLACEMENT
If the wire rope has become worn or is beginning to show signs of strands
breaking, it must be replaced before being used again.
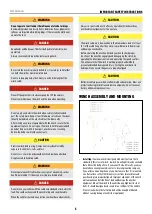
1. Turning clutch to the “CLUTCH OUT” position.
2. Extend cable assembly to its full length. Note how the existing cable
is connected to the drum.
3. Remove old cable assembly and attach new one as the ld cable
connected to the drum. Insert the end of the new rope and secure
the screw being tightly screwed
4. Turning clutch to the “CLUTCH IN” position.
5. Retract cable assembly onto drum, first five wraps being careful
not to allow kinking, then winch cable must be wound onto the drum
under a load of at least 10% rated line pull.
WARNING
Only replace the wire rope with the identical replacement part
recommended by the manufacturer. Ropes are not part of any
warranty offered and the sole responsibility of the operate / user to
maintain or change.
Содержание 13JR02H-CAD
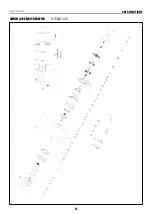
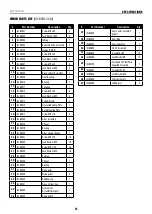
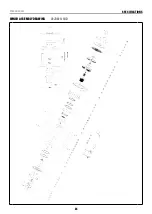
Страница 12: ...Winch Manual SPECIFICATIONS 12 WINCH ASSEMBLY DRAWING 13JR02H CAD...
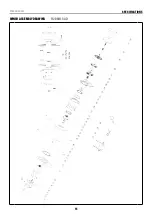
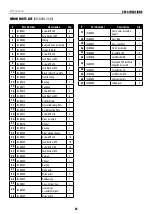
Страница 15: ...Winch Manual SPECIFICATIONS 15 WINCH ASSEMBLY DRAWING 15JR02H CAD...
Страница 18: ...Winch Manual SPECIFICATIONS 18 WINCH ASSEMBLY DRAWING 20JR02H CAD...
Страница 21: ...Winch Manual SPECIFICATIONS 21 WINCH ASSEMBLY DRAWING 25JR02H CAD...
Страница 24: ...Winch Manual SPECIFICATIONS 24 WINCH ASSEMBLY DRAWING 30JR02H CAD...


