WINCH MANUAL
OpERATION
8
OpERATION
Air + Manual mixed clutch
WARNING
–
Clutch is in all the time, for clutch out, either use air with pressure
58~116 psi or rotate clutch lever (no air required).
–
Pressure should not be below 58psi, otherwise air clutch will not
work
–
When clutch is engaged and winch is under load or spooling,
NEVER
disengage the clutch.
DANGER
These winches are not designed to be installed on 4x4, or any off-road
vehicle, by doing so will void your warranty.
The hydraulic system needs a relief valve to ensure the system safety.
The absence of such a valve could cause serious damage the winch
and(or) serious injury or death.
WARNING
1. Make sure clutch is totally engaged before starting any winch
operation
2. Stay clear and away from raised loads
3. Stay clear of cable while pulling do not try to guide cable
4. A min. of 5 wraps of cable around the drum barrel
Winch working demonstration:
1. For Air Clutch Use: Disengage the clutch by applying pressure 58-
116psi to the Free Spool pressure inlet
OR
for Manual Clutch use: To
Disengage the clutch rotate the clutch lever in the direction shown
(Note: No air necessary).
2. Grab the cable assembly and pull the cable to the desired length,
then attach to item being pulled.
CAUTION
Always leave at least five turns of cable on the drum. Review Winch
Safety Warnings and Precautions, before continuing.
3. Engage clutch: Rotate clutch lever in the direction shown (Manual) or
turn off the air supply (Air Operated)
4. Test-run winch in both directions. Turn the winch in each direction
for about one or two seconds meantime make the clutch totally
engaged automatically.
5. While standing aside of the tow path, hold and operate the switch
assembly supplied by your choice. Wait until the motor stops before
reversing directions.
If you are using a heat exchanger with your application to cool the
hydraulic fluid, you should refer to the illustration about mounting.
You should check the hydraulic fluid level regular and replace any that
may have seeped or spilled out. The hydraulic system should be purged at
this time. Listed below are the directions on how to purge the hydraulic
system.
Purging the hydraulic system.
1. Start the engine.
2. Power the winch to draw out about 5 feet of cable.
3. Shut down the engine.
4. Check the fluid level and fill as needed.
5. Repeat steps 1 through 4 as necessary.
6. Start the engine.
7. Move the cable into the desired position.
8. Turn the wheels on the vehicle from the right lock to the left lock
positions five times to help bleed the hydraulic system.
MAINTENANCE pRECAUTIONS
1. Correct use of the hydraulic winch can effectively increase the life of
the winch by many years.
2. We strongly recommend spring washers are used with mounting
bolts. Mounting bolts and wire rope must be inspected for looseness
regularly, if found to be loose always tighten before using the winch.
3. Re-spooling or changing the wire rope: Using the selector valve,
spool the drum into a suitable position, remove or feed the wire rope
into the hole on the edge of the drum. Insert steel plate and screws
and tighten. Start the winch, using minimum load spool in the wire
rope making it neat and tidy.
4. Pay attention to the wire ropes orientation on the drum reel. If the
rope is kinked, frayed or damaged in any way it MUST be replaced
immediately with a OEM part, if not replaced with an original this will
void any warranty.
5. During normal working, the pulling force must be equal or less than
the rated capacity. Overloading the winch capacity, is not allowed.
The maximum pulling force of the winch, is around 1.25 times of its
rated capacity, if exceeded will cause damage to the winch and(or)
equipment or serious injury. By doing so will void any warranty.
Содержание 13JR02H-CAD
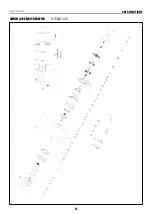
Страница 12: ...Winch Manual SPECIFICATIONS 12 WINCH ASSEMBLY DRAWING 13JR02H CAD...
Страница 15: ...Winch Manual SPECIFICATIONS 15 WINCH ASSEMBLY DRAWING 15JR02H CAD...
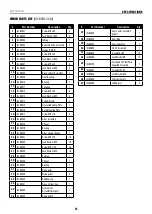
Страница 18: ...Winch Manual SPECIFICATIONS 18 WINCH ASSEMBLY DRAWING 20JR02H CAD...
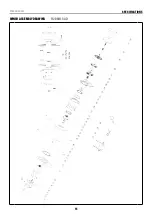
Страница 21: ...Winch Manual SPECIFICATIONS 21 WINCH ASSEMBLY DRAWING 25JR02H CAD...
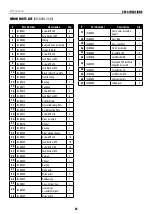
Страница 24: ...Winch Manual SPECIFICATIONS 24 WINCH ASSEMBLY DRAWING 30JR02H CAD...


