background image


PAGE 5 

90925A0

INSTALLATION CONT.

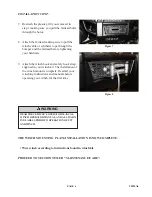
Figure 4

Figure 5

Figure 6

4.  Before the winch is installed, install the 

two longer bolts supplied in your kit though 

the two front holes in your winch mount as 

shown in figure 4.

5.  Install the winch into the winch mount at this 

time, notice the red handle should be on the 

passenger side of the vehicle. Install the M8 

bolts supplied in your winch kit and tighten. 

Attach the yellow and blue cable also for ease 

in installation.

6.  Reinstall the bumper aligning the two long 

bolts in the front of the winch mount, through 

the two front holes in the bumper. Reinstall 

all bumper mounting hardware at this time.


NOTE:  If installing a front plow mount, 

leave the bottom to bolts, and nuts out of 

the bottom of the bumper until you have the 

front plow mount in place.

Содержание 90930

Страница 1: ...installation and operation Always perform regular inspections and maintenance on the winch winch mount and related hardware Never operate this WARN product with damaged or missing parts WARNING INSTA...

Страница 2: ...ays take time to fully read and understand the installation and Operations Guide included with this product Never operate this product if you are under 16 years of age Never operate this product when...

Страница 3: ...t Number Qty Description A1 90923 1 Brkt Winch Polaris Ranger XP 900 B1 79462 4 Capscrew M10 X 1 25 X 25MM Black B2 78803 2 Capscrew M10 X 1 25 X 5MM Magni 565 B3 29926 6 Washer Plain 3 8 Type A B4 79...

Страница 4: ...ng bolts so the bumper can be removed from the vehicle 3 Install the winch mount bracket to the ve hicle using the M10 bolts washers and lock nuts supplied in the hardware kit Before you tighten slide...

Страница 5: ...d be on the passenger side of the vehicle Install the M8 bolts supplied in your winch kit and tighten Attach the yellow and blue cable also for ease in installation 6 Reinstall the bumper aligning the...

Страница 6: ...TV AND WINCH WARNING 7 Reattach the plastic grill you removed in step 1 making sure you pull the fairlead bolts through the holes 8 Attach the fairlead making sure to pull the winch cable or synthetic...

Страница 7: ......

Страница 8: ......

Страница 9: ...lace cables that look worn or frayed 4 Check all moving or rotating parts Remove debris that may inhibit the part from moving freely WARNING PERFORM REGULAR INSPECTIONS ON THE WINCH WINCH MOUNT AND RE...

Страница 10: ...Inspectez toutes les pi ces mobiles ou rotatives Retirez les d bris pouvant g ner le libre mouve ment des pi ces LE FAIT DE NE PAS SERRER SOLIDEMENT TOUS LES BOULONS DU TREUIL DE LA PLAQUE DE TREUIL...

Страница 11: ...TILISATION Figure 7 7 Rattachez la calandre en plastique enlev e l tape 1 en vous assurant de tirer les boulons du guide c ble travers les trous 8 Attachez le guide c ble en vous assurant de tirer le...

Страница 12: ...e Installez les boulons M8 fournis dans le kit du treuil et serrez Attachez les c bles jaune et bleu pour faciliter l installation 6 R installez le pare chocs en alignant les deux longs boulons l avan...

Страница 13: ...la partie sup ri eure pour d poser le pare chocs du v hicule 3 Installez le support de montage du treuil sur le v hicule en utilisant les boulons M10 les rondelles et les crous de blocage fournis dan...

Страница 14: ...t Description A1 90923 1 Support treuil Polaris Ranger XP 900 B1 79462 4 Vis t te creuse M10 X 1 25 X 25MM noire B2 78803 2 Vis t te creuse M10 X 1 25 X 5MM Magni 565 B3 29926 6 Rondelle plate 3 8 de...

Страница 15: ...temps de bien lire et comprendre le manuel d installation et d utilisation inclus avec ce produit Les personnes g es de moins de 16 ans ne doivent jamais faire fonctionner ce produit Ne faites jamais...

Страница 16: ...rement les inspections et l entretien du treuil de son kit de montage et du mat riel de montage connexe Ne faites jamais fonctionner ce produit WARN avec des pi ces endommag es ou manquantes Votre s c...

Отзывы: