background image

WARN INDUSTRIES 

PAGE 1 

61584 Rev C0 


WARNING


SEVERE INJURY OR DEATH MAY RESULT IF YOU IGNORE ANY OF THE 
FOLLOWING.


Read the Winch Operator’s Manual, ATV Operator’s Manual, and all warning labels 
before operating the winch and ATV. 


Stay clear of moving parts and cable.  Keep others away when operating the winch. 


Inspect the winch mechanism, fasteners, and cable, before operating.  Replace all worn 
or damaged parts before operating. 


Make sure the winch is deactivated when leaving the ATV unattended.


PARTS LIST: 

Your safety, and the safety of others, is very important. To help you make informed decisions about safety, we have provided installation 
and operating instructions and other information on labels and in this guide. This information alerts you to potential hazards that could 
hurt you or others. It is not possible to warn you about all potential hazards associated with this product, you must use your own good 
judgment.


CARELESS INSTALLATION AND OPERATION CAN RESULT IN SERIOUS INJURY OR EQUIPMENT DAMAGE. 
READ AND UNDERSTAND ALL SAFETY PRECAUTIONS AND OPERATING INSTRUCTIONS BEFORE INSTALLING 
AND OPERATING THIS PRODUCT. 

This guide identifies potential hazards and has important safety messages that help you and others avoid personal injury or death. 

WARNING

 and 

CAUTION

 are signal words that identify the level of hazard. These signal words mean:  

 WARNING signals a hazard that could cause serious injury or death, if you do not follow recommendations. 

CAUTION signals a hazard that may cause minor to moderate injury, if you do not follow recommendations.


This guide uses 

NOTICE

 to call attention to important mechanical information, and 

Note:

 to emphasize general information worthy of 

special attention. 

PART  NO.


QUANTITY DESCRIPTION


22262 

5/16” Flat Washer 

1402 

5/16” Lock Washer 

3870 

5/16-18 x ¾” Hex Bolt 

2079 

5/16-18” Hex Nut 

1320 8 

¼” 

Washer 

1321 

¼” Lock Washer 

1322 

¼” Hex Nut 

37205 

¼ x 20 x 1 x 1-3/4x 1” U-Bolt 

22508 

Capscrew, Hex, 8mm x 1.25 x 25mm 

61585 1 

Front 

Bracket 

61648 

Center Rear Bracket 

61582 

Left Rear Bracket 

61583 

Right Rear Bracket 


INSTALLATION INSTRUCTIONS

ATV WINCH MULTI-MOUNT


Multi-Mount Mounting-Kit:  PN 61019 

Application: HONDA RUBICON 


Содержание 61019

Страница 1: ...URY OR EQUIPMENT DAMAGE READ AND UNDERSTAND ALL SAFETY PRECAUTIONS AND OPERATING INSTRUCTIONS BEFORE INSTALLING AND OPERATING THIS PRODUCT This guide identifies potential hazards and has important safety messages that help you and others avoid personal injury or death WARNING and CAUTION are signal words that identify the level of hazard These signal words mean WARNING signals a hazard that could ...

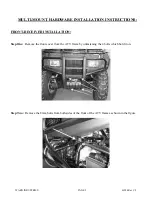
Страница 2: ...DWARE INSTALLATION INSTRUCTIONS FRONT RECEIVER INSTALLATION Step One Remove the front cover from the ATV frame by unfastening the 4 bolts which hold it on Step Two Remove the 8mm bolts from both sides of the front of the ATV frame as shown in the figure ...

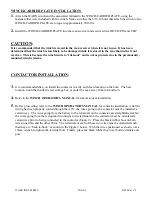
Страница 3: ...ashers Step Four Tighten all fasteners Replace the plastic front cover to the ATV frame REAR RECEIVER INSTALLATION Step One To remove the trunk unscrew the two Phillips head screws at each side of the trunk Then disconnect the electrical connections which connect the circuitry to the top of the trunk The two 8mm bolts which connect the rear rack to the ATV frame must also be removed Phillips head ...

Страница 4: ...wn using the 1 U bolt nuts lock washers two provided 8mm bolts washers and lock washers Do not tighten at this time Step Three Fasten the right rear bracket to the bike frame as shown using the 1 U bolt nuts washers lock washers provided 8mm bolts washers and lock washers Do not tighten at this time 8mm bolts washers and lock washers 1 U Bolt nuts washers and lock washers ...

Страница 5: ... bracket to the left and right brackets using the 5 16 bolts and lock washers as shown Tighten all Fasteners at this time 5 16 Bolts and lock washers Step Five Put the trunk back on the bike using original Phillips Head screws Be sure to re attach electrical connections ...

Страница 6: ...tactor in a dry and clean location on the bike The best location would be inside the rear storage box or under the seat away from dirt and rain 4 Refer to the WINCH OPERATOR S MANUAL for remote socket installation 5 Before proceeding refer to the WINCH OPERATOR S MANUAL for contactor installation After the wiring has been properly routed through the ATV the wires going to the contactor must be ins...

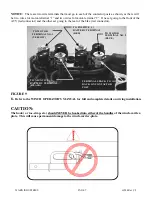
Страница 7: ...oing to the rear of the bike red connector FIGURE 9 6 Refer to the WINCH OPERATOR S MANUAL for full and complete details on wiring installation CAUTION The hook or toe strap etc should NEVER be hooked into either of the handles of the winch carrier plate This will cause permanent damage to the winch carrier plate TO MOTOR TERMINAL NO 2 BLUE TO MOTOR TERMINAL NO 1 YELLOW TO NEGATIVE BATTERY TERMINA...

Отзывы: