©2018 Warn Industries, Inc. WARN® and the WARN logo are trademarks of Warn Industries Inc.
6
101677A0
I N S T A L L A T I O N I N S T R U C T I O N S
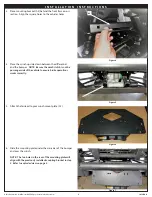
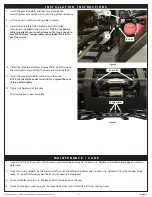
Figure 8
Figure 9
A2
7. Install the provided bolts and lock nuts through the
mounting bracket and the winch mounting plate and secure.
8. Lift winch up to reach mounting holes in plate.
9. Install winch to plate with hardware and installation
instructions supplied in the winch kit.
NOTE: Your battery
cables supplied in your winch kit may not be long enough to
reach the battery. Longer cables are included in this kit to
use if necessary.
10. Install the three lower factory bumper bolts by lifting up on
the winch plate and pushing the bumper back into place.
11. Install the provided u-bolts, washers and lock nuts.
NOTE: U-bolts will be easier to install if you spread the ends
of the u-bolts slightly.
12. Tighten all hardware at this time.
Your installation is now complete.
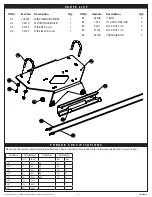
A1
B5 & B4
B1, B2 & B3
Bumper Bolts
M A I N T E N A N C E / C A R E
1. Inspect all parts on the winch, winch mount, and related hardware prior to each use. Replace all hardware that appears rusted or
deformed.
2. Inspect all nuts and bolts on the winch, winch mount and related hardware prior to each use. Tighten all nuts that appear to be
loose. Stripped, fractured, or bent bolts or nuts need to be replaced.
3. Check all cables prior to use. Replace cables that look worn or frayed.
4. Check all moving or rotating parts. Remove debris that may inhibit the part from moving freely.

