


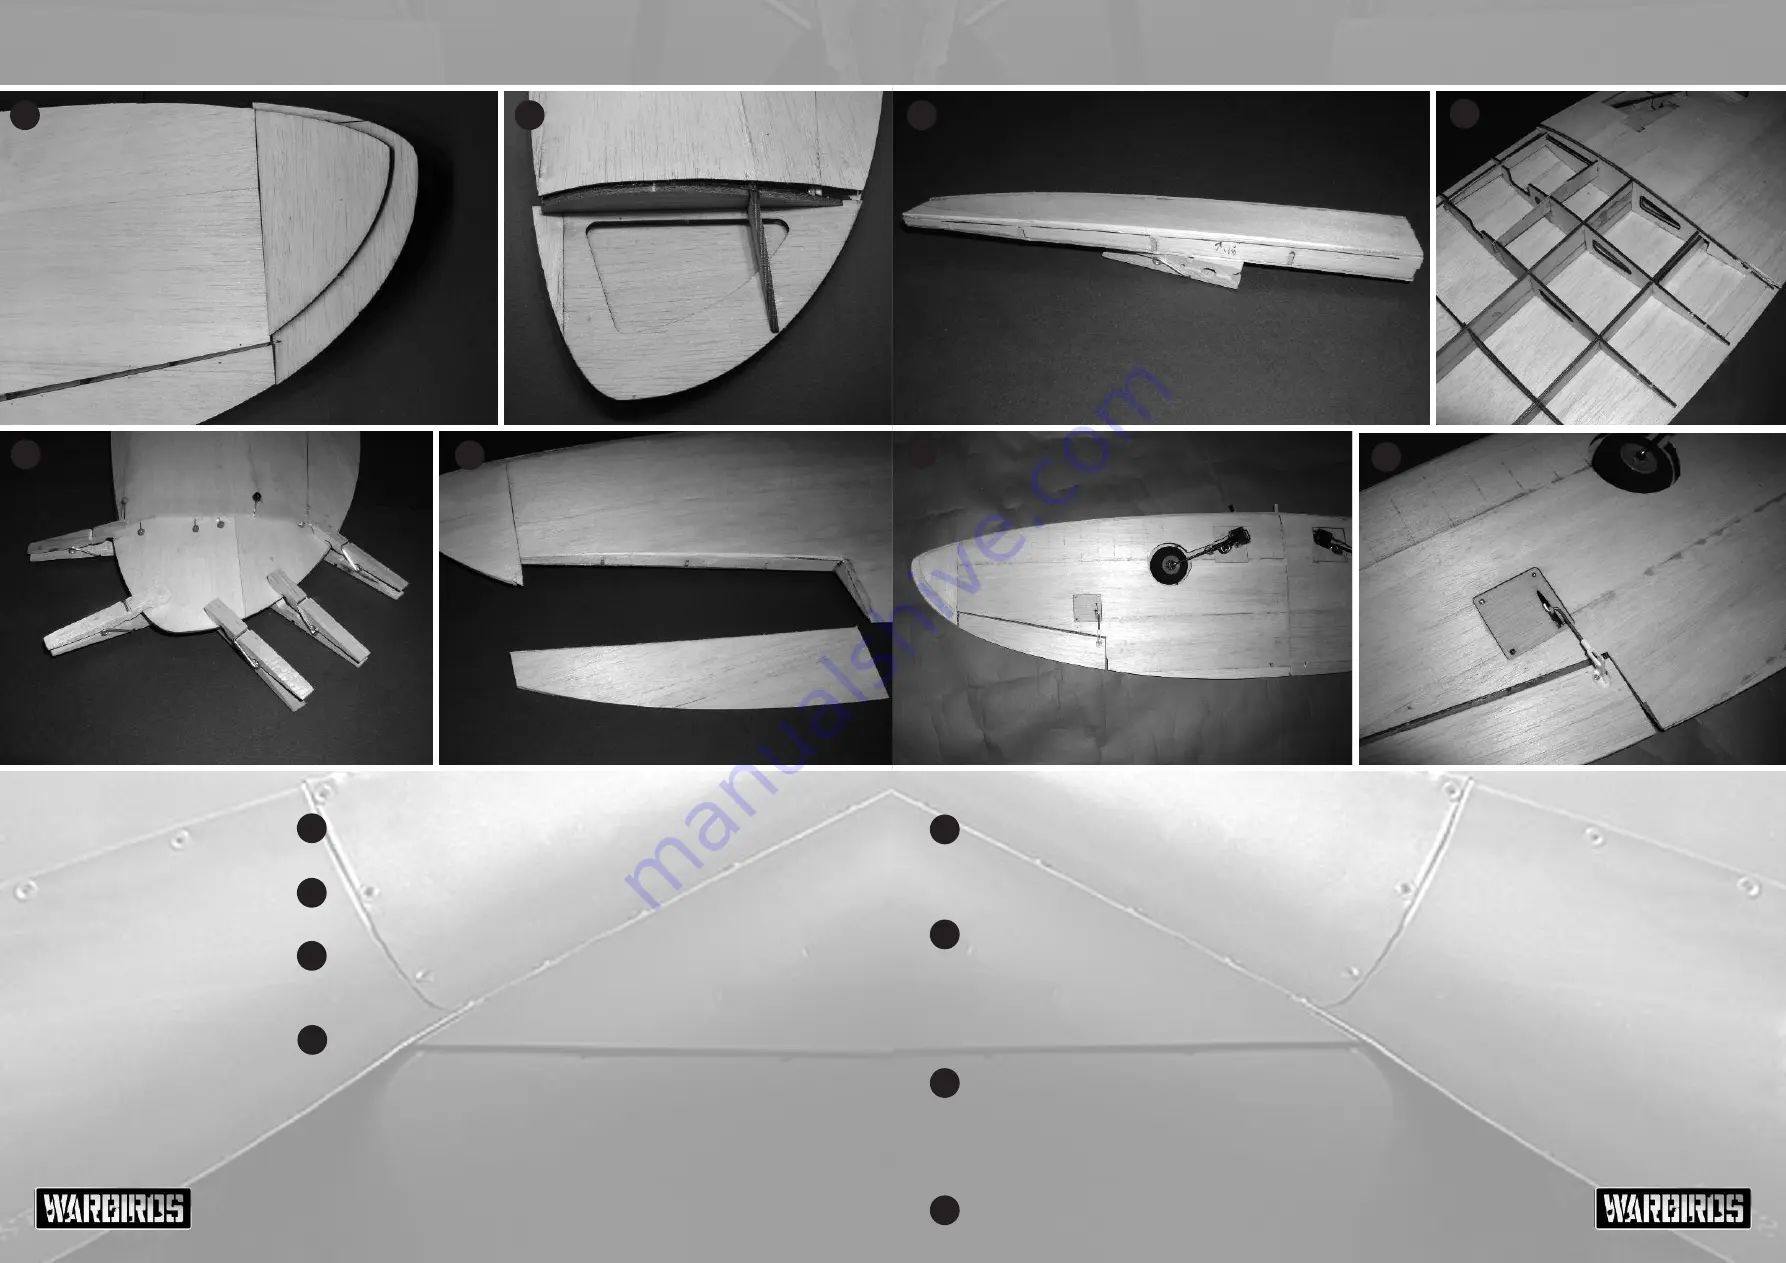
Add the lower soft balsa part of the wing tip, which will be sanded to blend
in with the wing skin a little later.
Glue in place the tip skin supporting rib. If the skin doesn't end that neatly,
don’t panic! Its only wood and a little scrap added will soon fill the gap.
To complete the tip, add the top skin which is made up of two parts that you
should first join with cyano. When you turn it over you can see the the
overhang of top skin needs to be sanded off.
With a junior hack saw blade or razor saw carefully saw through the three
ribs that retain the aileron. Then sand both faces flat in preparation for
hinging the control surfaces.
8
9
11
8
9
10
10
12
13
14
You will need three mylar hinges for each aileron. The hinge line will be 1/8”
(3mm) from the top of the skin. Draw a line and then cut three 20mm long
slots with a sharp knife to accommodate the hinges. Replicate the slots onto
the wing to match and dry fit the hinges.
You can now join the wings together. Pic 13 shows the bottom without skins
just to what is happening.
You can open up a hole right at the front where
the wing dowel fits.
The dihedral braces provide the strength, not the root
ribs. So if your actual wing joint isn't that tight, it wont make any difference,
just fill in with scrap wood. The soft balsa block near the trailing edge is to
stop the wing bolts crushing the wing skin.
It is very important to study the line of the trailing edge when viewed from
behind to check both wings look the same.
If they don’t, simply open up the
trailing edge with a knife as described earlier and adjust. The two leading
edge strips (two each wing) have been added and sanded to shape. The
electric screwjack retracts have also been fitted with just four screws.
We fitted 12.5g servos onto the lite ply plates simply by roughing them up
and hot gluing in position.
12
13
14
15
HINTS & TIPS
1 Nipping off the corners of the mylar stops
the hinges snagging upon insertion
Wing - Supermarine Spitfire IX
Wing - Supermarine Spitfire IX
11
15