background image

View Mode

This mode allows you to view your model in a variety of different ways.
This can be helpful for spotting issues before the print even starts.

This is the standard view and shows the solid outer surfaces of the model.

Normal

Overhang

Overhang mode shows where your model may need support material. Red highlighted areas show

overhangs and more severe angles and areas where support material is recommended. Refer to

page 38 for information on how to add support material to your model.

Ghost

Ghost view mode makes the model translucent to allow you to see what is behind it.

Xray

Xray is very similar to Ghost mode. It will allow you to see into objects, ensuring that inner details
are correct.

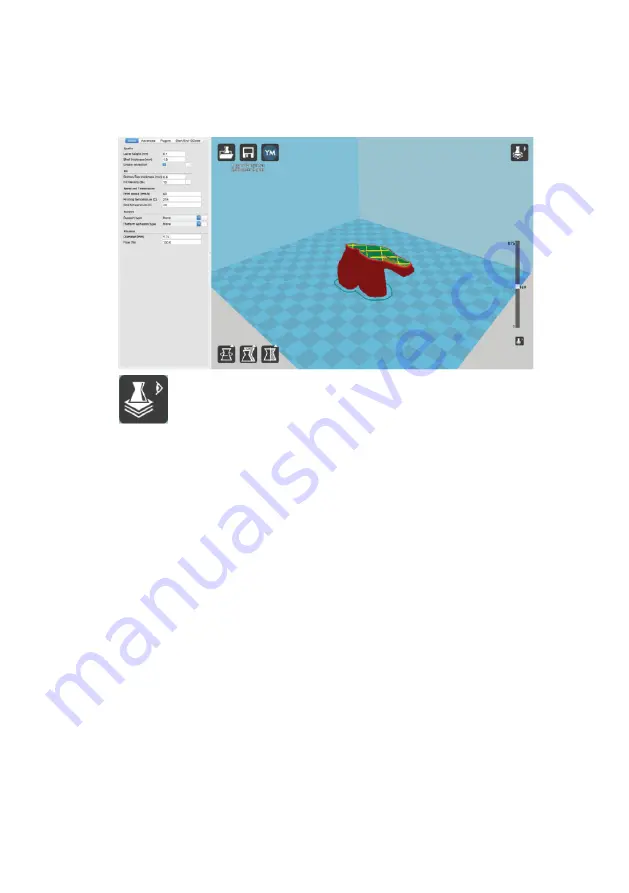
Layers

To view the toolpath of your print head and to ensure no skipped layers or gaps, use this option.
Use the slide bar on the right hand side of the window to move up and down through the
toolpath layers.

Using Cura

31

Содержание D12 300

Страница 1: ...D12 300 400 500 user manual...

Страница 2: ...erforming up to your expectations or you experience any issues please contact us before returning the item We are experienced in resolving problems through phone and email or you can reach us through...

Страница 3: ...your warranty shall be covered by distributor s Warranty and honored by WANHAO distributor too Our goods come with guarantees that cannot be excluded under the Chinese Consumer Law You are entitled t...

Страница 4: ...e extension cord ampere rating Also make sure that the total rating of all products plugged into the wall outlet does not exceed the fuse rating Use the product only with the supplied power supply cor...

Страница 5: ...4...

Страница 6: ...self when dealing with model stripping During the printing process do not have a strong collision with the printer In case of emergency turn off the 3D printer by unplugging the power outlet The print...

Страница 7: ...The box contains D12 300 3D PRINTER FILAMENT DETECTOR TWEEZERS NOZZLE CLEANER SPRING MAT MICRO SD CARD AND READER HEXAGON WRENCH USB CABLE FILAMENT FEEDING TUBE FILAMENT SHAFT SCREW POWER CABLE SHOVE...

Страница 8: ...ght kg 13 2kg 19 4kg 20 5kg Gross weight kg 16 2kg 23 4kg 24 5kg Accuracy Motor Accuracy Machine size cm 40 58 71cm 50 67 72cm 60 80 82cm Packing size cm 53 5 48 27 5cm 63 72 30cm 70 90 30cm Layer thi...

Страница 9: ...Read this manual carefully it will bring you great convenience...

Страница 10: ...data cable 2 Filament tube 3 Extruder assembly 4 Z axis cable pack 5 X axis belt tension adjuster 6 X axis belt 7 Movable bed sheet 8 Z axis end stop switch 9 Touching screen 10 Leveling nut 1 2 3 4 5...

Страница 11: ...11 Filament detector 12 X axis roller 13 Filament holder 14 Y axis motor 15 SD card slot 16 Reinforcing rib 14 16 15 13 11 12...

Страница 12: ...asp ArticleID 136 unboxing for step by step guide on unboxing and setup levelling filament installation and printing Package Contents 6 Sets components pack as left picture 1x Wanhao D12 300 printer...

Страница 13: ...se Then use 4pcs M5 x 40mm bolt to lock the tower onto the base Note On the base there s sticker No 1 and on the tower there s sticker No 1 So No 1 base match to the No 1 tower No 2 base match to the...

Страница 14: ...onto the cardan joint by one M3 x 8mm bolt Then install the cardan joint onto the filament stand by one M3 x 8mm bolt Twist the X axis belt tension adjusting knob clock wise to tighten the belt tensi...

Страница 15: ...connect every wire according to it s Number which match to the corresponding connector Congratulation You have complete the installation of D12 300 You are now ready to boot up and print O K I D B 1...

Страница 16: ...twist the bolt to lock it Insert the L filament tube into the L feeder Then insert the orange locker to stop tube from falling out Congratulation You have install the 2nd extruder 4 6 8 Install the f...

Страница 17: ...r D12 300 machines Multiple language support Using rapid iterations we ve included many popular requests from our community The two color writing model can be uploaded to the SD card connected to the...

Страница 18: ...ge to Full settings preferences and more expert settings 5 Print type profiles 3 options to choose a print profile 6 Print with support structure The option to give your model some support material to...

Страница 19: ...the scroll wheel to zoom in or out Rightmouse button Hold and move the mouse to rotate the viewpoint around the 3D model Rightmouse button Shift Hold and move the mouse to pan the 3D view Right and le...

Страница 20: ...168 0 x 2 Connect your computer to your WIFI router Please make sure the computer and the printer are connecting to the same WIFI router 3 Open Cura WANHAO edition Click Wifi Enter the IP address whic...

Страница 21: ...power break If you experience the Power break during printing Once the power come back The machine would initiate and back to resume page You can just click RESUME to resume printing or you can stop t...

Страница 22: ...use Websites such as Thingiverse com Pinshape com and YouMagine com are a good place to start but there are many more available Alternatively you can create your own 3D Design using 3D Modelling Soft...

Страница 23: ...nter and resolution of each layer Here is an example of how size infill and resolution can effect printing time Dimensions Infill Resolution Print Time Filament Used 62 5 x 25 75 x 67 75mm 70 x 70 x 1...

Страница 24: ...er initialised press Tool Home All 8 Navigate to and select Press Tool Home All Your 3D printer will now try to align to the home position on the front left corner of the Heated Print Bed 9 Once align...

Страница 25: ...er Temp 195 C 210 C 185 C 220 C Heat Bed Temp 60 C 90 C 50 C 60 C Official Name Polyactic Acid Acrylonitrile Butadiene Styrene Polyvinylv Alcohol High Impact Polystyrene Printing Level Basic Advanced...

Страница 26: ...der and plate on the LCD When the temperatures are within a few degrees of the target you are ready to insert the filament NOTE Preheat PLA ABS will still be shown even after temperatures have been re...

Страница 27: ...le Swift upward action will ensure that the filament does not cool down before exiting the nozzle inlet If the filament gets stuck please see the troubleshooting section Both PLA and ABS filaments are...

Страница 28: ...rom the bed 1 Wait until the Extruder and Heated Print Bed have cooled down to room temperature This will allow the plastic to contract making it easier to remove 2 Using the Scraper carefully wedge u...

Страница 29: ...rs Cura is a free Open Source slicer software released on the AGPLv3 license It s available on MacOS X and Windows 1 Install the file located on your included MicroSD card 2 Select a destination folde...

Страница 30: ...ad more than one file onto the platform Cura will automatically move the additional files to fit NOTE Files in grey are outside of the print area and need to be moved or scaled to fit Changing the Vie...

Страница 31: ...vent adhesion issues during the print Reset The Reset button will return your model to the original orientation as defined by the CAD program used to create the model Scale The Scale button displays t...

Страница 32: ...ngles and areas where support material is recommended Refer to page 38 for information on how to add support material to your model Ghost Ghost view mode makes the model translucent to allow you to se...

Страница 33: ...or the fast prints where overall model finish is not of concern Most commonly used for quick iteration of designs found in rapid prototyping Material Selection Choose your desired filament The WANHAO...

Страница 34: ...using automatic merging Click on one file left click and choose Dual Extrusion Merge The 2 file would merge into one 33 To print one file with another support material You need to use double extrusion...

Страница 35: ...color The amount of material put in the wipe prime tower This is done in volume because in general you want to extrude a certain amount of volume to get the extruder going independent on the layer hei...

Страница 36: ...eneric settings We recommend using our tested profiles that are available at www wanhao3dprinter com You will want to choose the profile that matches your filament and quality needs Once downloaded yo...

Страница 37: ...or 0 8mm Fill Density This number is expressed as a percentage 0 will give a completely hollow print while 100 will give you a completely solid object We recommend 20 to 40 fill density as it is funct...

Страница 38: ...have a small surface area contacting the plate This can create adhesion issues causing your part to pop off at some point during the print To fix this use either Brim or Raft Raft is better used when...

Страница 39: ...es Advanced Tab Options MACHINE Nozzle Size mm This defines your nozzle size The slicing engine uses this value combined with your other settings to determine how quickly to feed filament into your Ex...

Страница 40: ...ders will overlap when laying down material This will help adhesion between the two different colours or types of filament This setting is not applicable to the WANHAO 3D Printer it is only for printe...

Страница 41: ...lp support the outer shell and the infill We recommend keeping this speed setting between your infill speed and your outer shell speed COOL Minimal Layer Time This will determine a minimum amount of t...

Страница 42: ...You can alter temperatures fan speeds and print speeds Fine tuning these for specific STL files can produce cleaner prints Pause at Z Height Pause your print at a specified height You can also specify...

Страница 43: ...print head is not moving this far during travel moves it will not retract Enable Combing This option prevents your print head from travelling over holes in the X Y plane when printing This will slight...

Страница 44: ...section will define how your Extruder cooling fan will operate during the print Your fan will not start until it has reached 25 or higher for speed settings If your print speeds are slowed down due to...

Страница 45: ...ut it will be harder to remove the support material and will use more filament Distance X Y mm This will determine how far away from your object in the X Y plane that the support material is being pla...

Страница 46: ...recommended Extra Margin mm This determines the distance around the outside of your object that the raft is created This can be helpful for ensuring no warping occurs in the lower layers Line Spacing...

Страница 47: ...external mesh errors while keeping internal holes intact This can accidentally fill in intentional internal holes Combine Everything Type B This will ignore all internal holes of the model and only fo...

Страница 48: ...SOME 3D MODELS AND OTHER MATERIALS ARE REFERENCED FROM THE FOLLOWING WEBSITE www thingiverse com thing 968975 Aug 14 2015 Human Jaw by gebrin 47...

Страница 49: ......

Страница 50: ...hejiang Province China Email support wanhao3dprinter com Website www wanhao3dprinter com DISPOSAL INSTRUCTIONS Do not throw this electronic device into the waste when discarding To minimize pollution...

Отзывы: