


WWW.
WAMBAM
FENCE.COM
3
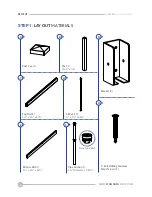
ASSEMBLY
INSTRUCTIONS
BL19101
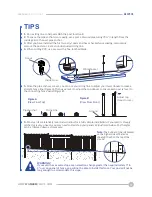
TIPS
1.
Run a string line to help establish the post location(s).
2.
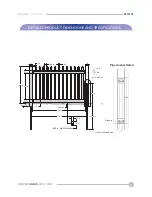
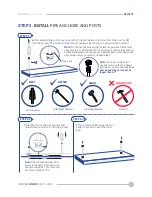
To space the pipe anchors more easily, use a piece of wood measuring 70⅜” in length from the
inside gear to the next pipe anchor.
3.
After you have installed the first two vinyl posts and have checked your spacing, temporarily
remove the posts to create an unobstructed string line.
4.
When cutting PVC, use a saw with a fine-toothed blade.
5.
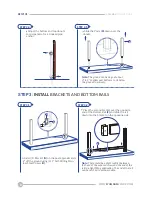
Once the pipe anchors are set, you can use your string line to adjust your lower donuts to make a
straight fence line
(Figure A)
. Then use a level to adjust the top donuts to ensure each post is level to
the connecting fence panel
(Figure B).
6.
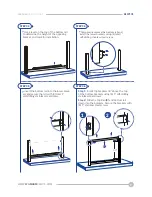
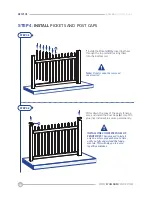
Most yards are relatively level and will allow for a fairly simple installation. If your yard is steeply
pitched or is very uneven, you may need to stair step your panels as illustrated below. Post heights
can be trimmed down as necessary.
Figure A
(View From Top)
Pipe Anchor
String Line
Ground
Donut
Inside Gear
Wood Spacer
Adjust top
donut to level
Figure B
(View From Front)
Note:
The bottom of the rail bracket
on the higher side of the fence
should sit flush to the top of the
ground.
WARNING!
If your yard has a severe slope or an elevation change greater than approximately 3” to
4” over one panel of fence, you will not be able to install this fence. Your post will not be
long enough to accommodate this slope.


