GB
6
Gravity spray attachment
Start-up
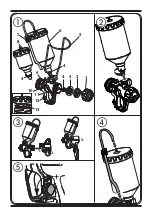
1) Insert container into gun body and fasten by turning with
bayonet catch. (Fig. 2)
2) Connect gun body with Click & Paint handle (not included).
(Fig. 3)
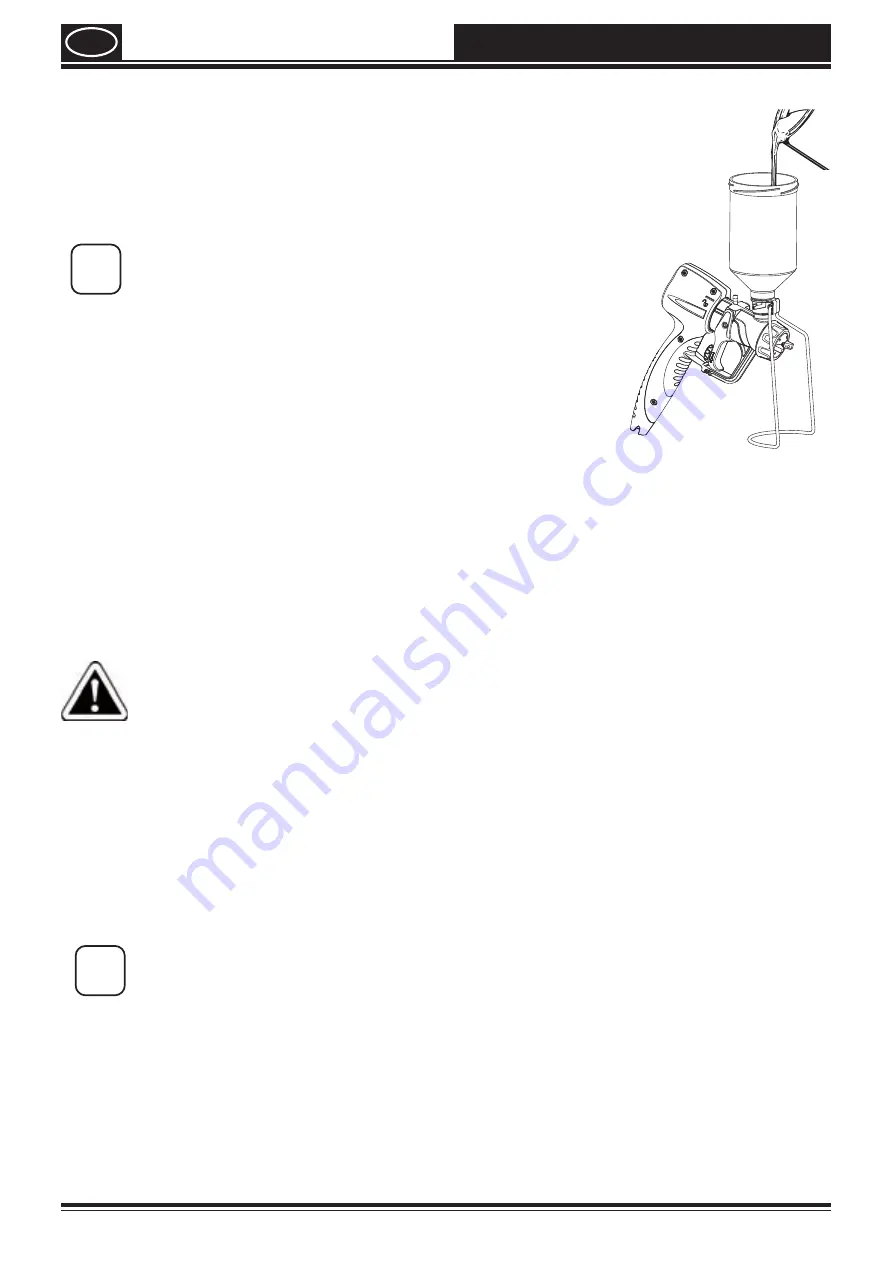
3) Place the gun on a level surface with the stand folded out.
i
Fill the container only if it is attached to the gun,
otherwise the coating material will leak.
4) Remove the container cover.
5) Fill container with prepared coating material.
6) Close container with cover.
7) Attach the valve hoses to the container cover and gun body.
(Fig. 4)
Adjusting the material quantity (fig. 5)
Set the material volume by turning the regulator on the trigger guard of the spray gun.
lower material volume
Æ
turn anti-clockwise (-)
higher material volume
Æ
turn clockwise (+)
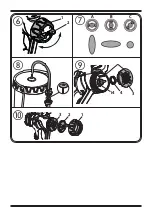
Selecting the spray setting
WARNING! Danger of injury! Never pull the trigger guard while adjusting
the air cap.
With the union nut (fig. 6, 1) slightly unscrewed, turn the air cap (2) to the desired
spraysetting position (arrow). Then tighten the union nut.
Fig. 7 A
= vertical flat jet
Æ
for horizontal surfaces
Fig. 7 B
= horizontal flat jet
Æ
for vertical surfaces
Fig. 7 C
= circular jet
Æ
for corners, edges and hard-to-reach surfaces
Interruption of Work
i
When processing 2-component varnishes, clean the device immediately.
Shutting down and cleaning
1) Switch the unit off.
2) Unscrew the container cover and fill the remaining coating material back into the
original container.
3) Pour water or solvent into the container.
Do not use flammable materials for cleaning purposes.
Содержание WOOD&METAL EXTRA GRAVITY FEED
Страница 2: ...햳 햶 4 1 2 3 햴 햵 햲 5 11 12 9 10 8 6 1 4 3 2 7 13 4 ...
Страница 3: ...햸 1 2 A B C 4 14 3 햻 햹 햺 3 2 1 햷 ...
Страница 4: ......
Страница 21: ...NL 17 Gravity spuitopzet ...


