26
OPERATING MANUAL
VERSION 07/2017
ORDER NUMBER DOC 2349369
2. Ensure that the system has been relieved of pressure and that the spray gun is
secured.
3. Unscrew anti-contact guard Remove nozzle seal.
4. Insert new nozzle seal. Screw the entire anti-contact guard onto the spray gun.
Tighten the anti-contact guard with a size 27 wrench (SW 27).
8.2.7 CHANGING OR CLEANING FILTER INSERT
1. Flush and clean the spray gun in accordance with Chapter
.
2. Relieve the pressure on the spray gun and product pressure generator in accordance
with Chapter
3. Secure the spray gun with the locking device.
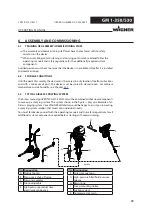
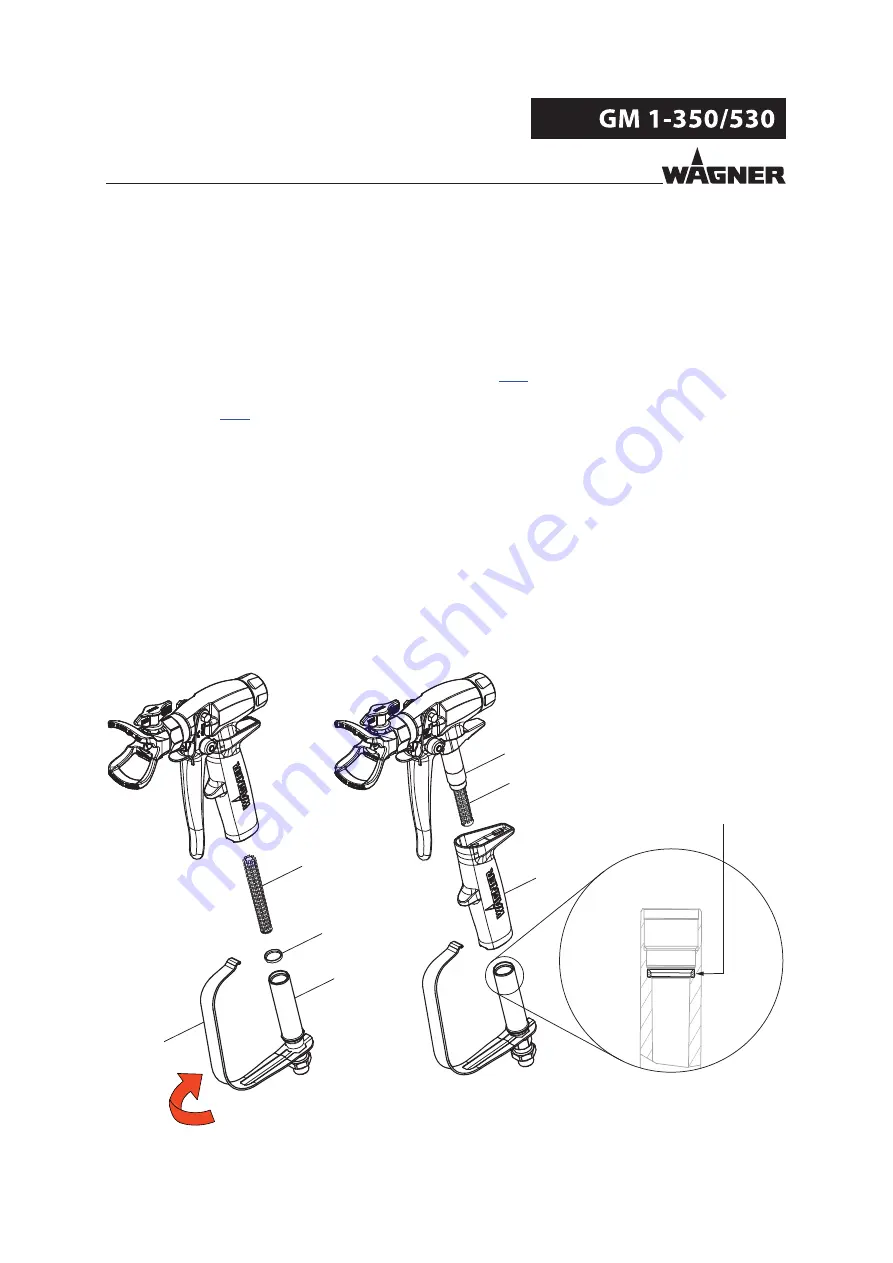
4. Use the guard bracket (B) with integrated hex tool to loosen and unscrew the filter
housing (A).
5. Remove the filter insert (C) from the filter housing (A).
6. Thoroughly clean the filter housing and gun handle with cleaning agent.
Assembly
7. Insert a new filter insert (C) with opening downwards into the filter housing (A).
Check the seal (F) to make sure it is in good condition and positioned correctly.
Note: if the seal (F) becomes damaged, it must also be replaced (order No. 364340).
8. Use the guard bracket to screw in and tighten the filter housing (A).
Note: If the filter insert (C) gets stuck in the filter socket (E), pull off the gun handle (D)
and carefully remove the filter insert (C).
Disassembly
Installation
position seal
(F)
B_5047
A
B
C
D
C
F
E

