7
Draft
Installation
Installing the Pedestal
Fix the pedestal to the bottom of the thin client before you place it on a flat surface. Do not fix
the pedestal if you are mounting this thin client using the VESA bracket. For more information
about mounting using a VESA bracket, see section ‘Mounting using VESA Dock’.
To install the pedestal:
1. Turn the Thin Client upside down.
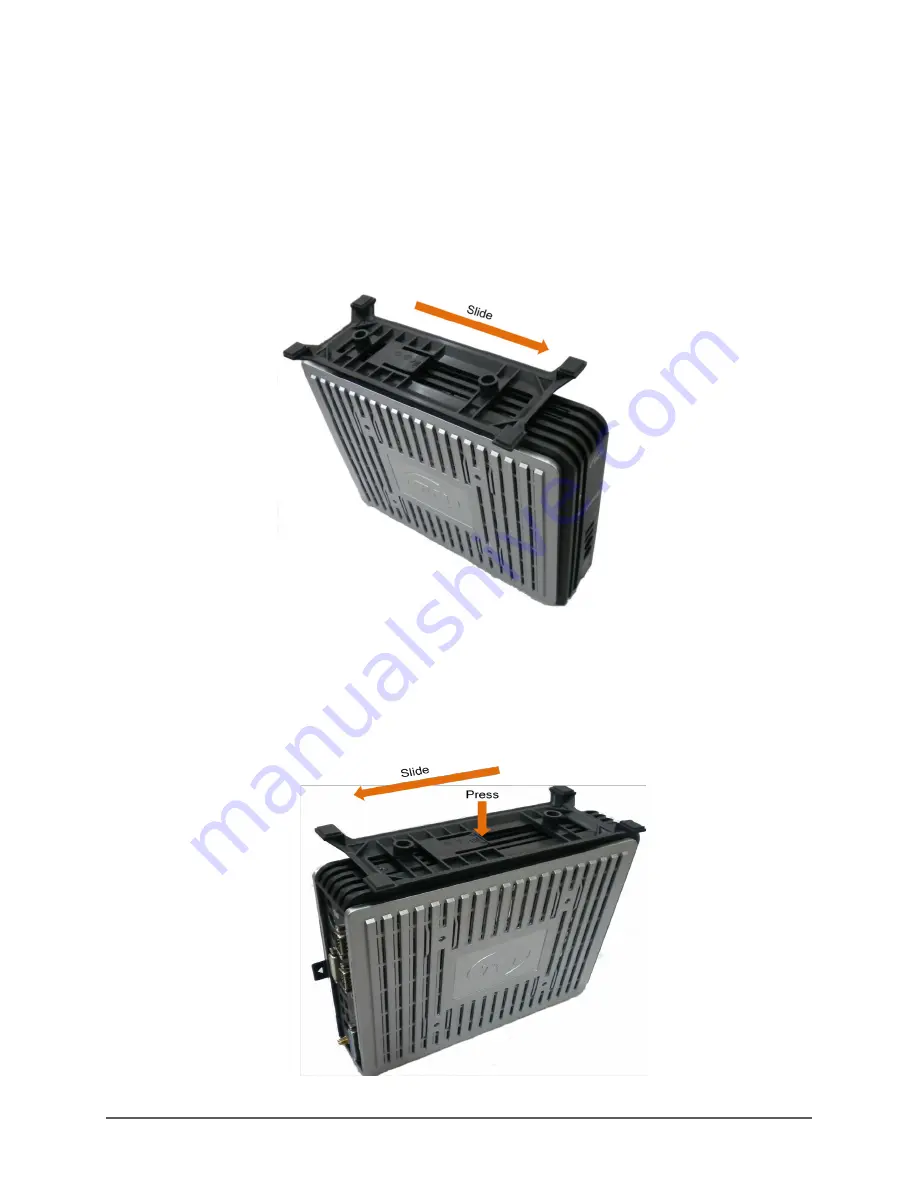
2. Locate the slots at the bottom of the Thin Client into which the tabs on the pedestal fit.
Figure 2-4: Installing the Pedestal
3. Insert the pedestal tabs into the slots on the Thin Client and then slide the pedestal. You
will hear a snap sound indicating that the pedestal is fixed in place.
To remove the pedestal:
1. Turn the thin client upside down.
Figure 2-5: Removing the Pedestal
Содержание Itona LQ+ Series
Страница 1: ...Itona LQ LQ Series Hardware User Guide ...
Страница 4: ...ii For more details about Product Warranty visit http www vxl net Support Product Warranty Terms aspx ...
Страница 6: ...iv Regulatory Certifications ...
Страница 18: ...Installation Draft 10 Figure 2 11 Under the Counter Left Figure 2 12 Behind the Monitor ...
Страница 36: ...Appendix 28 10 TMDS Clock 20 Hot Plug detect all versions and HEC Data optional HDMI 1 4 with Ethernet ...


