background image

29

4

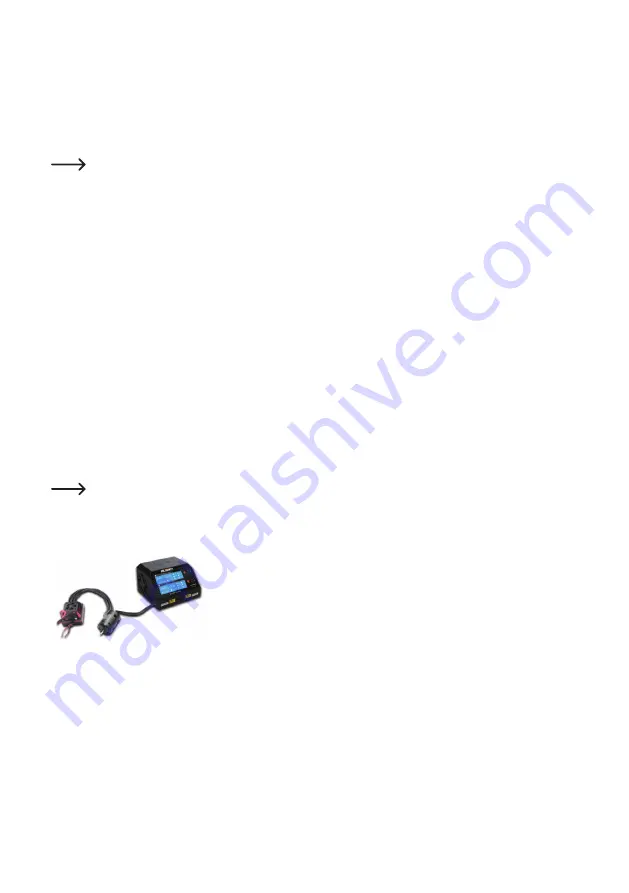
‘Discharger’ with discharge device operating mode

To use the ‘Discharger’ operating mode, connect a discharge device to the 

EXT.DISC

 discharge connection (7) and 

set the operating mode to ‘Discharger’.
Use an external discharge device such as the UP-D200 Smart Discharger 200 W with the 

EXT.DISC

 connection (7). 

You can now discharge with improved speed, achieving a discharging power of up to 200 W.

  You must connect a discharge device when using the ‘Discharger’ operating mode.

5

Balancer mode – measure internal cell resistance

In balancer mode, the charger monitors the internal cell resistance of every cell in the battery pack. The internal 

cell resistance can be used to determine the functionality and conservation status of a battery pack. The more even 

the cell resistance of individual cells, the more functional/healthy the battery back. The resulting charging process 

is dynamic, whereby the charging current or cell resistances adjust/fluctuate according to changing circumstances.

6

Recovering deeply discharged lithium batteries

The charger detects cell voltages, if they are too small, in order to start normal charging. It starts recovery of the 

battery pack by charging with a very low charging current of 0.1 A. As soon as a voltage is reached that allows rapid 

charging, charging is continued with a higher charging current.

g)  

Inductive charging (wireless) and charging via USB

• 

Lay your mobile device on the charging pad (8) with its rear facing down. Position it on the centre of the anti-slip 

strip (4) to charge it. Charging starts when the charger is connected to the power supply.

• 

To charge a battery via USB, connect the USB cable to the USB port (2). Charging starts when the charger is 

connected to the power supply.

  You can use these two charging functions while using another charger function at the same time.

h)  Measuring the speed of a motor with controller

• 

Use the 

Motor

 connection (5) to connect a motor to test its speed under 

different conditions.

• 

Press and hold the rotary switch for the charging channel 2 (10) for approx. 

2 seconds to open the test menu for motor speed.

• 

The motor starts to run. The motor speed is shown on the LCD display (9). 

If necessary, change the speed setting on the motor controller and read off 

the change.

Содержание 2179496

Страница 1: ...Bedienungsanleitung LADEGERÄT V CHARGE 600 DUO Best Nr 2179496 Seite 2 16 Operating Instructions V CHARGE 600 DUO CHARGER Item No 2179496 Page 17 31 ...

Страница 2: ...tiken geeigneter Akkutypen 8 8 Bedienelemente 9 a Ladegerät 9 b LC Display 10 9 Inbetriebnahme 10 a Aufstellen 10 b Anschluss an die Stromversorgung 10 c Anschlüsse am Ladegerät 11 d Systemmenü Einstellungen 11 e Betriebsart und Parameter im Programm Menü einstellen 12 f Akkupacks laden bzw entladen 13 g Induktives Aufladen kabellos und Aufladen über USB 14 h Drehzahl eines Motors mit Regler messe...

Страница 3: ...hen Fragen wenden Sie sich bitte an Deutschland www conrad de Österreich www conrad at Schweiz www conrad ch 2 Symbol Erklärung Das Symbol mit dem Blitz im Dreieck wird verwendet wenn Gefahr für Ihre Gesundheit besteht z B durch einen elektrischen Schlag Das Symbol mit dem Ausrufezeichen im Dreieck weist auf wichtige Hinweise in dieser Bedienungsanlei tung hin die unbedingt zu beachten sind Das Pf...

Страница 4: ...ie Spannungs Stromversorgung des Ladegeräts kann wahlweise mit verschiedenen Wechselspannungen oder Gleichspannungen siehe im Kapitel Technische Daten erfolgen Ein mitgeliefertes Netzkabel dient zur Wechsel spannungsversorgung über das Stromnetz Sogar der Anschluss an einen Akku zur Stromversorgung bei Outdoor Aktivitäten in trockenen Umgebungen wird unterstützt Beachten Sie dazu die Hinweise im K...

Страница 5: ...s Produkt vor extremen Temperaturen direktem Sonnenlicht starken Erschütterungen hoher Feuchtigkeit Nässe brennbaren Gasen Dämpfen und Lösungsmitteln Setzen Sie das Produkt keiner mechanischen Beanspruchung aus Wenn kein sicherer Betrieb mehr möglich ist nehmen Sie das Produkt außer Betrieb und schützen Sie es vor unbeabsichtigter Verwendung Der sichere Betrieb ist nicht mehr gewährleistet wenn da...

Страница 6: ...ort von der Betriebsspannung Betreiben Sie das Ladegerät nicht mehr bringen Sie es in eine Fachwerkstatt Gelangen Flüssigkeiten auf das Ladegerät so schalten Sie die Netzsteckdose stromlos an der es an geschlossen ist Schalten Sie hierzu den zugehörigen Sicherungsautomaten ab bzw drehen Sie die Sicherung heraus Schalten Sie auch den zugehörigen FI Schutzschalter ab so dass die Netzsteckdose allpol...

Страница 7: ...htbenutzung z B Lagerung von der Stromversorgung ziehen Sie das Netzkabel aus der Netzsteckdose In Schulen Ausbildungsstätten Hobby und Selbsthilfewerkstätten muss der Umgang mit elektrischen Geräten durch geschultes Personal überwacht werden Beachten Sie in gewerblichen Einrichtungen die Unfallverhütungsvorschriften des Verbandes der ge werblichen Berufsgenossenschaften für elektrische Anlagen un...

Страница 8: ...von 5C erfordert demzufolge einen Ladestrom von ca 5 A Wenn Sie den C Koeffizienten eines Akkupack nicht ermitteln können nehmen Sie immer einen Koeffizienten von 1C an und berechnen den Ladestrom damit Dies stellt immer eine sicheren Ladestrom dar Bedenken Sie dabei jedoch dass die Ladezeiten je nach den tatsächlichen aber nicht verifizierten Akku Daten variieren können c Charakteristiken geeigne...

Страница 9: ...ss PC Link 4 Anti Rutsch Streifen 5 Anschluss Motor 6 Anschluss Servo 7 Entladeanschluss EXT DISC 8 Ladepad induktiv 9 LC Display 10 Drehschalter 1 2 11 Balancer Anschlüsse 1 2 12 Akkuanschlüsse 1 2 13 Temperaturfühleranschlüsse 1 2 für extern 14 Wechselspannungsanschluss AC INPUT 15 Spannungswahlschalter 16 Gleichspannungsanschluss 9 32 V DC ...

Страница 10: ...einer ordnungsgemäßen Netzsteckdose auf wenn Sie es mit Netzspannung betreiben wollen Für den Betrieb an einer Gleichspannung muss sich die Gleichspannungsquelle in der Nähe befinden Halten Sie das Ladegerät fern von brennbaren oder leicht entzündlichen Materialien z B Vorhänge b Anschluss an die Stromversorgung Stellen Sie die zum Betrieb des Ladegerätes zu verwendende Wechselspannung am Spannung...

Страница 11: ...nden Sie je einen externen Temperatursensor zur Akkutemperaturüberwachung nicht im Lieferumfang ent halten mit den Temperaturfu hleranschlu ssen 1 2 13 Am Anschluss Motor 5 können Sie einen Motor mit Regler für Drehzahlmessungen anschließen Am Anschluss Servo 6 können Sie einen Servo Motor zur Bestimmung Überprüfung seiner Drehwinkeleinstel lungen anschließen Am Entladeanschluss EXT DISC 7 kann ei...

Страница 12: ...s Stufen Sie können die Drehzahl eines Brushless Motors verändern Sie können die Puls weite einstellen Systeminformation In diesem Punkt können Sie sich die Firmware Version und weiter Informationen anzeigen lassen Werkseinstellungen Zurücksetzen auf die Werkseinstellungen Zurück Zurückkehren zum letzten Programm oder Menü e Betriebsart und Parameter im Programm Menü einstellen Nach dem Herstellen...

Страница 13: ...inzustellenden Menüpunkt zu wählen Stellen Sie den Akkutyp ein und drücken Sie zur Bestätigung kurz den Drehschalter Stellen Sie die Zellenanzahl ein und bestätigen Sie durch ein kurzes Drücken des Drehschalters 10 Stellen Sie die gewünschte Betriebsart Laden Entladen Lagern Entlader ein und bestätigen Sie durch ein kurzes Drücken des Drehschalters 10 Sie müssen ein Entladegerät anschließen wenn S...

Страница 14: ...rstand jeder Zelle im Akkupack Der innere Zell widerstand kann dazu verwendet werden die Funktionsfähigkeit und den Erhaltungszustand eines Akkupacks zu be stimmen Je gleicher die Zellwiderstände der einzelnen Zellen sind desto funktionsfähiger gesünder ist derAkkupack Der resultierende Ladeprozess ist dynamisch wobei der Ladestrom bzw die Zellwiderstände den sich ändernden Gegebenheit anpassen sc...

Страница 15: ...ge Sekunden das Testmenü für den Servo aufzurufen Drehen Sie den Drehschalter für den Ladekanal 2 10 um die Pulsweite zu verändern und gleichzeitig die Reaktion des Servo Arms des angeschlosse nen Servo Motors zu überprüfen Die Änderung der Pulsweite wird gleich zeitig grafisch im LC Display 9 dargestellt 10 Fehler und Fehlermeldungen Fehlermeldung Mögliche Ursache Vorschlag zur Behebung Meldung f...

Страница 16: ...ht in den Hausmüll Entsorgen Sie das Produkt am Ende seiner Lebensdauer gemäß den geltenden gesetzlichen Bestimmungen Sie erfüllen damit die gesetzlichen Verpflichtungen und leisten Ihren Beitrag zum Umweltschutz 13 Technische Daten Eingangsspannung strom 100 120 V AC oder 220 240 V AC 50 60Hz mit Spannungswahlschalter einstellbar Leistungsaufnahme max 460 W max 4 6 A Ladeleistung 300 W AC 2 x 300...

Страница 17: ...current 23 c Characteristics of suitable battery types 23 8 Product overview 24 a Charger 24 b LCD display 25 9 Setup 25 a Placement 25 b Connecting to the power supply 25 c Connections on the charger 26 d System menu settings 26 e Adjusting the operating mode and parameters in the program menu 27 f Charge or discharge battery pack 28 g Inductive charging wireless and charging via USB 29 h Measuri...

Страница 18: ...ny technical questions please contact International www conrad com contact United Kingdom www conrad electronic co uk contact 2 Explanation of symbols The symbol with the lightning in a triangle indicates that there is a risk to your health e g due to an electric shock The symbol with an exclamation mark in a triangle is used to highlight important information in these oper ating instructions Alwa...

Страница 19: ...tection at the output as well overheat protection are also integrated into the product The voltage power supply of the charger can also be used with various AC voltages or DC voltages see Technical data The power cable supplied can be used with mains AC voltage Connection to a battery as a power supply for outdoor activities in dry environments is also supported see the information in Section 9 Op...

Страница 20: ...peratures direct sunlight strong jolts high humidity moisture flammable gases vapours and solvents Do not place the product under any mechanical stress If it is no longer possible to operate the product safely stop using it and prevent unauthorised use Safe operation can no longer be guaranteed if the product is visibly damaged is no longer working properly has been stored for extended periods in ...

Страница 21: ...rrent device in order to disconnect all poles of the socket from the mains voltage Then unplug the charger from the mains socket Do not use the product any longer rather take it to a specialised work shop or dispose of it in an environmentally friendly manner Do not place the battery charger on valuable furniture without using suitable protection Otherwise there is a risk of scratches pressure poi...

Страница 22: ...ow the accident prevention regulations for electrical systems and equipment of the government safety organisation or the corresponding authority for your country 7 Information about charging parameters Rechargeable batteries consist of two electrodes that are placed into an electrolyte Batteries are therefore classed as a chemical element Chemical reactions take place inside this element These rea...

Страница 23: ...C requires a charging current of approx 5 A If you can t determine the C coefficients of a battery pack always take a coefficient of 1C and calculate the charging current using that This is always a safe charging current Please keep in mind however that the charging times can vary according to the actual but not verified battery data c Characteristics of suitable battery types Ni Cd Ni MH Pb Li Fe...

Страница 24: ...tion 4 Anti slip strip 5 Motor connection 6 Servo connection 7 EXT DISC discharge connection 8 Charging pad inductive 9 LCD display 10 Rotary switch 1 2 11 Balancer connections 1 2 12 Battery connections 1 2 13 Temperature sensor connections 1 2 for external 14 AC INPUT AC voltage connection 15 Voltage selector switch 16 9 32 V DC DC voltage connection ...

Страница 25: ...e close to a standard mains socket if you wish to use it with mains voltage To use the charger with DC voltage the DC source must be located nearby Keep the charger away from flammable or combustible materials e g curtains b Connecting to the power supply Set the AC voltage for operation of the charger using the selector switch 15 on the device 110 120 V AC Never use the charger with any other tha...

Страница 26: ... angle of rotation settings can be connected to the Servo connection 6 A discharge device can be connected to the EXT DISC discharge connection 7 for rapid discharging Discharge capacities of up to 200 W are possible The PC link connection 3 does not have a regular function in normal operation It is used to update the charger firmware when the manufacturer makes firmware updates available d System...

Страница 27: ... the operating mode and parameters in the program menu After establishing the power supply the LC display 9 switches to the home standby display Turn the rotary switch 1 10 for the charging channel to select a menu item and to scroll up or down The values are displayed on the LC display Confirm the setting by briefly pressing the rotary switch The cell voltage as well as the cell resistance can on...

Страница 28: ...switch 10 to confirm You must connect a discharge device when using the Discharger function Please see Section Discharg er with discharge device operating mode Set the requisite charging current and briefly press the rotary switch to confirm You can also change the charging current setting during the charging process Set the requisite charging voltage and briefly press the rotary switch to confirm...

Страница 29: ...hium batteries The charger detects cell voltages if they are too small in order to start normal charging It starts recovery of the battery pack by charging with a very low charging current of 0 1 A As soon as a voltage is reached that allows rapid charging charging is continued with a higher charging current g Inductive charging wireless and charging via USB Lay your mobile device on the charging ...

Страница 30: ... connection e g an error at the battery or balancer contact Connection error check connection Soiled contacts Ensure that the contacts are free of dirt and grease and not oxidised Message for fluctuating input voltage Input voltage unstable Soiled contacts The max input voltage is not set correctly Ensure that the contacts are free of dirt and not oxidised 11 Care and cleaning Never use aggressive...

Страница 31: ... AC 50 60Hz can be adjusted with voltage selector switch Power consumption max 460 W max 4 6 A Charging power 300 W AC 2x 300 W DC Charging voltage current max 26 1 V 0 1 16 A DC input voltage 9 32 V DC max 680 W Discharging power 8 W 200 W with external discharge device Suitable for Li Po Li HV Li ion Li Fe battery 1 6S Ni Cd Ni MH battery 1 16S Lead battery 1 12S Operating conditions 0 to 40 C 0...

Страница 32: ...blikation entspricht dem technischen Stand bei Drucklegung Copyright 2020 by Conrad Electronic SE This is a publication by Conrad Electronic SE Klaus Conrad Str 1 D 92240 Hirschau www conrad com All rights including translation reserved Reproduction by any method e g photocopy microfilming or the capture in electronic data processing systems require the prior written approval by the editor Reprint...

Отзывы: