background image

15.

2. DISPLAY UNIT

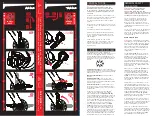
2.1 LEFT HANDLEBAR

Make sure to familiarize yourself with the controls.  Your left handlebar 
has the following controls:

1. Left Brake Lever - Use for engaging or disengaging the rear

brake.

2. Left Grip
3. Intensity Switch - By toggling between the two modes, you

can increase or decrease your headlight intensity.

4. Signal Switch - By sliding this switch to either side, you can

signal left or right, informing vehicles around you of where you
intend to turn.

5. Left Horn Switch

1

2

3

4

5

Содержание metro

Страница 1: ...metro Owner s Manual ...

Страница 2: ...2 PRINTSPEC EN_METRO 2013v1 2013 SCOOTERBAY CA INC Don t be a stranger Visit www facebook com voltbikes Chat with other riders and keep up to speed with VOLTBIKE events ...

Страница 3: ... de l équipement À des vitesses trop rapides pour son niveau de connais sance ou pour les conditions de la route ALWAYS Wear proper riding gear Avoid un paved surfaces as they may seriously affect handling and control TOUJOURS Porter des vêtements de conduite appropriés ainsi que des lunettes de sécurité Éviter les surfaces non pavées qui pourraient sérieuse ment affecter le contrôle du volant REA...

Страница 4: ...4 4 VOLTBIKE ...

Страница 5: ...as been altered structurally modified neglected improperly maintained or used for racing Improper or infrequent battery charging see battery section The warranty begins on the original date of purchase This warranty is not transferrable to another consumer All information contained within this publication is based on the lat est product information at the time of publication Due to constant improv...

Страница 6: ...LL BE ALLOWED UNLESS YOUR VOLTBIKE IS REGISTERED WITH VOLTBIKE AND THE UPC LABEL HAS BEEN PROVIDED The bicycle s serial number is located on the front steering column adjacent to the removable battery and under the plastic lid WARRANTY COVERAGE AND EXCLUSIONS VOLTBIKE limited warranty excludes any failures that are not caused by a defect in material or workmanship The warranty does not cover accid...

Страница 7: ...or a warranty claim You can also find a list of authorized VOLTBIKE service centers listed on the website www voltbike ca When requesting warranty service you must have your copy of the Warranty Registration form and the sales receipt for authorization YOUR VOLTBIKE METRO Instrument Panel Ignition Double Stand Battery Tailights Rear Wheel Lock Throttle Grip Charging Dock ...

Страница 8: ...nit Controls 2 1 Left Handlebar 2 2 Right Handlebar 2 3 Ignition 2 4 Display Unit 2 5 Wheels 2 6 Tires 2 7 Motor 2 8 Battery 2 9 Lighting 15 16 17 17 18 18 18 19 21 3 Inspection 3 1 Inpsection Before Riding 3 2 Inspection After Riding 23 25 4 Riding 4 1 Weather 4 2 Weather Conditions 4 3 Seasons 4 4 Road Conditions 25 25 26 26 4 5 Pedaling 4 6 Turning 4 7 Acceleration 4 8 Braking 4 9 Parking 27 27...

Страница 9: ...9 5 Maintenance 5 1 Battery Maintenance 5 2 Battery Recycling 5 3 Lubrication 5 4 Tires 5 5 Brakes 5 6 Storage 5 7 VOLTBIKE Cleaning 29 30 30 30 30 30 31 6 Specifications 32 7 Notes 33 ...

Страница 10: ...Operating your VOLTBIKE without proper instruction could be hazardous to the operator The risk of injury may increase greatly if you are not trained to operate the VOLTBIKE properly under different situations and weather conditions For information on e bike legislation in your area please visit www scooterbay ca Under the duration of provincial pilot programs all conventional bicycle legislation a...

Страница 11: ... surfaces Do not ride with clothing or extremities in close proximity to the drive chain or any moving parts Always use both brakes at the same time when stopping Never accelerate and have one or both brakes engaged at the same time This will damage the motor and drivetrain Do not remove any components as this will jeopardise your safety and the performance of your VOLTBIKE Never exceed speeds of ...

Страница 12: ... not operate the bicycle if tires are not within the recom mended pressures Take extra caution and follow installation instructions when modifying your VOLTBIKE with factory accessories Never exceed the stated load capacity for your VOLTBIKE Cargo should be evenly distributed and attached securely Reduce speed and follow the instructions in this manual for carrying cargo and make sure to allow lon...

Страница 13: ...uctions of the decals and other warnings on the VOLTBIKE carefully If any of the decals shown in this manual differ from the decals on your VOLTBIKE always read and follow the instructions of the decals on the bicycle If any decal becomes illegible or comes off contact VOLTBIKE for a replacement THIS BATTERY IS RECYCLABLE Please visit www scooterbay ca for service centers ...

Страница 14: ...approved bicycle helmet can help prevent a serious head injury Goggles are also an important safety compnent of your safety gear When travelling on your VOLTBIKE insects and airborne debris may become a serious hazard and hitting them may result in eye injury Your goggles will protect you from eye injury ...

Страница 15: ...rake Lever Use for engaging or disengaging the rear brake 2 Left Grip 3 Intensity Switch By toggling between the two modes you can increase or decrease your headlight intensity 4 Signal Switch By sliding this switch to either side you can signal left or right informing vehicles around you of where you intend to turn 5 Left Horn Switch 1 2 3 4 5 ...

Страница 16: ...e front brake Apply the rear brake by squeezing the lever towards the grip Release the lever to disengage the brake 2 Right Grip The throttle grip Twisting the throttle grip towards you will speed up the VOLTBIKE Twisting it away from you will slow the VOLTBIKE down 3 Headlight Switch Slide the switch all the way to the left to switch on both the instrument panel light and the headlight 6 7 8 ...

Страница 17: ...ey to the ON position 2 4 DISPLAY UNIT Be careful when reviewing indicators speed and battery gauges as you must always keep your eyes on the road Make sure to study your controls before riding The battery meter indicated your current battery charge H being high and L being low The left light will flash yellow once you decide to signal a left turn The right light will flash yellow once you decide ...

Страница 18: ...surfaces The tires on your VOLTBIKE run on air tubes which ensure maximum protection against sharp debris on the road Keep your tires inflated to 28 34PSI When treads become worn replace your tires with VOLTBIKE approved tires 2 7 MOTOR Your VOLTBIKE runs on a DC 500W 48V brushless motor It is located in the rear wheel hub and is designed for quick and quiet acceleration and resistance free operat...

Страница 19: ...mical structure of the battery it must be handled with caution and care Make sure to follow the directions listed in this manual WARNING This product contains lead and lead compounds chemicals known to cause harm to your health Make sure to wash hands after handling 2 8 1 BATTERY WARNINGS WARNING In case of eye contact with any battery chemicals rinse with water for at least 15 minutes and get med...

Страница 20: ...nput is the connector that looks similar to most home appliance connectors The input plug must be connected to the wall outlet when charging and the rectangular output connects to the VOLTBIKE CAUTION Using a charger or battery that is not certified for use with your VOLTBIKE may result in personal injury or permanent damage to your bicycle See your VOLTBIKE dealer for placement information 2 8 3 ...

Страница 21: ...rge your battery after every use as per the procedure outlined above and do not allow it to fully discharge as this may permanently damage the battery Avoid frequently removing the battery for charg ing as unnecessary movement may damage the electrical connections or agitate the chemicals inside 2 9 LIGHTING Your VOLTBIKE is equipped with front and rear lights in order to ensure your visibility to...

Страница 22: ...d it will click back into its initial position 2 9 2 HEADLIGHTS To turn your headlights on simply slide the headlight switch to the appropriate position as seen in the diagram below The back light for your instrument panel will turn on automatically 2 9 3 HIGH LOW BEAMS To toggle between the high and low beams push the switch to the ap propriate positions as seen in the diagram below Left Right Al...

Страница 23: ...TBIKE before operating increases the risk of an accident or equipment damage Always inspect your VOLTBIKE each time before riding and make sure it is in a safe operating condition When performing an inspection follow the steps below and they will help you to perform an efficient and correct inspection that will ensure you a safe and prolonged life for your VOLTBIKE 3 1 INSPECTION BEFORE RIDING BRA...

Страница 24: ...our VOLTBIKE is loud and must not be tested indoors as this may cause hearing damage LIGHTS Check the headlights by turning them on and off THROTTLE Check the throttle response by turning your VOLTBIKE off and twisting the right grip back and forth Make sure that the grip rotates back to its original position easily CHAIN Check the chain tension by applying pressure on the chain with your finger T...

Страница 25: ...ed below to ensure you a safe ride on your electric bicycle 4 1 WEATHER Operating your VOLTBIKE in wet weather conditions may pose a substantial risk and is not recommended Try to limit your use when rain and other precipitation is expected Stay informed about the weather forecast in your area and plan your use accordingly 4 2 WEATHER CONDITIONS Your VOLTBIKE is designed to operate in weather rang...

Страница 26: ...nough grip to handle well on tarmac covered with light gravel CAUTION Tarmac roads covered with heavy gravel or entirely consisting of gravel must not be ridden on Doing so will put your safety and your VOLTBIKE at risk CAUTION Your VOLTBIKE must not be operated on snow or winter salt covered roads Salt and frigid temperatures are harmful to the circuits inside of your VOLTBIKE and must be avoided...

Страница 27: ...hill When climbing a steep slope always pedal with the assistance of a motor WARNING Travelling too slow up the hill will cause loss of balance which may result in serious injury 4 5 PEDALING Your VOLTBIKE is equipped with folding pedals In case of a battery motor failure pedals can be used as an alternative method of power When standing still use the pedals to start moving the VOLTBIKE forward an...

Страница 28: ... cause serious injuries 4 8 BRAKING Your VOLTBIKE is equipped with drum brakes at both rear and front When braking gradually squeeze the right lever until the bicycle comes to a complete stop The right lever engages the front brake which is proven to be more efficient than rear brake in most situations Squeez ing the left lever will engage the rear brakes Using the rear brake in conjunction with t...

Страница 29: ...our VOLTBIKE when it is parked with the double stand deployed as this may permanently damage the kick stand mechanism 5 MAINTENANCE Maintaining your VOLTBIKE requires commitment and a schedule that must include visits to your local dealers CAUTION Failure to properly inspect and maintain your VOLTBIKE will result in faster degradation and wear of parts as well as unpredictable behaviour which may ...

Страница 30: ...ires every couple of weeks for any signs of wear Replace the tires at your local service center if no tread is visible 5 5 BRAKES Brake maintenance must be performed biweekly To tighten a loose break unscrew the bold located at the end of the lever and tighten it by screwing the nut into the opposite direction Make sure to not over tighten the brakes as this will overheat and damage the motor 5 6 ...

Страница 31: ...de of hard plastic which may crack under heavy loads 2 Store your battery in a dry warm place away from heat mois ture and fire 3 Make sure to charge the battery after every use Improper storage will result in damage to your VOLTBIKE and may shorten the life span of crucial components 5 7 VOLTBIKE CLEANING Your VOLTBIKE bicycle contains many electrical components There fore pressure washing your V...

Страница 32: ...acity 125Kg Constant Driving Distance 60 70km Max Climbing Ability 16 degrees Charging TIme 8 10 hours Maximum Speed 0 30km h Acceleration Minimum Operating Temperature Maximum Operating Temperature 27km h 4 12 seconds 10 F 14 F 40 F 104 F For full specifications please visit www voltbike ca ...

Страница 33: ...33 7 NOTES ...

Страница 34: ...34 34 ...

Страница 35: ...35 ...

Страница 36: ...36 36 ...

Страница 37: ...37 ...

Отзывы: