background image

74 


4.


Специальные инструкции по безопасности


4.1


Специальные инструкции по безопасности для электрического устройства для подвязки лозы


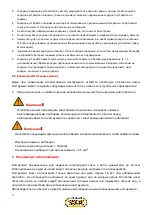
Не  снимайте  переднюю  крышку  во  время  работы  с  инструментом.  Во  время  работы  все  части  тела 
должны  находиться  на  расстоянии  не  менее  5  см  от  зоны  подвязки.  Во  время  использования 
устройства для подвязки любая небрежность может привести к травмам.


Закончив  подвязку,  крепко  держите  устройство  во  время  отсоединения,  осторожное  использование 
устройства для подвязки защищает оператора и продлевает срок службы устройства. 


4.2


Прочие инструкции по безопасности


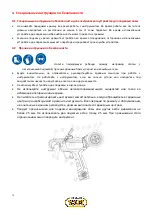
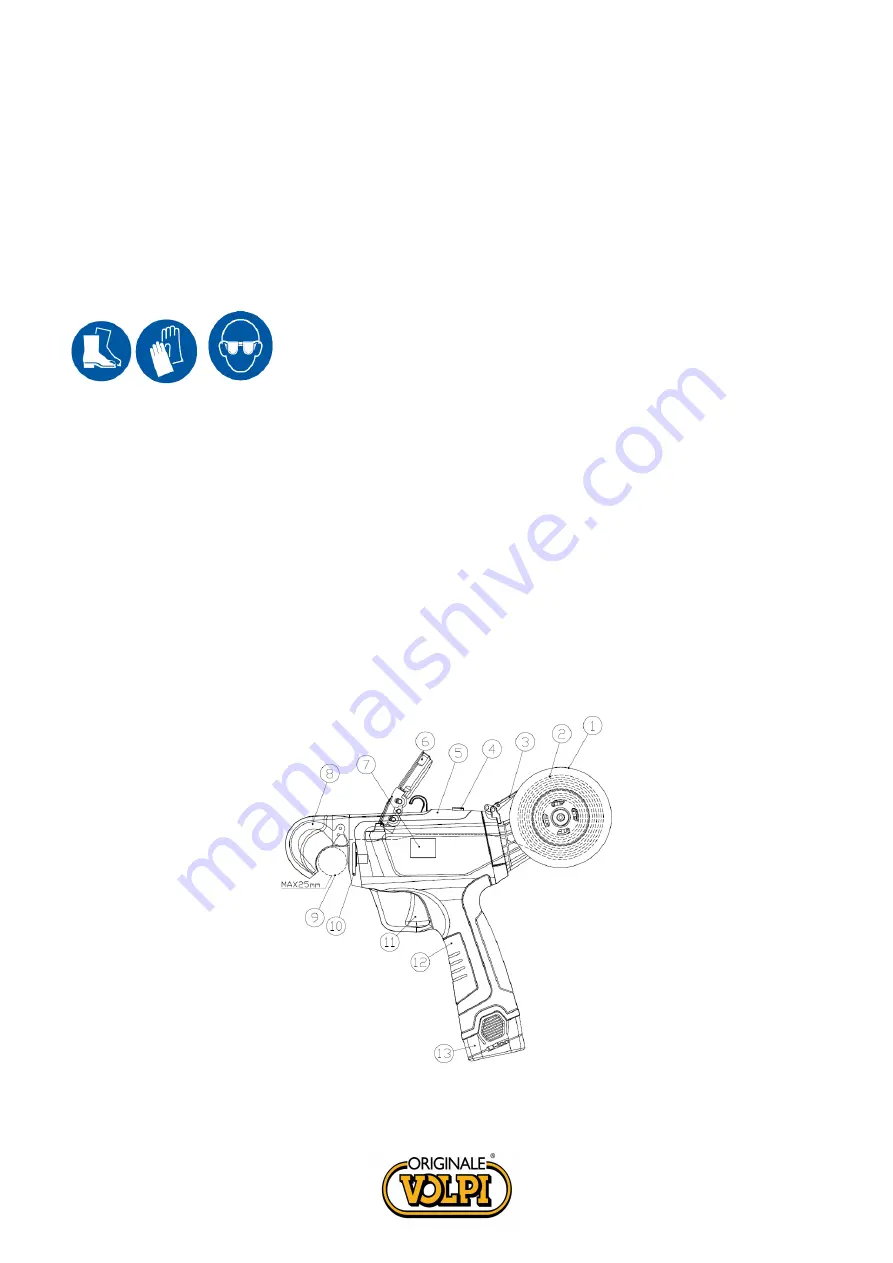
Носите  подходящую  рабочую  одежду,  например,  сапоги  с 

нескользящей подошвой, прочные длинные брюки, перчатки и защитные очки.


Будьте  внимательны,  не  отвлекайтесь,  руководствуйтесь  здравым  смыслом  при  работе  с 
инструментом.  Не  работайте  с  инструментом,  если  вы  сильно  устали  или  находитесь  под 
воздействием лекарств, наркотиков, алкоголя или других веществ. 


Не используйте устройство для подвязки в случае дождя.


Не  используйте  инструмент  вблизи  легковоспламеняющихся  жидкостей  или  газов  во 

избежание возгорания или взрыва.


Не пытайтесь отремонтировать инструмент самостоятельно, всегда обращайтесь в сервисные 

центры при необходимости ремонта инструмента. Все операции по ремонту и обслуживанию, 
не описанные в данном руководстве, должны выполняться сервисным центром.


Продукт  предназначен  для  подвязки  виноградной  лозы  или  других  веток  диаметром  не 
более  25  мм.  Не  использовать  для  подвязки  веток  толще  25  мм.  При  превышении  этого 
ограничения можно повредить инструмент.


Содержание Kamikaze KV4

Страница 1: ...onic Tying Machine Elektronische Bindemaschine Электрическое обвязывающее устройство Atadora eléctrica Attacheur électronique KV4 Manuale d uso User s Manual Handbuch Руководство пользователя Manual del usuario Manuel d utilisateur ...

Страница 2: ...LE ILLUSTRAZIONI PRIMA DI UTILIZZARE L UTENSILE PERLA PRIMA VOLTA Indice 1 Informazioni di sicurezza 3 2 Simboli di sicurezza 3 3 Informazioni generali di sicurezza per utensili elettrici 4 4 Istruzioni speciali di sicurezza 6 5 Destinazione d uso 9 6 Descrizione della funzione 9 7 Panoramica dello strumento 12 8 Specifiche tecniche 12 9 Lista componenti 13 10 Ricarica della batteria 13 11 Ambient...

Страница 3: ...no sempre disponibili 2 Simboli di sicurezza Questa sezione include le indicazioni di sicurezza per l utilizzo di questa macchina 2 1 Simboli presenti nel manuale Simbolo di pericolo Rischio di sezionamento o ferimento grave Superficie calda Simbolo di istruzioni Leggere attentamente il manuale di istruzioni Indossare guanti protettivi Indossare occhiali protettivi Indossare scarpe protettive con ...

Страница 4: ...nsili a batteria 3 1 Sicurezza della zona di lavoro Mantenere la zona di lavoro pulita e ben illuminata Zone di lavoro disordinate e scure possono causare incidenti Non utilizzare l utensile elettrico in atmosfere infiammabili o esplosive come in presenza di liquidi gas o polveri infiammabili L utensile elettrico può generare scintille in grado di innescare polveri o fumi infiammabili Mantenere ba...

Страница 5: ...re incidenti e lesioni Una corretta manutenzione dell utensile può ridurre il rischio di incidenti Leggere il manuale prima di utilizzare l utensile selezionare correttamente l utensile e gli accessori per evitare incidenti 3 4 Avvertimenti per l utilizzo di utensili a batteria Assicurarsi che l interruttore e il foro di inserimento della batteria siano in perfetto stato di funzionamento prima di ...

Страница 6: ...nali Al termine della legatura tenere saldamente la legatralci durante il movimento di distacco un uso prudente della lega tralci protegge l operatore e allunga la vita utile della legatralci 4 2 Altre istruzioni di sicurezza Indossare indumenti da lavoro adatti come stivali con suola antiscivolo pantaloni lunghi robusti guanti e occhiali protettivi Mantenere l attenzione non distrarsi utilizzare ...

Страница 7: ... legatura e sovraccaricare l utensile La garanzia non copre i danni causati dalla mancata manutenzione secondo quanto riportato in questo manuale Non cercare di riparare l utensile da sé portare sempre l utensile nei centri assistenza in caso di necessità di riparazioni Tutte le operazioni di riparazione e manutenzione non descritte all interno di questo manuale devono essere effettuate dal centro...

Страница 8: ...erie dalla presa non tirare i cavi e non lasciare il caricabatterie collegato una volta completata la carica Mantenere il caricabatterie pulito lontano da ambienti umidi e dalla pioggia Non utilizzare il caricabatterie all esterno sporco e acqua possono causare danni al caricabatterie e lesioni personali Il caricabatterie è progettato per l utilizzo con le batterie originali altrimenti può causare...

Страница 9: ... terzi o proprietà altrui causato da incidenti durante l utilizzo dell utensile Il produttore non è responsabile per i danni causati da un uso improprio dell utensile 6 Descrizione della funzione La legatralci è dotata di una struttura compatta leggera velocità elevata e facilmente utilizzabile con una mano sola Il prodotto combina caratteristiche di sicurezza efficienza e semplicità di utilizzo P...

Страница 10: ... Cod Display Descrizione Display 1 Simbolo batteria Indica solo che la sezione 2 corrisponde al livello di carica della batteria 2 Livello di carica della batteria Batteria al 100 Batteria al 75 Batteria al 50 Batteria al 25 Batteria al 10 3 Indicatore errori 0 Significa normale Non ci sono 2 e 8 Software danneggiato 1 Circuito danneggiato 3 Ingranaggio bloccato 4 Sottotensione 5 Sovratensione 6 M...

Страница 11: ...ndere la macchina Premere per 3 secondi per spegnere la macchina Premere due volte in sequenza per accedere alla definizione del numero di giri Premere i pulsanti sinistro e destro per aumentare o diminuire il numero di giri quindi premere il pulsante centrale per confermare Macchina spenta 9 Macchina inutilizzata per 30 secondi Modalità standby premere il grilletto per riattivare 10 Spegnimento a...

Страница 12: ... di legatura 11 Grilletto 12 Impugnatura 13 Batteria 14 Carica batterie 8 Specifiche tecniche Specifiche tecniche Legatralci elettronica 1 Diametro Massimo legatura 25mm 2 Tensione nominale 14 4 V 3 Potenza nominale 28 W 4 Corrente nominale 2 0 A 5 Protezione corrente 3A 6 Classe di isolamento II 7 Peso a vuoto 0 78 Kg Batteria al Li Ioni 1 Capacità 2 5Ah 2 Tensione massima 16 8V Tensione nominale...

Страница 13: ...are la batteria dalla legatralci prima di caricarla Assicurarsi che la batteria sia asciutta e pulita prima di cominciare la ricarica Assicurarsi che la batteria sia completamente carica prima di utilizzarla la prima volta La batteria non è completamente carica all acquisto ricaricarla per 3 4 ore prima di utilizzarla per la prima volta Ricaricare la batteria quando l indicatore sul display della ...

Страница 14: ...a Monitorare il tempo di ricarica tramite l indicatore LED luce rossa in carica luce verde fine carica Scollegare i connettori del carica batterie dalle batterie al termine della ricarica Assicurarsi che la batteria venga ricaricata almeno ogni 3 mesi nei periodi di inutilizzo Non riporre la macchina con la bateria collegata 11 Ambiente di lavoro Mantenere la temperatura dell ambiente tra 0 C e 45...

Страница 15: ...ne di uscita del filo stesso 5 Premere il coperchio e ruotarlo nella direzione della freccia 6 Chiudere la leva pressa filo 7 Inserire l estremità del filo nel foro di alimentazione dalla macchina 8 Con le pinzette rimuovere i due fili esterni alla bobina La freccia indica la corretta uscita del filo ...

Страница 16: ... utilizzare bobine di questo tipo è necessario consultare il servizio tecnico o il proprio punto vendita Danni all utensile dovuti all utilizzo di bobine di filo diverse da quelle fornite ed indicate dal produttore non sono coperti dalla garanzia 11 Procedura di lavoro Indossare guanti e vestiti adatti durante l utilizzo di questo utensile L utensile si deve fermare quando il grilletto viene rilas...

Страница 17: ... non può essere ritratto e la legatralci si blocca sul ramo In questo caso spegnere la macchina e spostare il gancio a mano per liberare la lega tralci 10 1 Procedura di legatura Quando l utensile è in funzione tenere la mano che non sorregge l utensile ad una distanza minima di 5 cm dall utensile Non mettere la mano nell apertura di legatura Non utilizzare l attrezzatura su rami con diametro magg...

Страница 18: ...razioni non menzionate in questo manuale devono essere eseguite esclusivamente dal centro assistenza Per assicurare il sicuro funzionamento dell utensile utilizzare solo ricambi originali 11 Attenzione E necessario interrompere il lavoro quando il filo residuo ha una lunghezza di circa 20 cm Rimuovere il filo residuo ed inserire il nuovo filo come visibile sotto Se non viene estratto il filo resid...

Страница 19: ...rima Non spruzzare acqua né immergere l utensile in acqua l utensile verrebbe danneggiato Mantenere l utensile pulito ed eventuali prese di ventilazione libere L utensile deve essere pulito con un panno o una spazzola Non utilizzare detergenti potrebbero danneggiare l utensile in modo permanente Al termine di ogni bobina di filo pulire il condotto di alimentazione del filo con le pinzette e con un...

Страница 20: ...lizzare un pennello per pulire i corpi estranei nel binario come mostrato nella figura 5 Utilizzare un pennello per eliminare i corpi estranei nell area di rilegatura anteriore come mostrato nella figura 6 Dopo il completamento della pulizia lubrificare con olio lubrificante normale olio bianco o olio per macchine sulla taglierina e su ciascun giunto mobile come mostrato nella figura ...

Страница 21: ...nsile smaltire separatamente batteria utensile accessori e imballo a seconda del tipo di materiale Non dismettere l utensile con i rifiuti domestici Portare l utensile ad un centro di raccolta rifiuti Le parti in metallo e in plastica possono essere riciclate Per informazioni dettagliate contattare il centro assistenza Non dismettere la batteria tra i rifiuti domestici non bruciare non immergere i...

Страница 22: ...frequenza richiesta Utilizzo di filo non approvato dal produttore Rottura di parti interne o esterne dovute all uso di attrezzi non idonei per sbloccare il filo Sono esclusi dalla garanzia i componenti soggetti ad usura durante il normale uso es coltello taglia filo e ruota di legatura La garanzia è valida solo per i prodotti che sono stati registrati tramite il sito web entro 30 giorni dalla data...

Страница 23: ...eo e residui di filo dal condotto di alimentazione filo Mancata alimentazione del filo o fine della bobina 1 Verificare che il filo non sia bloccato nel condotto di alimentazione 2 Rimuovere eventuale materiale estraneo o residui di filo dal condotto di alimentazione Legatura scorretta dovuta al bloccaggio tra i rami L operazione potrebbe essere condotta troppo velocemente Attendere il termine del...

Страница 24: ...nsione Riferimento alle pertinenti norme armonizzate utilizzate o riferimenti alle altre specifiche tecniche in relazione alle quali è dichiarata la conformità UNI EN ISO 12100 2010 EN 60745 1 2009 EN 55014 1 2006 A1 2009 A2 2011 EN 60335 1 2012 EN 55014 2 2015 EN 60335 2 29 2012 EN 61000 3 2 2014 EN 62233 2008 EN 61000 3 3 2013 EN 62133 2013 Persona autorizzata a costituire la documentazione tecn...

Страница 25: ...ry 36 13 Operating procedure 38 14 Warning 40 15 Cleaning and maintenance 41 16 Storage 43 17 Waste disposal and environmental protection 43 18 Spare parts 43 19 Warranty 44 20 Trouble shooting and repair 45 21 Declaration of conformity 46 1 Note of Safety Before first using the machine please read this instruction manual carefully for your own safety and for the safety of others Keep the manual i...

Страница 26: ...protective shoes with non slip soles Do not use the tying machine in the rain or wet hedge or branch Do not place with domestic waste 2 2 Symbols on Battery Li on battery Don t dispose with household waste Don t dispose the battery in fire where it will explode Don t disassemble the battery The battery can be recharged and recycled Discarded batteries should be recycled in an environmentally frien...

Страница 27: ...tions can cause you to lose control of power tool 3 2 Electrical safety Power tool plug must match the outlet Never modify the plug in anyway Do not use any adapter plugs with earthed grounded power tools Unmodified plugs and matching outlets will reduce risk of electrical shock Do not use non approved AC adapters or plugs Avoid body contact with earthed or grounded surfaces such as pipes radiator...

Страница 28: ...Liquid of battery will canker or burn 3 5 Personal safety Keep alert watch what you are doing and use common sense while shifting the power tool Do not operate the power tool when you are tired or under the influence of drugs alcohol or medication A moment of inattention when operating the power tool may cause serious personal injury Use personal protective equipment Always wear goggles Safety equ...

Страница 29: ...ol your self bring the tool to our Service Center in case of need All works which are not described in this manual may only be performed by our Service Centre The product is designed to tie grape vines and other branches within the effective range of 25mm maximum diameter Don t use it in all kinds of tying work exceeding the range of 25mm maximum diameter The excess of this range would damage the ...

Страница 30: ... in the handle 12 The battery 13 must be recharged at least every 3 months to avoid damaging it The warranty does not cover damage caused by failure to comply with the recharge frequency 4 4 Use charger correctly Use the charger only with rechargeable battery If not it can cause fire or explode Use original charger to keep safety Always check charger wire and plug before use If damaged please move...

Страница 31: ...be used by minors over 16 years of age under the supervision of adults Do not use the tool in the rain or on wet hedges The operator or the user shall assume full responsibility for the harm to others or any property damage to others caused by any accident occurs during the use The manufacturer shall not be liable for any damage caused by not normal or improper use 6 Function description The tying...

Страница 32: ...ent will be damaged Equipment damage caused by reverse installation direction twist knot and jamming is not covered by the warranty 6 1 Display Display and instructions Code Display Description Display 1 Battery symbol Battery symbol 2 Battery charge level 100 battery 75 battery 50 battery 25 battery 10 battery 3 Faults indicator 0 means normal There are no 2 and 8 Damaged software 1 Damaged circu...

Страница 33: ...ff and confirmatio switch Press for 3 seconds to turn on the tool Press for 3 seconds to turn off the tool Press 2 times consequently to turn on the display of the twist number Press the left and right switch to increase or decrease the twist number then press the central switch to confirm it Tool shut down 9 No operations for 30 seconds Standby mode hold the trigger to re activate it 10 Auto powe...

Страница 34: ...ation Electric tying machine 1 Max tying diameter 25mm 2 Rated voltage 14 4 V 3 Rated power 25 W 4 Rated current 2 0 A 5 Current protection 3 A 6 Protection class II 7 Weight 0 78 Kg Battery lithium 1 Capacity 2 5Ah 2 Max Voltage 16 8V 3 Nominal voltage 14 4V 4 Running hours 20 000 ligatures 10 000 per battery 5 Weight battery 0 25 kg Charger 1 Rated voltage 100 240V AC 50 60Hz 2 Output voltage DC...

Страница 35: ...arge at temperature of 10 C 22 C indoor The three way battery charger allows you to recharge the 2 batteries supplied at the same time Make sure specifications on battery and adapter matched before charging The red LED light on the charger indicates the battery is charging the green LED light indicates it is fully charged The approximate charging time is 3 to 4 hours charging time for 2 fully disc...

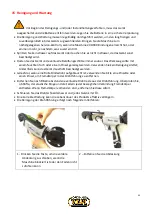
Страница 36: ...e previously charged battery from the case and insert it in the appropriate seat of the tying machine See the following figures 1 Open the thread press lever 2 Press the cover down and rotate it in the direction of the arrow remove the cover 3 Remove the cover 4 Insert the coil of thread paying attention to the direction of the thread coming out ...

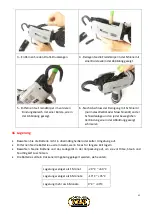
Страница 37: ...hole of the machine 8 With the tweezers remove the two threads outside the coil 9 Pay attention to the direction of the thread which must NOT have knots distortions or wrap around of any kind 10 After positioning the thread turn on the power switch and pull the trigger Make sure that the thread is correctly positioned into the machine ...

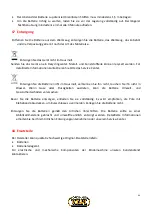
Страница 38: ...n tying branches please switch off the machine before removing the foreign matter Switch on the machine the tying machine is in working state start working after pulling trigger To save electric quantity and ensure that the tying machine has the longest service life don t overload the machine don t use it to tie branches exceeding 25mm In the process of tying if the tying is not successful please ...

Страница 39: ...daily usage it is suggested to disconnect the battery to the machine and place them together in the toolbox According to the size of actual branches to be tied adjust gear switch with the buttons place on the tying machine so as to achieve the best branch tying effect Place the hook in the correct position according to the picture you should always put the branch attached to the outer end of the h...

Страница 40: ...n be used 14 Warning It is necessary to stop working when the residual thread has a length of about 20 cm Remove the remaining thread and insert the new thread as shown below If the residual thread is not removed there is a risk of locking and jamming 1 Open the front cover and remove the pressing plate 2 Remove the remaining thread with the tweezers ...

Страница 41: ...er and equipment handle clean It shall be cleaned with a wet cloth or a hair brush Don t use any cleaning agent otherwise it may cause permanent damage to the equipment Each time after one roll of tying wire is used up please use tweezers or a brush to clear up foreign matters in wire track After continuing working for 8 hours use tweezers or a brush to clear up foreign materials in the wire track...

Страница 42: ... plate 4 Use a brush to clean the foreign objects in the rail as shown in the figure 5 Use a brush to remove foreign objects in the front binding area as shown in the figure 6 After the cleaning process is complete lubricate with lubricating oil ordinary white oil or machine oil on the cutter and each movable joint as shown in the figure ...

Страница 43: ...rt of household waste Send the equipment to a recycling center The metal and plastic in the equipment can be recycled after be screened For detailed information please contact the Service Center Do not discard the battery in household waste fire danger of explosion or water In case of the leakage of toxic gas or liquid damaged battery may cause potential environmental and personal health risk Befo...

Страница 44: ...proved by the producer Components subjected to wear such as the cutter or tying mouth during normal operation are not covered by the warranty The warranty is valid only for products that have been registered through the website within 30 days from the purchase date For more information you can write to info volpioriginale it Activate the warranty for your new tool through our website http www volp...

Страница 45: ...ters and unsuccessfully tied tying wire Incorrect or missing wire feeding 1 Check if the tying wire is stuck in feeding tray if it is stuck conduct cleaning timely 2 Check if there are any residual tying wires or other foreign matters in the whole feeding track and conduct cleaning timely Tying is easily stuck by branches 1 Operation may be too fast please adjust operation speed Only after confirm...

Страница 46: ...014 35 UE Low Voltage Directive Reference to the relevant harmonized standards used or references to other technical specifications for which conformity is declared UNI EN ISO 12100 2010 EN 60745 1 2009 EN 55014 1 2006 A1 2009 A2 2011 EN 60335 1 2012 EN 55014 2 2015 EN 60335 2 29 2012 EN 61000 3 2 2014 EN 62233 2008 EN 61000 3 3 2013 EN 62133 2013 Authorized person to set up the technical document...

Страница 47: ...ifikationen 56 9 Komponentenliste 57 10 Aufladen der Batterie 57 11 Arbeitsumgebung 58 12 Anfänglich Montage 58 13 Arbeitsvorgang 61 14 Achtung 62 15 Reinigung und Wartung 64 16 Lagerung 65 17 Entsorgung 66 18 Ersatzteile 66 19 Garantie 67 20 Problemlösung 68 21 Konformitätserklärung 69 1 Sicherheitshinweise Lesen Sie vor der ersten Verwendung der Maschine diese Betriebsanleitung zu Ihrer eigenen ...

Страница 48: ... Gerät nicht bei Regen oder auf nassen Zweigen Nicht in den Hausmüll werfen 2 2 Symbole auf der Batterie Lithium Ionen Batterie nicht in den Hausmüll werfen Setzen Sie die Batterie keinen Flammen aus sie kann explodieren Zerlegen Sie die Batterie nicht Die Batterie kann wieder aufgeladen und recycelt werden Ausrangierte Batterien sollten umweltfreundlich recycelt werden 2 3 Symbole auf dem Ladeger...

Страница 49: ...ht zugelassene Stecker Vermeiden Sie den Körperkontakt mit geerdeten Oberflächen wie Rohren Heizkörpern und Kühlern Es besteht ein erhöhtes Risiko eines Stromschlags wenn der Körper mit Gegenständen in Berührung kommt die zur Erde entladen Setzen Sie das Gerät keinen Regen oder Nässeeinflüssen aus Wenn Wasser in das Ladegerät oder das Gerät eindringt besteht die Gefahr eines Stromschlags Beschädig...

Страница 50: ...nfluss von Drogen Alkohol oder Medikamenten stehen Ein Moment der Unachtsamkeit bei der Bedienung des Elektrowerkzeugs kann zu schweren Verletzungen führen Geeignete persönliche Schutzausrüstung tragen Tragen Sie immer eine Schutzbrille und Ausrüstung wie Staubmasken rutschfesteSicherheitsschuhe Helme Gehörschutz usw umdasRisikovonPersonenschädenzuverringern Vermeiden Sie einen versehentlichen Sta...

Страница 51: ...Das Produkt wurde entwickelt um Weinreben und andere Zweige mit einem maximalen Durchmesser von 25 mm zu binden Verwenden Sie das Gerät nicht zum Binden von Zweigen mit einer Dicke über 25 mm Ein Überschreiten dieser Stärke würde die Bindevorrichtung beschädigen Versuchen Sie nicht den eventuell festsitzenden Zuführhaken 8 oder den Draht 2 zu entfernen bevor Sie die Bindemaschine ausgeschaltet hab...

Страница 52: ... Laden muss die Batterie komplett abkühlen Zerlegen Sie die Batterie nicht beschädigen Sie die Batterie nicht um Verletzungen zu vermeiden Lagern Sie die Maschine nicht mit der Batterie 13 im Griff 12 eingesetzt Die Batterie 13 muss mindestens alle 3 Monate aufgeladen werden um eine Beschädigung zu vermeiden Die Garantie deckt keine Schäden ab die durch Nichteinhaltung der Aufladefrequenz verursac...

Страница 53: ...kann elektromagnetische Wellen erzeugen und medizinische elektrische Geräte stören Wenn Sie eine medizinische Vorrichtung tragen Herzschrittmacher usw müssen Sie vor der Verwendung des Elektrowerkzeugs eventuelle negative Auswirkungen mit Ihrem Arzt abklären Achtung Berühren Sie während der Verwendung nicht den Zuführhaken oder das Binderad um Verletzungen zu vermeiden Geräusch und Vibrationsmessu...

Страница 54: ...Position 5 Bindering 4 Umdrehungen Position 6 Bindering 5 Umdrehungen Position 7 Bindering 6 Umdrehungen Position 8 Bindering 7 Umdrehungen Überprüfen Sie vor der Verwendung ob der Draht die richtige Richtung innerhalb der Zuführschiene hat der Draht darf nicht aufgerollt verknotet oder festgeklemmt sein Wenn der Draht falsch installiert ist oder wenn der Draht verdreht geknotet oder verklemmt ist...

Страница 55: ...gen Gibt die Anzahl der Umdrehungen für jede Bindung an von 3 bis 8 5 Anzahl der Bindungen Gibt die Gesamtzahl der Bindungen an von 1 bis 99999 Tasten Anweisungen 6 7 Linke Taste Rechte Taste Die linke oder rechte Taste drücken Fehler Anzahl der Umdrehungen Anzahl der Bindungen 8 Taste zum Einschalten und Bestätigen 3 Sekunden lang drücken um das Gerät einzuschalten 3 Sekunden lang drücken um das ...

Страница 56: ...et es sich automatisch aus 7 Übersicht über das Gerät 1 Drahtbehälter für Spule von 90 Meter 2 Draht für die Bindung Spule von 90 Meter 3 Draht Druckhebel 4 Öffnungstaste 5 Vordere Abdeckung 6 Draht Druckwagen 7 Display 8 Drahtzufuhrhaken 9 Arbeitsposition 10 Binderad 11 Abzug 12 Griff 13 Batterie 14 Batterieladegerät 8 Technische Spezifikationen Technische Spezifikationen Elektronische Bindemasch...

Страница 57: ...onsklasse II 5 Ladezeit 3 4 h 9 Komponentenliste Öffnen Sie das Paket sorgfältig und prüfen Sie ob folgende Teile vorhanden sind Bindemaschine 2 Drahtspulen pro Bindung 2 Batterien 3 Wege Ladegerät Gürteltasche Werkzeugkasten Pinzette Schere Benutzerhandbuch Garantiezertifikat 10 Aufladen der Batterie Setzen Sie die Batterie niemals extremen Bedingungen wie hohen Temperaturen oder Stößen aus Das A...

Страница 58: ...bgeschlossen ist Die ungefähre Ladezeit beträgt 3 bis 4 Stunden Ladezeit für 2 vollständig entladene Batterien gleichzeitig die Batterien nicht länger als erforderlich angeschlossen lassen da sie beschädigt werden können Das Ladegerät hat drei Ausgänge kann also bis zu 3 Batterien gleichzeitig laden 2 1 zusätzlich oder optional Die Ladezeit ist proportional zur Anzahl der Batterien und zum Status ...

Страница 59: ...nd drehen Sie sie in Pfeilrichtung um die Abdeckung zu entfernen 3 Entfernen Sie die Abdeckung 4 Führen Sie die Drahtspule unter Beachtung der Richtung des Drahtausgangs ein 5 Drücken Sie auf die Abdeckung und drehen Sie sie in Pfeilrichtung 6 Den Draht Druckhebel schließen ...

Страница 60: ...t eine Drahtspule aufgebraucht entfernen Sie eventuelle Drahtreste aus der Maschine Wennder Bindevorgangfehlschlägt entfernenSie miteinerPinzette Drahtreste bevor Siemit denArbeitenfortfahren Achtung Das Gerät kann nur mit 90 Meter Spulen verwendet werden die vom Hersteller geliefert und genehmigt wurden Wenn Sie größere Spulen verwenden möchten müssen Sie den Spulenhalter vom Gerät entfernen Um S...

Страница 61: ...ie sie nicht zum Binden von Zweigen mit mehr als 25 mm Wenn die Bindeprozess nicht erfolgreich ist schalten Sie das Gerät aus Entfernen Sie den in der Bindeöffnung verfangenen Draht und schalten Sie das Gerät wieder ein Führen Sie einem Probe Bindevorgang durch wenn diese erfolgreich ist kann weitergearbeitet werden Wenn der Bindevorgang mehrere Male fehlschlägt schalten Sie das Gerät für eine gen...

Страница 62: ...ieren niemals an der Bindespirale Sichtbare Anzahl auf dem Display Maximaler Ø mit Kunststoffdraht Maximaler Ø mit Papierdraht 3 25mm 24mm 4 25mm 22mm 5 24mm 18mm 6 22mm 14mm 7 20mm Nicht empfohlen 8 16mm Nicht empfohlen Wenn sich der Bindungsvorgang stark verlangsamt überprüfen Sie den Ladezustand der Batterie Die in den Anweisungen nicht erwähnten Reparaturarbeiten und Funktionen müssen vom Serv...

Страница 63: ...opfungen und Staus 1 Öffnen Sie die vordere Abdeckung und entfernen Sie den Draht Druckwagen 2 Entfernen Sie den verbleibenden Draht mit der Zange 3 Setzen Sie den Draht Druckwagen ein und positionieren Sie die vordere Abdeckung richtig Das Gerät kann mit dem neuen Draht weiterarbeiten ...

Страница 64: ...em feuchten Tuch oder einem Pinsel gereinigt werden Verwenden Sie kein Reinigungsmittel Andernfalls kann das Gerät dauerhaft beschädigt werden Jedes Mal wenn eine Rolle Bindedraht aufgebraucht ist verwenden Sie bitte eine Pinzette oder einen Pinsel um Fremdkörper in der Drahtführung zu entfernen Entfernen Sie nach 8 Betriebsstunden eventuelle Drahtreste aus der Drahtführung Überprüfen Sie ob Stift...

Страница 65: ...an jeder beweglichen Verbindung wie in der Abbildung gezeigt schmieren 16 Lagerung Bewahren Sie die Batterie nicht in übermäßig heißer oder kalter Umgebung auf Entfernen Sie die Batterie aus dem Gerät wenn Sie es für längere Zeit lagern Bewahren Sie die Batterie und das Ladegerät in der Verpackung auf um sie vor Hitze Staub und Feuchtigkeit zu schützen Die Batterie sollte in trockener Umgebung gel...

Страница 66: ...e Batterie nicht im Hausmüll verbrennen Sie ihn nicht tauchen Sie ihn nicht in Wasser Wenn Gase oder Flüssigkeiten austreten kann die Batterie Umwelt und Gesundheitsschäden verursachen Bevor Sie die Batterie entsorgen entladen Sie sie vollständig Es wird empfohlen die Pole mit Klebeband abzudecken um Kurzschlüsse zu vermeiden Zerlegen Sie die Batterie nicht Entsorgen Sie die Batterien gemäß den ör...

Страница 67: ...internen oder externen Teilen durch Verwendung ungeeigneter Werkzeuge zum Lösen des Drahtes Die Garantie erstreckt sich nicht auf Komponenten die bei normalem Gebrauch einem Verschleiß unterliegen z B Drahtschneidemesser und Binderad Die Garantie gilt nur für Produkte die innerhalb von 30 Tagen nach dem Kaufdatum über die Website registriert wurden Schreiben Sie für weitere Informationen an info v...

Страница 68: ... und Fremdkörper und Drahtreste aus der Drahtführung entfernen Keine Drahtzufuhr oder Spulenende 1 Überprüfen ob der Draht in der Zuleitung blockiert ist 2 Fremdkörper und Drahtreste aus der Drahtführung entfernen Falscher Bindevorgang durch Blockierung zwischen den Zweigen Der Vorgang wurde eventuell zu schnell durchgeführt Vor dem Versetzen der Bindemaschine warten bis der Bindevorgang abgeschlo...

Страница 69: ...annungsrichtlinie Bezugnahme auf die verwendeten einschlägigen harmonisierten Normen oder Bezugnahme auf sonstige technische Spezifikationen zu denen Konformität erklärt wird UNI EN ISO 12100 2010 EN 60745 1 2009 EN 55014 1 2006 A1 2009 A2 2011 EN 60335 1 2012 EN 55014 2 2015 EN 60335 2 29 2012 EN 61000 3 2 2014 EN 62233 2008 EN 61000 3 3 2013 EN 62133 2013 Zur Erstellung der technischen Unterlage...

Страница 70: ...ическая спецификация 80 9 Список компонентов 80 10 Зарядка аккумулятора 80 11 Рабочая среда 81 12 Начальная сборка 81 13 Порядок работы 84 14 Внимание 85 15 Чистка и обслуживание 86 16 Хранение 88 17 Утилизация 88 18 Запчасти 89 19 Гарантия 89 20 Устранение неполадок 90 21 Декларация соответствия 91 1 Информация по технике безопасности Перед первым использованием устройства внимательно прочитайте ...

Страница 71: ...ащитную обувь с нескользящей подошвой Не используйте устройство в случае дождя или мокрых ветвей Не выбрасывайте вместе с бытовыми отходами 2 2 Символы на аккумуляторе Литий ионный аккумулятор не выбрасывайте вместе с бытовыми отходами Не бросайте аккумулятор в огонь он может взорваться Не разбирайте аккумулятор Аккумулятор можно перезаряжать и перерабатывать Отслужившие аккумуляторы следует собир...

Страница 72: ...а должна соответствовать розетке Не модифицируйте розетку Ни в коем случае не модифицируйте вилку Не используйте переходники если вилка инструмента заземлена Правильное использование неизмененных вилок с подходящими розетками снижает риск поражения электрическим током Не используйте адаптеры переменного тока или вилки которые не соответствуют стандартам Избегайте контакта тела с заземленными повер...

Страница 73: ...ие других батарей может повредить инструмент и увеличить риск получения травм Аккумулятор следует хранить вдали от металлических предметов таких как монеты скрепки гвозди винты Короткое замыкание может вызвать возгорание Неправильное использование может привести к протечке жидкости из аккумулятора В случае контакта с жидкостью обильно промойте водой и обратитесь к врачу Вытекание жидкости из аккум...

Страница 74: ... длинные брюки перчатки и защитные очки Будьте внимательны не отвлекайтесь руководствуйтесь здравым смыслом при работе с инструментом Не работайте с инструментом если вы сильно устали или находитесь под воздействием лекарств наркотиков алкоголя или других веществ Не используйте устройство для подвязки в случае дождя Не используйте инструмент вблизи легковоспламеняющихся жидкостей или газов во избе...

Страница 75: ... правильное положение перед установкой Зарядное устройство предназначено для использования в помещении Зарядка должна проводиться в помещении Отсоедините батарею перед чисткой зарядного устройства во избежание повреждений и риска поражения электрическим током используйте для чистки сухую ткань Не подвергайте аккумулятор воздействию солнца или яркого света Не допускайте контакта с горячими поверхно...

Страница 76: ... конец зарядки 4 5 Внимание Остаточные риски Даже при правильном использовании инструмента остаются некоторые остаточные риски Инструмент может создавать следующие опасности из за своих конструктивных характеристик Продолжительное и необоснованное использование может быть вредным для оператора Внимание Устройство может производить электромагнитные волны и создавать помехи электромедицинским прибор...

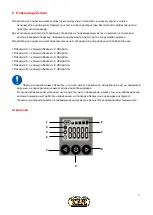
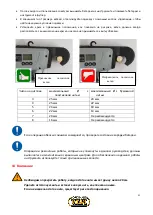
Страница 77: ...исла оборотов нити Позиция 3 кольцо обвязки 2 оборота Позиция 4 кольцо обвязки 3 оборота Позиция 5 кольцо обвязки 4 оборота Позиция 6 кольцо обвязки 5 оборотов Позиция 7 кольцо обвязки 6 оборотов Позиция 8 кольцо обвязки 7 оборотов Перед использованием убедитесь что нить имеет правильное направление внутри подающей дорожки не перекручена не имеет узлов или заблокирована В случае неправильной устан...

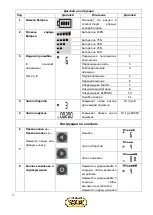
Страница 78: ...дача 4 Недонапряжение 5 Перенапряжение 6 Повреждение Mosfet 7 Низкий заряд батареи 9 Повреждение EEPROM 10 Ошибка кодера 11 4 Число оборотов Указывает число витков для каждой подвязки От 3 до 8 5 Число подвязок Указывает общее число подвязок От 1 до 99999 Инструкции по кнопкам 6 7 Левая кнопка Правая кнопка Нажмите левую или правую кнопку Ошибка Число оборотов Число подвязок 8 Кнопка включения и п...

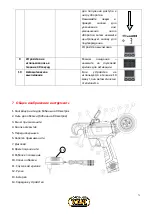
Страница 79: ...а спусковой крючок для активации 10 Автоматическое выключение Если устройство не используется в течение 10 минут оно автоматически отключается 7 Общее изображение инструмента 1 Контейнер нити для бобины на 90 метров 2 Нить для обвязки бобина на 90 метров 3 Рычаг прижима нити 4 Кнопка открытия 5 Передняя крышка 6 Каретка прижима нити 7 Дисплей 8 Крюк подачи нити 9 Рабочее положение 10 Колесо обвязк...

Страница 80: ... кг Зарядное устройство 1 Входное напряжение 100 240 В пер т 50 60 Гц 2 Выходное напряжение пост т 16 8 В 3 Зарядный ток 1 4 A 4 Класс изоляции II 5 Время зарядки 3 4 ч 9 Список компонентов Аккуратно откройте упаковку и проверьте наличие нижеперечисленных компонентов Устройство для подвязки лозы 2 бобины с нитью для обвязки 2 батареи Зарядное устройство на 3 выхода Сумка Коробка для инструментов П...

Страница 81: ... заряжается зеленый светодиод означает что она полностью заряжена Примерное время зарядки составляет от 3 до 4 часов время одновременной зарядки 2 полностью разряженных батарей не оставляйте батареи подключенными дольше чем это необходимо поскольку они могут повредиться Зарядное устройство имеет три выхода вы можете заряжать 3 батареи одновременно 2 1 дополнительная Время зарядки пропорционально ч...

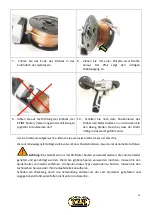
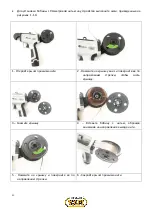
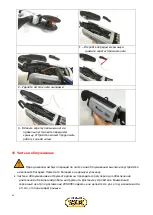
Страница 82: ...ках 1 10 1 Откройте рычаг прижима нити 2 Нажмите на крышку вниз и поверните ее по направлению стрелки чтобы снять крышку 3 Снимите крышку 4 Вставьте бобину с нитью обращая внимание на направление выхода нити 5 Нажмите на крышку и поверните ее по направлению стрелки 6 Закройте рычаг прижима нити ...

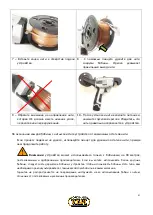
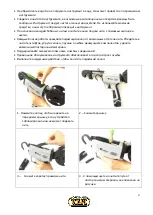
Страница 83: ...стите устройство от возможных остатков нити Если процесс подвязки не удался используйте пинцет для удаления остатков нити прежде чем продолжить работу Внимание устройство может использоваться только с бобинами на 90 метров поставляемыми и одобренными производителем Если вы хотите использовать более крупные бобины следует снять держатель бобины с устройства Чтобы использовать бобины этого типа вам ...

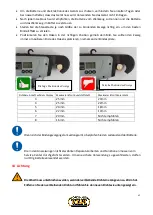
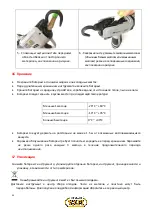
Страница 84: ...ли подвязка проходит неправильно выключите устройство Удалите нить которая возможно запуталась в отверстии обвязки и снова включите инструмент Проведите пробную подвязку если подвязка проходит нормально продолжайте работу Если подвязка проходит неправильно несколько раз выключите устройство для более тщательной проверки Откройте переднюю крышку и рычаг прижима нити проверьте что нить не имеет узло...

Страница 85: ...мажной нитью 3 25 мм 24 мм 4 25 мм 22 мм 5 24 мм 18 мм 6 22 мм 14 мм 7 20 мм Не рекомендуется 8 16 мм Не рекомендуется Если операция обвязки слишком замедляется проверьте состояние зарядки батареи Операции и ремонтные работы которые не упомянуты в данном руководстве должны выполняться исключительно сервисным центром Для обеспечения надежной работы инструмента используйте только оригинальные запчас...

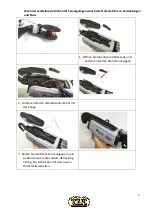
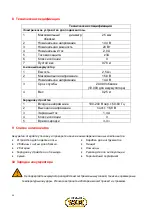
Страница 86: ... и обслуживание Перед началом любых операций по чистке или обслуживанию выключите устройство и извлеките батарею Поместите батарею в надежную упаковку Чистка и обслуживание инструмента должны проводиться регулярно для обеспечения длительной и безопасной работы инструмента Доставьте устройство в ближайший сервисный центр по достижении 200 000 подвязок или делайте это раз в год в зависимости от того...

Страница 87: ...8 часов работы очищайте подающий канал от возможных остатков нити Убедитесь в чистоте штифтов упругих колец пружин и любых движущихся компонентов удалите возможный посторонний материал Поддерживайте смазку маслом ножа и любых соединений Правильное обслуживание инструмента обеспечивает его долгий срок службы Выполните следующие действия чтобы очистить подающий канал 1 Нажмите кнопку чтобы надавить ...

Страница 88: ... температуре Меньше 1 месяца 20 C 60 C Меньше 6 месяцев 10 C 35 C Больше 6 месяцев 0 C 30 C Батарею следует держать на расстоянии не менее 1 5 м от возможных воспламеняющихся веществ Хорошее обслуживание батареи требует полностью зарядить ее перед хранением Заряжайте не реже одного раза каждые 3 месяца в течение продолжительного периода неиспользования 17 Утилизация Снимите батарею с инструмента у...

Страница 89: ...а 12 месяцев для профессиональных пользователей Гарантия распространяется на механические части включая батарею зарядное устройство мотор и приводной механизм Гарантия теряет силу в следующих случаях Неправильное использование инструмента Техническое обслуживание не выполняется в порядке указанном в настоящем руководстве по эксплуатации Модификации инструмента Повреждение инструмента даже по ошибк...

Страница 90: ...дать для ремонта в сервисный центр Грязный или неисправный кодер Неисправная цепь управления Прерывистая работа Прерывистые внутренние соединения Передать для ремонта в сервисный центр Поломка выключателя питания Грязный или неисправный кодер Неисправная цепь управления Обвязка не срабатывает обвязка не правильная Обвязка слишком широкая Правильно отрегулируйте обвязку Обвязка не получается из за ...

Страница 91: ...ки лозы Тип Линия Kamikaze Volpi Модель KV4 ОТВЕЧАЕТ СООТВЕТСТВУЮЩИМ УНИФИЦИРОВАННЫМ СОЮЗНЫМ НОРМАМ ДИРЕКТИВА 2006 42 CE Директива по машинам ДИРЕКТИВА 2014 30 UE Электромагнитная совместимость ДИРЕКТИВА 2014 35 UE Директива о низком напряжении Ссылка на соответствующие унифицированные применяемые нормы или на другие технические спецификации в отношении которых декларируется соответствие UNI EN IS...

Страница 92: ...04 13 Procediemnto de trabajo 106 14 Atención 108 15 Limpieza y manteniento 109 16 Almacenamiento 111 17 Eliminación de residuos y protección del medio ambiente 111 18 Piezas de repuesto 112 19 Garantía 112 20 Problemas y soluciones 113 21 Declaracion de conformidad 114 1 Consideraciones de seguridad Antes de usar por primera vez la máquina lea atentamente este manual de instrucciones por su propi...

Страница 93: ...la batería La batería se puede recargar y reciclar Las baterías desechadas deben reciclarse de una manera respetuosa con el medio ambiente 2 3 Símbolos en el cargador Peligro Advertencia Use solo el cargador en el interior Limitador de temperatura de seguridad Clase de aislamiento II El equipo eléctrico no se puede tirar con la basura doméstica 3 Instrucciones generales de seguridad para herramien...

Страница 94: ...s enfriadores Existe un mayor riesgo de descarga eléctrica si su cuerpo entra en contacto con objetos que se descargan en el suelo No exponga el instrumento a la lluvia o a condiciones de humedad Cualquier entrada de agua en el cargador de la batería puede crear un riesgo de descarga eléctrica No maltrate el cable Nunca use el cable para transportar tirar o desenchufar la herramienta eléctrica Man...

Страница 95: ...o que está haciendo y use el sentido común No use la herramienta eléctrica cuando esté cansado o bajo la influencia de drogas alcohol o medicamentos Un momento de falta de atención cuando se usa la herramienta eléctrica puede causar lesiones personales graves Utilice equipo de protección personal Utilice siempre gafas de seguridad y equipos como máscaras contra el polvo zapatos de seguridad antide...

Страница 96: ...ón en caso de cortocircuito No intente reparar la herramienta usted mismo siempre lleve la herramienta a nuestro Servicio de Asistencia Técnica en caso de necesidad Todos los trabajos que no se describen en este manual solo pueden ser realizados por nuestro Servicio de Asistencia Técnico El producto está diseñado para unir viña de uva y otras ramas dentro del rango efectivo de 25 mm de diámetro má...

Страница 97: ...ría para evitar lesiones personales No guarde la herramienta con la batería 13 insertada en el mango 12 La batería 13 debe recargarse al menos cada 3 meses para evitar dañarla La garantía no cubre los daños causados por el incumplimiento de la frecuencia de recarga 4 4 Uso adecuado del cargador Use el cargador solo con la batería recargable De lo contrario podría provocar un incendio o explotar Us...

Страница 98: ...ta herramienta junto con dispositivos electromédicos Atención No toque el gancho de alimentación o la rueda giratoria durante el uso para evitar lesiones personales Medidas de sonido y vibración Nivel de presión acústica 70 dB A Valor de vibración total 2 5 m s2 5 Uso conforme previsto La herramienta está diseñada para atar ramas de vid hasta un diámetro de 25 mm El uso para otros fines puede caus...

Страница 99: ...co de atado 5 vueltas Posición 7 hueco de atado 6 vueltas Posición 8 hueco de atado 7 vueltas Antes del uso verifique que el hilo tenga la dirección correcta dentro de la pista de alimentación el hilo no debe enrollarse anudarse ni bloquearse En caso de una instalación incorrecta del cable o si el cable está enrollado anudado o bloqueado el sistema de alimentación podría no funcionar correctamente...

Страница 100: ...sión 6 Mosfet dañado 7 Batería baja 9 EEPROM dañada 10 Error Encoder 11 4 Número de vueltas Indíca el número de vueltas por cada atado Da 3 a 8 5 Número de atados Indíca el número total de atados Da 1 a 99999 Instrucciones de botón 6 7 Botón izquierda Botón derecha Toque el botón izquierda o derecha Error Número de vueltas Número de atados 8 Botón de encendido y confirma selección Mantenga presion...

Страница 101: ...el gatillo para reactivar 10 Apague automático Si no está utilizada durante 10 minutos la herramienta se apaga automáticamente 7 Partes de la atadora 1 Carrete para bobina de 90 metros 2 bobina de hilo de 90 metros 3 tapa fijación de hilo 4 Botón de apertura 5 cubierta frontal 6 fijador hilo 7 Pantalla 8 Gancho de alimentación de alambre 9 hueco de atado 10 hélice de atado 11 Gatillo 12 Mango 13 B...

Страница 102: ...otección corriente 3A 6 Clase de protección II 7 Peso en vacío 0 78 Kg Batería litio 1 Capacidad 2 5 Ah 2 Tensión máxima 16 8V 3 Tensión nominal 20h 4 Duración 20 000 ligaduras 10 000 por batería 4 Peso batería 0 25kg Cargador 1 Voltaje nominal entrada 100 240V AC 50 60Hz 2 Voltaje de salida DC16 8V 3 Corriente de carga 1 4A 4 Clase de protección II 5 Tiempo de carga 3 4 h ...

Страница 103: ...a útil de la batería se reducirá Cargue cuando la pantalla 7 indique el nivel 1 menos del 10 La batería debe ser reemplazada si la duración es insuficiente Use solo las baterías originales suministradas por el fabricante Respete las precauciones de seguridad y medioambientales durante cada fase 10 1 Procedimiento de carga de la batería Cargue en un entorno cerrado a una temperatura de entre 10 C y...

Страница 104: ...ramienta a una temperatura de 5 C 30 C cuando trabaje 12 Puesta en marcha Verifique si la atadora el cable eléctrico y la batería están limpios y secos antes de empezar Realice el ensamblaje de acuerdo con los siguientes pasos Cargue la batería con el cargador adecuado Inserte la batería cargada en el alojamiento apropiado en el mango de la atadora Para montar la bobina de hilo de 90 metros en la ...

Страница 105: ...nte 5 Presione la tapa hacia abajo y gire en la dirección de la fecha 6 Cierre la tapa de fijación del hilo 7 Coloque el extremo del hilo por la alimentación de la herramienta 8 Utilice unos alicates para sacar los dos cables de unión La flecha indíca la dirección correcta de salida del hilo ...

Страница 106: ...as más grandes deberá quitar el carrete de la herramienta Para utilizar bobinas de este tipo es necesario consultar con el servicio técnico o el punto de venta Los daños a la herramienta debidos al uso de bobinas de hilo distintas a las suministradas e indicadas por el fabricante no están cubiertos por la garantía 13 Procediemnto de trabajo Utilice guantes y ropa adecuados cuando utilice esta herr...

Страница 107: ...hilo si es necesario Si la atadora se bloquea durante la fase de atado el gancho no puede retraerse y la atadora se bloquea en la rama En este caso apague la máquina y mueva el gancho con la mano para liberar la atadora 13 1 Procedimientos de atado Cuando el equipo esté en funcionamiento mantenga la otra mano a una distancia de al menos 5 cm del área de la atadura de la boca no coloque su mano en ...

Страница 108: ... reparación y las funciones serán implementadas por el Servicio de Asistencia Técnica Para garantizar un uso seguro solo se pueden usar piezas originales 14 Atención Es necesario dejar de trabajar cuando el hilo restante tenga una longitud de unos 20 cm Quite el hilo restante e inserte el hilo nuevo como se muestra a continuación Si no se extrae el hilo restante se corre el riesgo de bloqueos y at...

Страница 109: ... puede seguir trabajando con el nuevo hilo 15 Limpieza y manteniento Antes de iniciar cualquier operación de limpieza o mantenimiento apague la máquina y retire la batería Coloque la batería en un lugar seguro La limpieza y el mantenimiento de la herramienta se deben levar a cabo con regularidad para garantizar un funcionamiento prolongado y seguro de la herramienta Lleve la máquina al ...

Страница 110: ...l cable Cada 8 horas de trabajo use pinzas o un cepillo para limpiar materiales extraños en la guía de cables Compruebe si el pasador el anillo de retención y el resorte de cada junta móvil tienen algún material extraño si hay algún material extraño quítelo inmediatamente Mantenga la cuchilla y cada junta lubricadas con aceite Un buen hábito de mantenimiento puede extender la vida útil del product...

Страница 111: ...tura Almacenamiento menos de 1 mes 20 C 60 C Almacenamiento menos de 6 meses 10 C 35 C Almacenamiento durante 6 meses 0 C 30 C La batería debe mantenerse a una distancia mínima de 1 5 m de posibles sustancias inflamables Para un buen mantenimiento de la batería recárguela por completo antes de guardarla Recargue al menos una vez cada 3 meses durante largos períodos sin uso El interruptor debe esta...

Страница 112: ...servicio 19 Garantía La garantía cubre 12 meses para uso profesional La garantía cubre las partes mecánicas incluida la batería el cargador de batería el motor y el mecanismo de transmisión La garantía pierde validez en los siguientes casos Uso no apropiado o no conforme al previsto de la herramienta El mantenimiento no se realiza de la manera indicada en este manual del usuario Cambios de herrami...

Страница 113: ... reparaciones encoder sucio o defectuoso Circuito de control defectuoso Funcionamiento intermitente La línea de conexión interna está suelta Enviar al centro de reparaciones Interruptor de ON OFF no funciona correctamente encoder sucio o defectuoso Circuito de control defectuoso Falta ligadura ligadura incorrecta Después de atarlo la ligadura es demasiado ancha Ajuste el enlace correctamente con e...

Страница 114: ...Linea Kamikaze Volpi Modelo KV4 ES CONFORME CON LA LEGISLACIÓN DE ARMONIZACIÓN PERTINENTE DE LA UNIÓN DIRECTIVA 2006 42 CE Directiva Sobre Máquinas DIRECTIVA 2014 30 UE Compatibilidad Electromagnética DIRECTIVA 2014 35 UE Directiva de baja tensiòn Referencias a las normas armonizadas pertinentes utilizadas o referencias a otras especificaciones respecto a las cuales se declara la conformidad UNI E...

Страница 115: ...la batterie 126 11 Ambiance de travail 127 12 Mise en marche 127 13 Procédure de travail 129 14 Atention 131 15 Nettoyage et entretien 132 16 Stockage 134 17 Élimination des déchets et protection de l environnement 134 18 Element de réponses 135 19 Garantie 135 20 Problèmes et solutions 136 21 Declaration de conformite 137 1 Informations de sécurité Avant d utiliser la machine pour la première foi...

Страница 116: ...e pas jeter avec les ordures ménagères 2 2 Symboles sur la batterie Batería Li ion No deseche con la basura doméstica Ne jetez pas la batterie dans le feu en raison du danger d explosion Ne pas démonter la batterie La batterie peut être rechargée et recyclée Les piles jetées doivent être recyclées de manière écologique 2 4 Symboles dans le chargeur Danger Avertissement Utilisez uniquement le charg...

Страница 117: ...s à la terre telles que des tuyaux des radiateurs des refroidisseurs Le risque d électrocution est plus grand si votre corps entre en contact avec des objets déchargés dans le sol N exposez pas l instrument à la pluie ou à l humidité Toute entrée d eau dans le chargeur de batterie peut créer un risque de choc électrique N abusez pas du câble N utilisez jamais le câble pour transporter tirer ou déb...

Страница 118: ...ntion lors de l utilisation de l outil électrique peut provoquer des blessures graves Utilice equipo de protección personal Utilice siempre gafas de seguridad y equipos como máscaras contra el polvo zapatos de seguridad antideslizante cascos protección auditiva etc para reducir el riesgo de lesiones personales Evite la activación accidental Transportar la herramienta con el interruptor en la posic...

Страница 119: ...ts dans ce manuel ne peuvent être effectués que par notre service d assistance technique Le produit est conçu pour joindre des vignes et d autres branches dans la plage effective de diamètre maximal de 25 mm Ne l utilisez pas dans tous les types de reliure dépassant le diamètre maximal de 25 mm Un excès de cette plage endommagerait l attacheur électronique N essayez pas de libérer le crochet d ali...

Страница 120: ...erie lorsque l affichage 7 indique qu elle est au niveau de charge 1 Laissez la batterie refroidir complètement avant de commencer à charger Ne démontez pas et n endommagez pas la batterie pour éviter les blessures Ne stockez pas la machine avec la batterie 13 insérée dans la poignée 12 La batterie 13 doit être rechargée au moins tous les 3 mois pour éviter de l endommager La garantie ne couvre pa...

Страница 121: ...ucturelles Un fonctionnement manuel prolongé ou déraisonnable de l outil peut causer des dommages au corps de l utilisateur Attention L appareil peut produire des ondes électromagnétiques et interférer avec les appareils électromédicaux Il est suggéré de consulter un médecin avant d utiliser cet outil avec des appareils électromédicaux Attention Ne touchez pas le crochet d alimentation ni la roue ...

Страница 122: ...roche de ligature 2 tours Position 4 croche de ligature 3 tours Position 5 croche de ligature 4 tours Position 6 croche de ligature 5 tours Position 7 croche de ligature 6 tours Position 8 croche de ligature 7 tours Avant utilisation vérifiez que le fil a la bonne direction à l intérieur de la piste d alimentation il ne doit pas être roulé noué ou bloqué En cas d installation incorrecte du câble o...

Страница 123: ...magé 4 Sous tension 5 Surtension 6 Mosfet endommagé 7 Batterie faible 9 EEPROM endommagé 10 Erreur Encoder 11 4 Nombre de torsades Indique le nombre de torsades pour chaque attache Da 3 a 8 5 Nombre d attaches Indique le nombre total d attaches Da 1 a 99999 Instructions de bouton 6 7 Bouton gauche Bouton droit Presser el bouton gauche ou droit Erreur Nombre de torsades Nombre d attaches 8 Bouton d...

Страница 124: ...e pour reactiver 10 Arrêt automatique Si n est pas utilisée pendant 10 minutes la machine s arr ete automatiquement 7 Parties de l attacheur électronique 1 Dérouleur pour les bobines de 90 mètres 2 Fil d affichage bobine de 90 mètres 3 Levier presse fil 4 Bouton d ouverture 5 Couverture anterieure 6 Chariot presse fil 7 Affichage 8 Crochet d alimentation fil 9 Position de travail 10 crochet de lig...

Страница 125: ...on nominale 14 4V 4 Heures d ouverture 20 000 ligatures 10000 par batterie 5 Poids batterie 0 25 kg Chargeur 1 Entrée de tension nominale 100 240V AC 50 60Hz 2 Tension de sortie DC16 8V 3 Courant de charge 1 4A 4 Classe de protection II 5 Temps de charge 3 4 h 9 Liste des composants Ouvrez l emballage avec soin et vérifiez si les composants suivants sont inclus Attacheur N 2 bobines de fil N 2 Bat...

Страница 126: ...pecter les consignes de sécurité et de protection de l environnement lors de chaque phase 10 1 Procédure de chargement de la batterie Charge dans un environnement fermé à une température comprise entre 10 C et 22 C Connectez correctement l adaptateur de chargeur à la batterie La lumière LED rouge sur le chargeur indique que la batterie est en cours de chargement la lumière LED verte indique qu ell...

Страница 127: ...ont propres et secs avant de commencer Terminez l assemblage en suivant les étapes suivantes Chargez la batterie avec le chargeur de batterie approprié Insérez la batterie chargée dans le siège approprié de la poignée de l attacheur Pour assembler la bobine de fil de 90 mètres sur la machine suivez les étapes des figures 1 à 10 1 Ouvrez le levier presse fil 2 Appuyez sur le couvercle et faites le ...

Страница 128: ...vec une pince à épiler retirez les deux fils à l extérieur de la bobine La flèche indique la sortie de fil correcte 9 Faites attention au sens du fil qui ne doit pas présenter de nœuds de distorsions ou de bobines d aucune sorte 10 Après avoir placé le fil allumez l interrupteur d alimentation et appuyez sur la gâchette Assurez vous que le fil est correctement guidé dans la machine ...

Страница 129: ...tée aux conditions d utilisation Ceci permettra à la société de reliure de maintenir les attaches dans les meilleures conditions d utilisation Si les débris ou la saleté bouchent l appareil mettez l appareil hors tension avant de les retirer En appuyant sur l interrupteur d allumage illustré à la figure 10 dans la section ci dessus vous entendrez un bip et l affichage LCD s allumera la machine est...

Страница 130: ...es opérations incorrectes ne sont pas couverts par la garantie Pendant les jours froids ou temps pluvieux pour protéger la batterie et l électronique de la machine ne laissez pas la machine se mouiller N utilisez pas l équipement en cas de pluie Après chaque utilisation il est recommandé de retirer la batterie de l outil et de placer la batterie et l outil à l intérieur de la boi te En fonction de...

Страница 131: ...s les pièces d origine peuvent être utilisées 13 2 Atention Il est nécessaire d arrêter le travail lorsque le fil résiduel a une longueur d environ 20 cm Retirez le fil restant et insérez le nouveau fil comme indiqué ci dessous Si le fil résiduel n est pas extrait il y a un risque de blocage et de bourrage 1 Ouvrez la couverture anterieure et retirez le chariot presse fil 2 Quittez le fil restant ...

Страница 132: ...dommager l équipement Gardez la fente d aération la chambre du moteur et la poignée de l équipement propres Il doit être nettoyé avec un chiffon humide ou une brosse à cheveux N utilisez aucun agent de nettoyage sinon cela pourrait endommager l équipement de manière permanente Lorsqu un fil de liage est épuisé utilisez une pince à épiler ou une brosse pour rincer les corps étrangers dans le guide ...

Страница 133: ...tilisez une brosse pour nettoyer les corps étrangers dans le rail comme indiqué en la figure 5 Utilisez une brosse pour éliminer les corps étrangers dans la zone d attache anterieure comme indiqué en la figure 6 Terminé le nettoyage lubrifiez avec de l huile de graissage huile blanche ordinaire ou huile pour machine sur le couteau et chaque joint mobile comme indiqué en la figure ...

Страница 134: ...position OFF pendant le stockage 16 Élimination des déchets et protection de l environnement Retirez la batterie de l ordinateur recyclez la batterie l outil les accessoires et l emballage séparément en fonction du type de matériau L équipement ne fait pas partie des ordures ménagères Envoyez le matériel à un centre de recyclage Le métal et le plastique de l équipement peuvent être recyclés après ...

Страница 135: ...z pas la batterie avec la fréquence requise Utilisation de fils non approuvés par le fabricant Rupture de pièces internes ou externes due à l utilisation d outils inappropriés pour libérer le fil Les composants sujets à l usure lors d une utilisation normale sont exclus de la garantie p Ex Lame coupe fil et roue de liage La garantie n est valable que pour les produits qui ont été enregistrés à tra...

Страница 136: ...rifiez et retirez tout corps étranger et débris de fil du conduit d alimentation en fil Pas d alimentation du fil ou de fin de la bobine 1 Vérifiez que le câble n est pas bloqué dans la ligne d alimentation 2 Retirez tous les corps étrangers ou traces de câbles de la ligne d alimentation Liaison incorrecte en raison d un blocage entre les branches L opération pourrait être effectuée trop rapidemen...

Страница 137: ...ective Basse Tension Référence aux normes harmonisées pertinentes utilisées ou référence à d autres spécifications par rapport auxquelles la conformité est déclarée UNI EN ISO 12100 2010 EN 60745 1 2009 EN 55014 1 2006 A1 2009 A2 2011 EN 60335 1 2012 EN 55014 2 2015 EN 60335 2 29 2012 EN 61000 3 2 2014 EN 62233 2008 EN 61000 3 3 2013 EN 62133 2013 Personne autorisée à compiler la documentation tec...

Страница 138: ...____________________________________________________________ ____________________________________________________________________________________ ____________________________________________________________________________________ ____________________________________________________________________________________ ____________________________________________________________________________________...

Страница 139: ...____________________________________________________________ ____________________________________________________________________________________ ____________________________________________________________________________________ ____________________________________________________________________________________ ____________________________________________________________________________________...

Страница 140: ...140 Davide e Luigi Volpi S p A Via San Rocco 10 46040 Casalromano MN Italy www volpioriginale it info volpioriginale it YLBKV4_2 Libretto d uso ITA_ENG_GER_RUS_ESP_FR ...

Отзывы: