background image


5

ENGLISH

O

peratOr

s

 M

anual

10. Attach one wire to one side of the seal bar by tightening the screw. 

11. Pull the wire across the sealing bar straight and tight.
12. Attach it by tightening the screw.
13. Repeat steps 10 through 12 for the second wire.
14. Trim the wires.
15. 

Cut a piece of Teflon tape the same length of the sealing bar, plus about 

2 inches (5 cm).

16. Apply the tape smoothly over the sealing wires on the sealing bar.
17. Trim the tape.
18. Place the sealing bar back in the machine. Verify that the sealing bar is 

properly snapped into the holder.

r

ePlace


the

 S

eal

 P

ad

Inspect the pad for roughness. Replace if areas of the pad are rough.

Tools Needed:


„

Replacement seal pad


„

Scissors

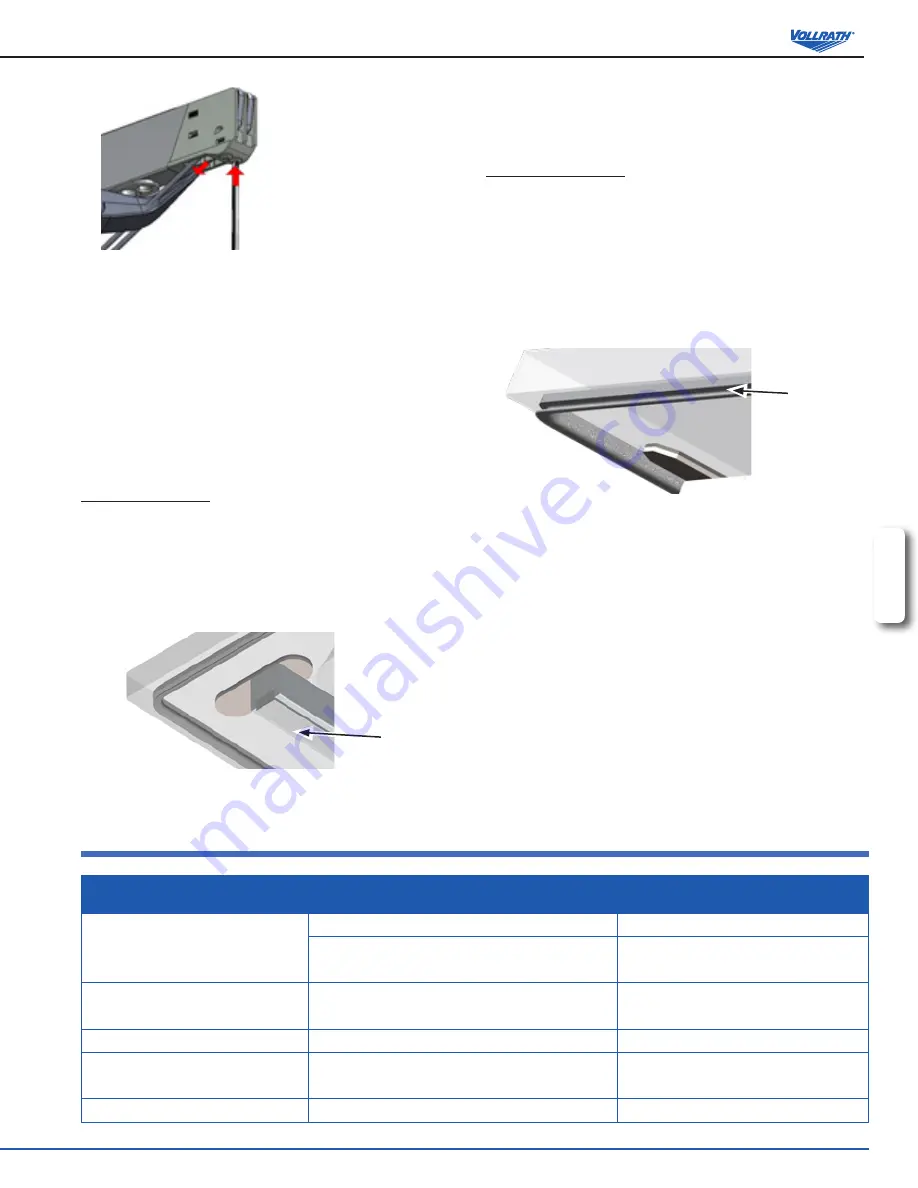
1.  Remove the worn pad from the holder.

Seal pad

3.  Cut a new piece of seal pad the same length as the old one. A pad that is 

too short or too long will cause sealing problems.

4.  Place the new pad in the holder. Ensure that the pad is completely and 

evenly placed in the groove. 

r

ePlace


the

 l

id

 g

aSket

The lid gasket ensures the vacuum chamber is completely sealed during 

the packing cycle. This is essential to achieve maximum vacuum. The lid 

gasket wears due to the extreme pressure differences and must be replaced 

regularly. 

Tools Needed:


„

Replacement gasket


„

Scissors 

1.  Remove the worn gasket. 

Lid gasket

2.  Cut a new piece of gasket slightly longer than the old one. Position the 

new gasket so the lip faces downward and outward.

3.  Press the gasket into the slot evenly. 
4.  Trim the gasket so the ends come tightly together to prevent leakage. 

The ends must be cut off straight. If the lid gasket is too short or too long, 

it can cause problems when closing the lid or leakage may occur.

t

roubleShooting


Problem

it might Be caused By

course of action

The control panel does not illuminate.

The machine is not connected to an electrical outlet.

Connect the machine to the power supply.

The main fuse is burned out.
The circuit board fuse is burned out.

Contact Vollrath Technical Services.

The control panel is on but there is no 

activity after closing the lid.

The lid micro switch may need to be adjusted.
The control transformer fuse is burned out.

Contact Vollrath Technical Services.

The lid does not open automatically.

The gas spring is damaged.

Contact Vollrath Technical Services.

F1 in display 

The lid micro switch may need adjusting.
The pump may require technical services.

Contact Vollrath Technical Services.

– – in display

The lid may have not opened correctly.

Check the lid.

Содержание 40831 VP12

Страница 1: ...ich are explained below Please read carefully WARNING Warning is used to indicate the presence of a hazard that will or can cause severe personal injury or death CAUTION Caution is used to indicate the presence of a hazard that will or can cause minor or major personal injury if the caution is ignored NOTICE is used to note information that is important but not hazard related These precautions sho...

Страница 2: ...ning program D Display Shows the current value of the active function during the program cycle or the set value of the selected function when the machine is idle E Function LEDs The LED for the function illuminates when the function is active during the program cycle or when the function is selected in the programming mode F Increase Time Vacuum Stop Button During a packing cycle stops the current...

Страница 3: ...d quickly reaches the boiling point which can lead to an insufficient seal NOTICE Hot products create condensation which can damage the pump 2 Watch the vacuum process through the clear lid 3 Press the vac stop button as soon as bubbles appear in the product This will stop the vacuum and start the seal step NOTICE Do not let products boil Boiling will increase the amount of moisture that enters th...

Страница 4: ...m removes any moisture that may have accumulated in the pump During the program the pump and oil reach operating temperature which evaporates any moisture in the pump 1 Press the Pump Conditioning button 2 The display shows 3 Close the lid 4 The program starts Moving dots appear on the display 5 The program runs for approximately 15 minutes Do not interrupt the program If the program is interrupte...

Страница 5: ...gasket wears due to the extreme pressure differences and must be replaced regularly Tools Needed Replacement gasket Scissors 1 Remove the worn gasket Lid gasket 2 Cut a new piece of gasket slightly longer than the old one Position the new gasket so the lip faces downward and outward 3 Press the gasket into the slot evenly 4 Trim the gasket so the ends come tightly together to prevent leakage The e...

Страница 6: ...s damaged or worn Replace the seal pad The Teflon tape is damaged Replace the Teflon tape The vacuum bag opening is not clean Clean the vacuum bag s opening Service and Repair There are no user serviceable parts within this appliance To avoid serious injury or damage never attempt to repair the unit or replace a damaged power cord yourself Do not send units directly to The Vollrath Company LLC Ple...

Отзывы: