background image

4

Changing the View Mode Settings
You can resize the video content to fit while the menu is open.

To change the view mode settings:

1.  Press the 

MENU button on the 

remote. The on-screen menu is 

displayed.

2.  Use the 

Arrow buttons on the 

remote to highlight 

System and 

press 

OK. The SYSTEM menu is 

displayed.

3.  Use the 

Arrow buttons on the 

remote to highlight 

View Mode 

and press 

OK. The VIEW MODE 

menu is displayed.

4.  Highlight 

ViewportOverlay

or 

Centered Overlay and press 

OK.
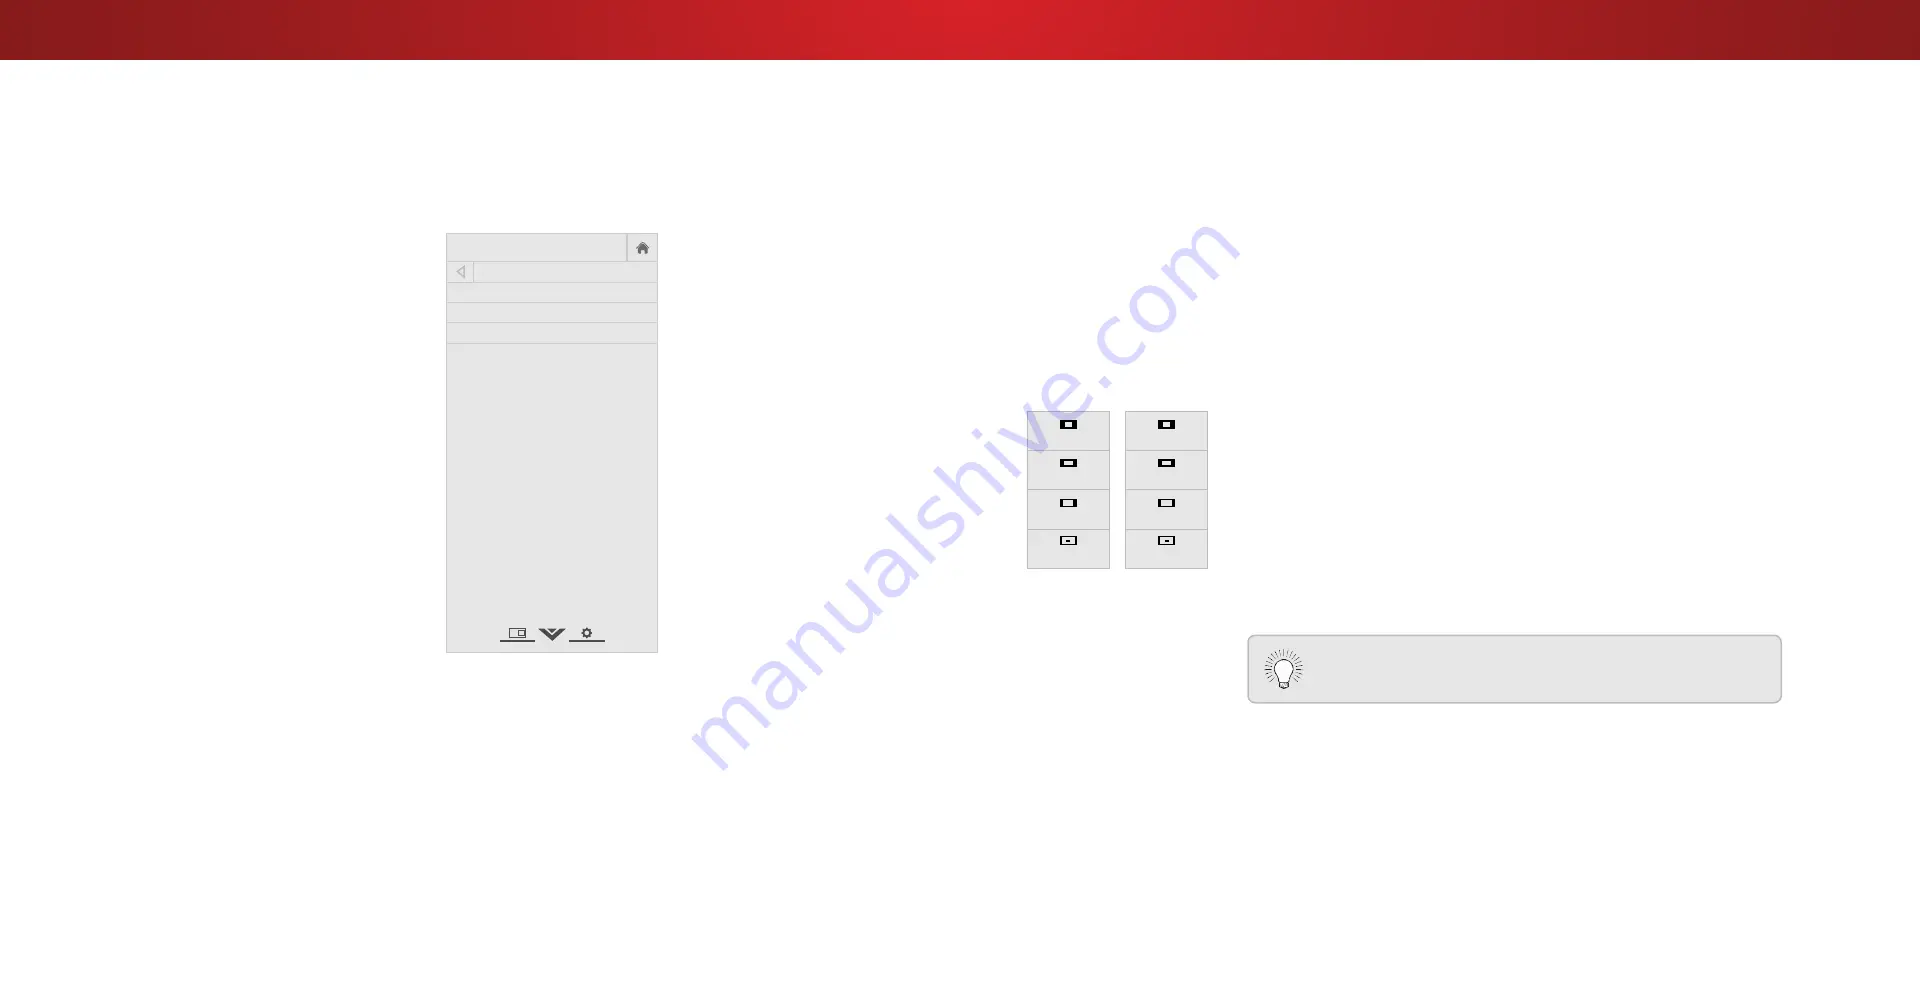
•  Viewport - The entire picture 

is visible in the space to the 

right of the menu.

•  Overlay - The left-hand 

portion of the picture 

covered by the menu.

•  Centered Overlay - The picture extends off of the right 

side of the screen.

5.  Press the 

EXIT button on the remote. See Viewing Video with 

the Menu Open on page 24 for an alternate way of resizing 

the video content.

Help

VIZIO

Network

Sleep

Timer

Input

CC

ABC

Audio

Wide

Normal

Picture

Settings

Panoramic

Wide

Zoom

2D

3D

Exit

VIEW MODE

Viewport

Overlay

Centered Overlay

CHANGING THE SCREEN ASPECT RATIO

The TV can display images in five different modes: Normal, Stretch, 

Panoramic, Wide, and Zoom. Each mode displays the picture 

differently.

Some programs have black bars on the top or sides of the picture 

so that the picture keeps its original shape. Examples include 

wide-screen movies and older television programs.

To change the screen aspect ratio:

1.  Press the 

WIDE

 button on the 

remote.

2.  Use the 

Arrow

 buttons to 

highlight the aspect ratio you 

wish to view and press 

OK

.

•  Normal

 preserves the content’s 

original aspect ratio and size. 

• 

Standard Definition

 (480i and 

480p—old TV programs) - Since 

the 4:3 aspect ratio is not large 

enough to fill the TV’s screen, 

black bars are added to the left 

and right of the display image.

• 

720p and 720i HD

 - Fills a 720p or 1080p screen.

• 

1080p and 1080i HD

 - Fills a 720p or 1080p screen. 

•  Stretch

 expands a widescreen image to fill the screen from 

top to bottom and stretches it half as much from right to 

left. Figures appear tall and thin.

• 

Standard Definition

 - Not available.

• 

720p and 720i HD

 - If you are watching widescreen 

1.85:1 content, the image will fill the screen. With 2.35:1 

widescreen content, one-sixth of the image is cut off by 

the left and right sides of the screen.

• 

1080p and 1080i

 - Not available.

•  Panoramic

 stretches a 4:3 aspect ratio picture to the left 

and right edges of the screen. The center of the image is 

Panoramic

Wide

Zoom

Normal

Stretch

Wide

Zoom

Normal

Note: Aspect ratio settings may 

vary by Input source.

not stretched, but the sides of the image are extremely 

stretched. If you are watching widescreen (1.85:1 or 2.35:1) 

content with black bars on the top and bottom, the black 

bars will still appear on the top and bottom of the display 

image.

• 

Standard Definition

 (480i and 480p) - Fills the screen 

from the left to right edges.

• 

720p and 720i

 - Not available.

• 

1080p and 1080i

 - Not available.

•  Wide

 stretches a 4:3 aspect ratio picture to the edges of 

the screen. Since the picture is being stretched, the display 

image may appear distorted—figures appear short and fat. 

If the program is already formatted for widescreen viewing 

(1.85:1 or 2.35:1), then black bars will appear on the top 

and bottom of the display image.

•  Zoom

 expands images evenly in all directions (33% taller 

and 33% wider) with black bars to fit the screen. A 720p 

image will fill a 1080p screen.

• 

Standard Definition

 - Not available.

• 

720p and 720i HD

 - Fills a 1080p screen

• 

1080p and 1080i

 - Not available.

Tip: The aspect ratio cannot be changed for Ultra HD 

content or for any video content on HDMI-5.

45

Содержание D60-D3

Страница 1: ...Models D60 D3 and D70 D3 USER MANUAL VIZIO ...

Страница 2: ...g Up Channels 36 Selecting a Channel Source 36 Scanning for Channels 36 Adding New Channels 36 Skipping Channels 37 Listening to Alternate Audio 38 Changing the Analog Audio Language 38 Setting Up Closed Captioning 39 Changing the Appearance of Digital Closed Captions 39 Renaming Devices on the Input Menu 41 Changing the TV Settings 42 Viewing System Information 42 Changing the On Screen Menu Lang...

Страница 3: ...o blades and a third grounding prong The wide blade or the third prong are provided for your safety If the provided plug does not fit into your outlet consult an electrician for replacement of the obsolete outlet Protect the power cord from being walked on or pinched particularly at plugs convenience receptacles and the point where they exit from the apparatus Only use attachments accessories spec...

Страница 4: ... dust or high humidity Operating your TV in environments with heavy dust or high humidity may cause fire or electric shock Follow instructions for moving your TV Ensure that the power cord and any other cables are unplugged before moving your TV When unplugging your TV hold the AC DC power adapter not the cord Pulling on the power cord may damage the wires inside the cord and cause fire or electri...

Страница 5: ... information with regard to proper grounding of the mast and supporting structure grounding of the lead in wire to an antenna discharge unit size of the grounding conductors location of antenna discharge unit connection to grounding electrodes and requirements of the grounding electrode Lightning Protection For added protection of the TV during a lightning storm or when it is left unattended or un...

Страница 6: ...mited DTS the Symbol DTS and the Symbol together are registered trademarks and DTS Studio Sound is a trademark of DTS Inc DTS Inc All Rights Reserved This product qualifies for ENERGY STAR in the factory default settings and this is the setting in which power savings will be achieved Changing the factory default picture settings or enabling other features will increase power consumption that could...

Страница 7: ... images below to ensure nothing is missing or damaged Getting to Know Your TV PACKAGE CONTENTS Power Cord VIZIO LED HDTV Remote Control with Batteries Quick Start Guide English French and Spanish 4 x Phillips Screws INSTALLATION GUIDE VIZIO Please read this guide before using the product D60 D3 and D70 D3 TV Stands 7 ...

Страница 8: ... earthquake occurs and the TV is not properly secured Place the TV screen down on a clean flat surface To prevent scratches or damage to the screen place the TV on a soft surface such as carpet rug or blanket To install the stands 1 Insert the stands into the base of the TV 2 Secure each stand to the TV with two 2 Phillips screws included Insert the screws into the back of the TV and tighten them ...

Страница 9: ... surface is clear of debris that can scratch or damage the TV 3 Remove the stands by loosening and removing the screws 4 Attach your TV and wall mount to the wall carefully following the instructions that came with your mount Use only with a UL listed wall mount bracket rated for the weight load of this TV For some wall mounts you may want to use cables with right angle connectors This allows the ...

Страница 10: ...n using the remote aim it directly at this sensor The power indicator flashes on when the TV turns on then goes out after several seconds To keep the power indicator on as long as the TV is on see Turning the Power Indicator On or Off on page 46 10 ...

Страница 11: ...ver Stereo Audio Out Connect an RCA audio device such as sound bar Component Composite Connect a component or composite device USB Connect a USB thumb drive to play photo music or video HDMI Connect an HDMI device HDMI Connect an HDMI device Note The image shown here is for illustrative purposes only and may be subject to change The actual number of ports and their locations may vary depending on ...

Страница 12: ...nually enter a digital sub channel For example 18 4 or 18 5 ENTER Confirm channel or passcode entered using the Number Pad A V CONTROLS Control the USB media player and streaming video playback CLOSED CAPTIONS Turn closed captions On and Off EXIT Close the on screen menu VOLUME UP DOWN Increase or decrease loudness of the audio OK Select the highlighted option BACK Go to the previous on screen men...

Страница 13: ...R COMPONENT CABLE ANALOG HD VIDEO 1080p 1 STEREO AUDIO BEST HDMI HDMI 1 4 2 DIGITAL ULTRAHDVIDEO 4K 30Hz 1 HD AUDIO GOOD AV CABLE ANALOG SD VIDEO 480i 1 STEREO AUDIO BETTER COAXIAL CABLE ANALOG DIGITAL HD VIDEO 1080i 1 STEREO HD AUDIO 1 Maximum Resolution 2 HDCP 2 2 supported on HDMI ports 1 2 and 5 Recommended for use with high performance devices only Available for compatible gaming systems or h...

Страница 14: ...OMPONENT CABLE Component cables are designed to carry high definition video signals along with additional audio connections Colors are delivered with color information split up three different ways over three connectors for video separated into Red Blue and Green signals and the left and right audio connectors Red and White HD Video Resolutions up to 1080p Analog Connection Audio and Video Signals...

Страница 15: ...ncluded to the TV and the device 4 Turn the TV and your device on Home Audio Receiver VIZIO Sound Bar BEST HDMI CABLE ARC 2 WAY COMMUNICATION 2 0 5 1 DIGITAL AUDIO PCM DTS DOLBY DIGITAL GOOD RCA CABLE ANALOG STEREO CONNECTION 2 0 CHANNEL BETTER OPTICAL SPDIF CABLE PCM STREAM DOLBY DIGITAL 5 1 CHANNEL DTS 5 1 CHANNEL Note The image shown here is for illustrative purposes only and may be subject to ...

Страница 16: ...mitted between devices PCM Stream Lossless Dolby Digital 5 1 Channel DTS 5 1 Channel Digital Connection Audio Signal Only HDMI CABLE HDMI technology transmits crystal clear digital multi channel surround audio through a single HDMI cable Audio Return Channel enabled ARC TVs allow audio to be sent over an already connected HDMI cable eliminating the need for a separate audio cable See Connecting an...

Страница 17: ...n HDMI Cable HDMI Cable Your Blu Ray Player RCA Audio Your Home Audio Receiver With HDMI ARC With an HDMI ARC setup the audio connection between your TV and Home Audio Receiver can be removed The HDMI cable will transmit audio signal to and from your TV with an all digital audio video connection HDMI Cable HDMI Cable Your Blu Ray Player VIZIO Internet Apps Plus Built In Tuner VIZIO Internet Apps P...

Страница 18: ... Network Setup to configure the TV See Using Guided Setup on page 48 Connecting to a Wireless Network 1 Ensure you have a router or modem broadcasting as high speed wireless signal 802 11n recommended 2 Use the Guided Network Setup to configure the TV See Using Guided Setup on page 48 Router Modem Ethernet Cable Note The image shown here is for illustrative purposes only and may be subject to chan...

Страница 19: ... the Ethernet port on the TV Choose your mode Select Store Demo for in store display Select Home Use for in home use Seleccione Home Use para Modo de Casa o Store Demo para Demostración en la Tienda Choisissez Home Use pour le Mode Domicile ou Store Demo pour la Démo en Magasin Store Demo Home Use Press the Power button on the remote The TV powers on and the Setup App starts 1 2 Use the Arrow butt...

Страница 20: ...ard then highlight Connect and press OK Use the Arrow and OK buttons on the remote to review the Terms Of Service and Privacy Policy When you are finished highlight I Accept and press OK 7 8 Enter your E mail Address First Name Last Name and Zip Code using the on screen keyboard Highlight Next and press OK 5 Select your time zone and press OK 20 ...

Страница 21: ... and OK buttons on the remote to select the input your TV source is connected to When you are finished the message Setup is complete will appear The First Time Setup is complete Use the Arrow buttons on the remote to highlight your TV source and press OK 9 If you have cable TV select whether you have a cable box or if you connect the TV directly to a cable from the wall Note Number of ports may di...

Страница 22: ... remote You can also open the on screen menu by pressing the VIA button and selecting HDTV Settings from the VIA Dock then pressing OK From this menu you can Adjust the Picture settings Adjust the Audio settings Setting the Sleep Timers Adjust the Network settings Adjust the Channel settings Set up Closed Captioning Name Inputs Adjust TV settings Access the Guided Setup View the User Manual Help V...

Страница 23: ... edges of the screen The center of the image is not stretched but the sides of the image are extremely stretched If you are watching widescreen 1 85 1 or 2 35 1 content with black bars on the top and bottom the black bars will still appear on the top and bottom of the display image Standard Definition 480i and 480p Fills the screen from the left to right edges 720p and 720i Not available 1080p and...

Страница 24: ...ide Normal Picture Settings Panoramic Wide Zoom 2D 3D Exit PICTURE Picture Mode Standard Auto Brightness Control Medium Backlight 85 Brightness 50 Contrast 50 Color 59 Tint 0 Sharpness 9 More Picture Picture Mode EDIT Color Calibration CENTERED OVERLAY OVERLAY Help VIZIO Network Sleep Timer Input CC ABC Audio Wide Normal Picture Settings Panoramic Wide Zoom 2D 3D Exit VIEWPORT PICTURE Picture Mode...

Страница 25: ... Picture Mode Edit Color Calibration 4 To manually change each of the picture settings use the Up Down Arrow buttons on the remote to highlight that picture setting then use the Left Right Arrow buttons to adjust the setting Auto Brightness Control The auto brightness control detects the light levels in the room and automatically adjusts the backlight for the best picture Select Off Low Medium or ...

Страница 26: ... size of the displayed picture Press the OK button when you are finished Picture Position Adjust the vertical and horizontal positions of the picture to ensure the image is centered and completely fills the screen Use the Left Right Arrow buttons to adjust the horizontal position of the displayed picture Use the Up Down Arrow buttons to adjust the vertical position of the displayed picture Press t...

Страница 27: ...URE MODE EDIT menu use the Arrow buttons to highlight Lock Picture Mode and then press OK The LOCK PICTURE MODE menu is displayed 2 Use the Number Pad on your remote to enter a unique 4 digit PIN 3 Highlight Save and press OK 4 Press the EXIT button to exit the menu screens To unlock all custom picture modes 1 From the PICTURE MODE EDIT menu use the Arrow buttons to highlight Unlock Picture Mode a...

Страница 28: ... that has been edited can be restored to the factory default settings To reset a customized preset picture mode 1 From the PICTURE MODE EDIT menu use the Arrow buttons to highlight Reset Picture Mode and then press OK The RESET PICTURE MODE window is displayed 2 Use the Left Right Arrow buttons to highlight Reset and press OK 3 Press the EXIT button to exit the menu screens Inputs assigned to a de...

Страница 29: ...w buttons to adjust the value When you are finished press the OK button to save the setting 3 When you are finished press the EXIT button 11 Point White Balance Gain Red Green Blue 5 0 0 0 Adjusting the Color Tuner Settings The Color Tuner settings allow you to adjust the HSB color and 11 point white balance turn color channels off for testing and display color bar flat and ramp test patterns To a...

Страница 30: ...ft Right Arrow buttons until the Ramp Test Pattern menu is displayed 2 Use the Arrow buttons on the remote to highlight Off Use the Left Right Arrow buttons to select the color for the ramp test pattern Selecting a color immediately shows that color ramp or To hide the Ramp Test Pattern use the Left Right Arrow buttons to highlight Off 3 When you are finished press the EXIT button Ramp Test Patter...

Страница 31: ... RCA connector when connected to a home theater audio system Select Variable if you are controlling the volume with the TV s volume controls or select Fixed if an external audio device sound bar or AV receiver will control the volume Equalizer Adjusts the boost or attenuation of different frequencies using either preset or custom settings See Changing the Equalizer Settings on page 31 Delete Audio...

Страница 32: ...enu is displayed 2 Use the Arrow buttons on the remote to highlight Audio and press OK The AUDIO menu is displayed 3 Use the Arrow buttons to highlight Delete Audio Mode and press OK The TV displays To delete the user created custom audio mode select the Delete button 4 Highlight Delete and press OK 5 Press the EXIT button on the remote 32 ...

Страница 33: ...ge whether the TV will turn off If you don t want the TV to turn off when there is no signal change the setting to Off Otherwise select 10 minutes 3 When you have finished setting the auto power off time press the EXIT button on the remote Enabling the Screen Saver If there is no on screen content or static content when audio is streaming the backlight is turned off saving energy You can set the t...

Страница 34: ... Manual Setup and press OK The MANUAL SETUP menu is displayed 2 To change the settings manually use the Arrow buttons on the remote to highlight DHCP and then use the Left Right Arrow buttons to change the setting to Off 3 Use the Arrow and OK buttons to adjust each setting IP Address The IP address assigned to the TV Subnet Mask The subnet mask Default Gateway Your network s default gateway addre...

Страница 35: ...ton on the remote Help VIZIO Network Sleep Timer Input CC ABC Audio Wide Normal Picture Settings Panoramic Wide Zoom 2D 3D Exit ENTER ACCESS POINT NAME Enter your access point name This is used to connect to an access point with a hidden SSID a b c d e f g h i j k l m n o p q r s t u v w x y z 0 1 2 3 4 5 6 7 8 9 com Space Connect Testing Your Network Connection To test your network connection 1 F...

Страница 36: ...m 2D 3D Exit CHANNELS Channels not searched Channel Source Cable Find Channel Partial Channel Search Add Analog Channel Skip Channel Analog Audio Stereo Digital Language English Help VIZIO Network Sleep Timer Input CC ABC Audio Wide Normal Picture Settings Panoramic Wide Zoom 2D 3D Exit Help VIZIO Network Sleep Timer Input CC ABC Audio Wide Normal Picture Settings Panoramic Wide Zoom 2D 3D Exit FI...

Страница 37: ...to view You can remove these channels from the TV s memory with the Skip Channel feature Channels that have been removed with the Skip Channel feature can still be viewed if the channel is entered using the Number Pad If you wish to completely block a channel from being viewed use the parental controls See Locking and Unlocking Channels on page 43 To remove a channel 1 From the CHANNELS menu highl...

Страница 38: ...light Analog Audio and press OK The ANALOG AUDIO menu is displayed 2 Select Stereo SAP secondary audio programming or Mono Press OK 3 Press the EXIT button on the remote Help VIZIO Network Sleep Timer Input CC ABC Audio Wide Normal Picture Settings Panoramic Wide Zoom 2D 3D Exit ANALOG AUDIO Stereo SAP Mono To use the Digital Language feature 1 From the CHANNELS menu highlight Digital Language and...

Страница 39: ...s 1 From the CLOSED CAPTIONS menu use the Arrow buttons to highlight Digital Style and press OK 2 Use the Left Right Arrow buttons on the remote to select Custom The DIGITAL STYLE menu appears as shown 3 Use the Up Down Arrow buttons on the remote to highlight the setting you wish to change then use the Left Right Arrow buttons to change the setting Caption Style Choose As Broadcast to keep defaul...

Страница 40: ...t appears This is the typical As Broadcast mode Opaque background and window in the same color When text appears the entire line fills with color at once In the example below the closed caption text is green the background is black and the window is red CLOSED CAPTIONS SCREEN LAYOUT Text Background CLOSED CAPTION TEXT SAMPLE Window 40 ...

Страница 41: ... OK 4 To use a preset input name a Highlight the Input Port row and press OK b Highlight the input name you want to use and press OK or To enter a custom name a Enter your custom label using the on screen keyboard b Highlight OK and press OK c The Input Name changes to show the custom name that you created 5 When you have finished naming your input press the EXIT button on the remote Help VIZIO Ne...

Страница 42: ...Press the MENU button on the remote The on screen menu is displayed 2 Use the Arrow buttons on the remote to highlight System and press OK The SYSTEM menu is displayed 3 Highlight System Information and press OK 4 Use the Up Down Arrow buttons to scroll through the system information 5 When you are finished reviewing the system information press the EXIT button on the remote Changing the On Screen...

Страница 43: ...played 2 Use the Arrow buttons on the remote to highlight System and press OK The SYSTEM menu is displayed 3 Use the Arrow buttons on the remote to highlight Parental Controls and press OK 4 Enter your parental PIN If you have not set a PIN enter the default 0000 The PARENTAL CONTROLS menu is displayed To set a custom parental passcode see Changing the Parental Control PIN on page 44 Setting the T...

Страница 44: ...u may not want to block the channel completely using a channel lock but you may wish to block certain programs from being viewed When this is the case you can use the TV s Rating Block feature to block content based on its rating For a list of content ratings and their definitions visit www tvguidelines org To block or unblock content by its rating 1 From the PARENTAL CONTROLS menu highlight the c...

Страница 45: ...e TV s screen black bars are added to the left and right of the display image 720p and 720i HD Fills a 720p or 1080p screen 1080p and 1080i HD Fills a 720p or 1080p screen Stretch expands a widescreen image to fill the screen from top to bottom and stretches it half as much from right to left Figures appear tall and thin Standard Definition Not available 720p and 720i HD If you are watching widesc...

Страница 46: ... menu is displayed 5 Use the Arrow buttons on the remote to highlight CEC and press OK The CEC menu is displayed 6 Highligh CEC and press OK Select a setting and then press OK CEC To use CEC you must select Enable Device Discovery To determain if your device is connected and supports CEC select Device Discovery and then press OK 7 Press the EXIT button on the remote Changing the DLNA Name of Your ...

Страница 47: ...s 1 Press the MENU button on the remote The on screen menu is displayed 2 Use the Arrow buttons on the remote to highlight System and press OK The SYSTEM menu is displayed 3 Highlight Reset Admin and press OK The RESET ADMIN menu is displayed 4 Highlight Reset TV to Factory Defaults and press OK Help VIZIO Network Sleep Timer Input CC ABC Audio Wide Normal Picture Settings Panoramic Wide Zoom 2D 3...

Страница 48: ... 3D Exit GUIDED SETUP Channel Setup Network Setup USING THE INFO WINDOW The Info Window can be displayed by pressing the INFO or GUIDE button on the remote Press the INFO or GUIDE button one time to display channel input and display information Press the INFO or GUIDE button two times to display the program title program rating audio information and the start and end times of the program DIGITAL E...

Страница 49: ...ive from the list and press OK 5 Use the Arrow buttons to highlight the type of media to display Music Video or Photo and press OK 6 Use the Arrow buttons to highlight the file you want to display Press OK Music or video files play photos display You can display your photos in fullscreen Select the photo press OK then highlight Fullscreen and press OK Removing the USB Drive from the TV To safely r...

Страница 50: ...ed USB devices Current Folder Playback Controls Use to control audio playback Highlight Play Pause Previous or Next and press OK Toggle Music Photos Toggle between viewing all content and only viewing folders MUSIC PLAYER All Sort by Album Artist Track Fab Apple Dream On January Mix Comp By Oliver 00 04 00 00 04 46 Track Album Artist Duration Starry Summer Summer Mix JCheesy 2 42 1 Downspin JChees...

Страница 51: ... USB devices Current Folder View All or View Folders VIDEO PLAYER Folders File Date Duration Family Vacation California 00 23 43 1 26th Birthday Party 00 38 18 2 Summer 2012 00 41 08 3 Greatest Trip Ever 00 05 32 4 Folder Contents Playlist This area displays the contents of the currently selected folder You can browse among files using the Arrow and OK buttons on the remote Back Button Highlight t...

Страница 52: ...mbnails Folders Adjust Slideshow Settings Start Fullscreen Slideshow PHOTO VIEWER Browse Music View Music Files Back Button Highlight this button and press OK to return to the previous screen Folder Contents This area displays the contents of the currently selected folder You can browse files and folders using the Arrow and OK buttons on the remote Page Information If your USB thumb drive has more...

Страница 53: ...V I A Plus App Dock is where all of your V I A Apps are accessed To launch an App from the Dock 1 Press the V Button on the remote 2 Highlight a V I A Plus App by scrolling left and right using the Left Right Arrow buttons on the remote The highlighted App is in the center of the dock 3 Press the OK button on the remote to launch the App Using the App Launcher Keys Using the App Launcher Keys on t...

Страница 54: ...allows you to add and store Apps The Apps on the first page are displayed in the Dock and Apps on additional pages can be moved to the Dock To open the Fullscreen V I A Plus Apps Window 1 Press the V Button on the remote twice 2 Highlight an App by using the Arrow buttons on the remote 3 Press the OK button on the remote to launch the App 4 To exit from an open App or to close the App Dock press t...

Страница 55: ...atest Displays apps that were most recently added to the library of apps All Apps Displays every app that is available for download Categories Displays apps sorted into categories Spotlight Yahoo Weather News and Finance Movies and TV Photos and Video Sports Music Social Information Fun and Games Shopping and Local TV Settings Displays App software information and development settings Apps with a ...

Страница 56: ...e you want To move the Apps on your My Apps tab 1 Use the Arrow buttons on the remote to highlight the app you wish to move 2 Press and hold the OK button The following options appear Star Note App location appearance and availability subject to change without notice Deleting an App from the My Apps Tab To delete an app from your TV 1 Use the Arrow buttons on the remote to highlight the App you wi...

Страница 57: ... to the desired location and press OK to place the app When you can move the app it appears as shown below Note App location appearance and availability subject to change without notice Cursor showing the location that the app will move to 57 ...

Страница 58: ...chnical Problems Product Updates And More You can also contact our award winning support team at Phone 877 698 4946 TOLL FREE Hours Of Operation Monday Friday 7 am to 11 pm CST Saturday Sunday 9 am to 6 pm CST Live Chat Support Available Do You Have Questions Find Answers At SUPPORT VIZIO COM 58 ...

Страница 59: ...GISTER YOUR VIZIO PRODUCT NOW Customized Support Get assistance quickly with your information on hand News Offers Take advantage of the latest news and special offers from VIZIO Safety Satisfaction Stay up to date with important product updates and notifications Why Register 59 ...

Страница 60: ...on t look right Adjust the Color and Tint settings in the Picture menu See Adjusting the Picture Settings on page 25 Select a pre set picture mode See Adjusting the Picture Settings on page 25 VIZIO recommends selecting Calibrated Check all cables to ensure they are securely attached The buttons on the remote aren t working Ensure you are only pressing one button at a time Point the remote directl...

Страница 61: ...nna the signal strength of the channel may be low Ensure your antenna is connected securely to the TV and move the antenna around the room or close to a window for the best signal When I change input source the display image changes size The TV remembers the viewing mode on each input source If the viewing mode on the new input source differs from the one on the input source you switch from the di...

Страница 62: ...0 1 Pixel Pitch 0 693mm H x 0 693mm V Viewing Angle 176 H 176 V HDMI Inputs 3 Component Video Inputs 1 Composite Inputs 1 Shared with Component RF Antenna Input 1 USB Port 1 Ethernet 1 Audio Outputs RCA Analog Stereo Output Optical Digital OSD Language English French Spanish Ambient Light Sensor Yes D60 D3 Remote Control Model XRT122 Certifications UL cUL FCC ID Class B ICES 003 BETs 7 ATSC ES 7 0...

Страница 63: ...0 000 1 Pixel Pitch 0 8015mm H x 0 8015mm V Viewing Angle 176 H 176 V HDMI Inputs 3 Component Video Inputs 1 Composite Inputs 1 Shared with Component RF Antenna Input 1 USB Port 1 Ethernet 1 Audio Outputs RCA Analog Stereo Output Optical Digital OSD Language English French Spanish Ambient Light Sensor Yes D70 D3 Remote Control Model XRT122 Certifications UL cUL FCC ID Class B ICES 003 BETs 7 ATSC ...

Страница 64: ...pressly approved by the party responsible for compliance with the FCC Rules could void the user s authority to operate this equipment Caution Always use an AC DC power adapter that is properly grounded Use the AC cords listed below for each area Canada Notice for License Exempt Radio Apparatus This device complies with Industry Canada s license exempt RSSs Operation is subject to the following two...

Страница 65: ...always clear all personal information from the product before it is serviced regardless of the servicer VIZIO s Responsibilities If VIZIO determines that a product is covered by this warranty VIZIO will at its option repair or replace it or refund the purchase price to you There will be no charge for parts or labor during the warranty period Replacement parts may be new or recertified at VIZIO s o...

Страница 66: ...the binding arbitration agreement and class action waiver In addition you may pursue a claim in small claims court in your county of residence if in the United States or in Orange County California In such case the provisions of the section titled Binding Arbitration Agreement Class Action Waiver U S Residents will not apply Exclusions and Limitations TO THE GREATEST EXTENT PERMITTED BY APPLICABLE...

Страница 67: ...oaded applications Recovery and reinstallation of user data and downloaded applications is not covered under this warranty In order to protect your personal information VIZIO recommends that you always clear all personal information from the product before it is serviced regardless of the servicer VIZIO s Responsibilities If VIZIO determines that a product is covered by this warranty VIZIO will at...

Страница 68: ...e without notice but any change will not affect your original warranty Check www vizio mx for the most current version INFORMATION EXCLUSIVELY FOR MEXICO To make a warranty claim or to obtain parts components supplies and accessories you may contact the importer of record the warranty service provider or the establishment from whom you purchased the VIZIO product Importer of Record VIZIO Sales Mar...

Страница 69: ...ion described herein are subject to change without notice VIZIO Inc is not responsible for typographical technical or descriptive errors VIZIO the VIZIO logo the V logo and other terms and phrases are trademarks or registered trademarks of VIZIO Inc HDMI HDMI High Definition Multimedia Interface and the HDMI Logo are trademarks or registered trademarks of HDMI Licensing LLC The Bluetooth word mark...

Страница 70: ... 2015 VIZIO INC ALL RIGHTS RESERVED 151217AD US NC ...

Отзывы: