background image

ODYS LCD-TV CINEMA 22” – Pure White 


1

EN 

CONTENTS 

ACCESSORIES .............................................................................................................................................................................. 2


SAFTY INTRODUCTIONS ........................................................................................................................................................... 3


INTRODUCTION........................................................................................................................................................................... 9


CONTROLS................................................................................................................................................................................ 9


CONNECTION OPTION ......................................................................................................................................................... 10


REMOTE CONTROL KEY FUNCTIONS .............................................................................................................................. 11


INSTALLING BATTERIES ..................................................................................................................................................... 13


INSTALLATION........................................................................................................................................................................... 14


STAND INSTALLATION......................................................................................................................................................... 14


QUICK GUIDE......................................................................................................................................................................... 15


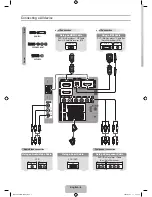
CONNECTIONS & SETUP ......................................................................................................................................................... 17


ANTENNA CONNECTION ..................................................................................................................................................... 17


DVD CONNECTION ............................................................................................................................................................... 19


PC CONNECTION ................................................................................................................................................................... 21


BASIC OPERATION .................................................................................................................................................................... 22


TURNING THE TV ON ........................................................................................................................................................... 22


VOLUME ADJUSTMENT ....................................................................................................................................................... 22


PROGRAM SELECTION ........................................................................................................................................................ 22


SLEEP TIMER .......................................................................................................................................................................... 23


RETURN FUNCTION.............................................................................................................................................................. 23


SOURCE INPUT SWITCH ...................................................................................................................................................... 24


OSD OPERATION........................................................................................................................................................................ 25


HOW TO USE THE OSD (On Screen Display) ....................................................................................................................... 25


VIDEO MENU OPTIONS ........................................................................................................................................................ 25


AUDIO MENU OPTIONS ....................................................................................................................................................... 28


SETUP MENU OPTIONS ........................................................................................................................................................ 30


TIMER MENU OPTIONS ........................................................................................................................................................ 36


FIRST TIME INSTALLATION ................................................................................................................................................ 40


DVB OPERATION ................................................................................................................................................................... 42


TROUBLESHOOTING ................................................................................................................................................................ 46


SPECIFICATIONS........................................................................................................................................................................ 47


WARRANTY CONDITION ......................................................................................................................................................... 48


Содержание Cinema

Страница 1: ...ETUP 17 ANTENNA CONNECTION 17 DVD CONNECTION 19 PC CONNECTION 21 BASIC OPERATION 22 TURNING THE TV ON 22 VOLUME ADJUSTMENT 22 PROGRAM SELECTION 22 SLEEP TIMER 23 RETURN FUNCTION 23 SOURCE INPUT SWITCH...

Страница 2: ...cter Batteries WARR AN TY C AR D R C A c a b l e Audio cable ACCESSORIES Ensure that the following accessories are included with your TV If an accessory is missing please contact the dealer where you...

Страница 3: ...orrect operation This is an ATTENTION symbol If the users ignore this warning there might be damage to the person or to the appliance due to incorrect operation No Operations when Problems Occur When...

Страница 4: ...r Set the TV on Balanced Spot There will be damage if the TV drops or breaks Don t set the TV on uneven oblique or shacking surface Ventilation Don t interfere with its proper ventilation when the TV...

Страница 5: ...model Connect to Earth Connection This appliance shall be connected to a mains socket outlet with a protective earth connection If the provided plug does not fit into your outlet consult an electrici...

Страница 6: ...please clean it with water downright Please treat the used batteries with the observance of the local law Battery Recycling In order to ensure the environmentally friendly disposal of batteries pleas...

Страница 7: ...r scrape the screen with sharp and hard object Clean the screen with a soft cloth moistened in warm water A mild soap may be used if the screen is extremely dirty Dry the screen with a soft cloth afte...

Страница 8: ...facturer Use only with the cart stand tripod bracket or table specified by the manufacturer or sold with the apparatus When a cart is used use caution when moving the cart apparatus combination to avo...

Страница 9: ...Press this button to standby mood 2 MENU Press this button to display the OSD menu When the OSD menu is on press this button to exit the menu 3 AV TV Press this button to select AV source or TV sourc...

Страница 10: ...SCART Connector CVBS input RGB input Audio input based on TV audio and video output 05 S video Input Connect S video output of your AV device 06 YPbPr Video Input Connect the component image output of...

Страница 11: ...ton for 2 digit or 3 digit program 11 LCDMENU LCD menu selection 12 EXIT Exit the OSD menu On screen display 13 SLEEP Sets the sleep timer 14 INPUT Press to display all possible input sources 15 butto...

Страница 12: ...TLE Press the button to select different captions 29 REVEAL button Press this button to reveal the hidden information for some teletext mode 30 SUBPAGE Carry out the function of SUBCODE in the text wh...

Страница 13: ...eries may cause skin irritation If any chemical matter seeps out of the batteries wipe it up immediately using a dry cloth Due to varying storage conditions the battery life for the batteries included...

Страница 14: ...se see the position of the wall brackets bolts as follow picture The actual dimension of the wall brackets bolt should according to the products Detailed installation instructions are available from y...

Страница 15: ...ly when the device is being switched on for the first time 1 Choose the desired option in the menu using the buttons 2 Change the settings using the buttons 3 You can choose among the following settin...

Страница 16: ...ions IMPORTANT BUTTONS MUTE LCD MENU open the menu EXIT leave menu EPG or TELETEXT INPUT choose signal source TV analogue TV cable TV DVB T DVB T ENTER Confirm chosen options open program list ASPECT...

Страница 17: ...CTIONS SETUP To prevent the equipment damage never plug in any power cords until you have finished connecting all equipment ANTENNA CONNECTION For optimum picture quality adjust antenna direction An a...

Страница 18: ...DVB T DTT reception insure that the service is available for your area DVB T radio in particular is very limited and not available in most locations Depending on your region and building structure a...

Страница 19: ...ect the video outputs Y PB PR of the DVD to the YPbPr jacks on the set 2 Connect the audio outputs of the DVD to the Audio Input jack on the set 3 Turn on the DVD player insert a DVD 4 Select YPbPr so...

Страница 20: ...4 Select S VIDEO source with using the SOURCE button on the remote control 5 Refer to the DVD player s manual for operating instructions When connecting with a HDMI cable 1 Connect the HDMI output of...

Страница 21: ...n cable 1 Connect the RGB output of the PC to the PC VGA Input jack on the set 2 Connect the audio outputs of the PC to the PC Audio Input jack on the set 3 Turn on the PC and the set 4 Select PC sour...

Страница 22: ...en you press the button on the remote control once again the power stand by Indicator illuminates red in standby mode If you intend to be away on vacation disconnect the power plug from wall power out...

Страница 23: ...itches the set to standby after the preset time has elapsed Press the SLEEP button on the remote control repeatedly to select the number of minutes The display will appear on the screen followed by cl...

Страница 24: ...NPUT SWITCH 1 Press SOURCE button on the remote control to the source menu The source menu rank as TV SCART S VIDEO YPbPr VGA HDMI DTV 2 Press button on the remote control to select the source in the...

Страница 25: ...r to the interrelated menu operation Note The MENU VOL VOL CH CH buttons on the control panel and the MENU buttons on the remote control are of the same function Here only signed as MENU on the remote...

Страница 26: ...int Sharpness or Colour temperature on the picture menu the picture mode will be changed to Personal automatically NOTE You can press PMODE button on the remote control to select the Picture Mode dire...

Страница 27: ...hen your system is in NTSC Sharpness Press to select the sharpness mode of your TV Available Sharpness Mode Normal Sharp Sharpest Softest Soft Colour temperature Select an optimum colour temperature m...

Страница 28: ...in menu 2 Press the button to select the option that you want to adjust in the SOUND menu 3 Press the button to adjust 4 When you are satisfied with your adjustment press the LCD MENU button to return...

Страница 29: ...o Personal automatically You may select the sound mode directly by pressing SMODE button NOTE You can press SMODE button on the remote control to select the Sound Mode directly Bass Press button and t...

Страница 30: ...source is selected HDMI YPbPr VGA and there are no relative input signal SETUP menu will be unavailable SETUP menu of TV input 1 Press the button to select SETUP in the main menu 2 Press the button to...

Страница 31: ...e you perform Auto Tuning you must choose the country where you are by selecting COUNTRY option Press ENTER key to start 1 Press and to select Auto Tuning in the SETUP menu 2 Press and to perform your...

Страница 32: ...e you are by selecting Country option 1 Press to select Manual tuning in SETUP menu 2 Press to perform your selection the menu of Manual tuning will display on the screen Program The current program n...

Страница 33: ...o input the numbers directly or press and to select the letters 5 Press and to move the cursor 6 Press MENU to return to previous menu or press EXIT to exit AFT Due to weak signals or a wrong antenna...

Страница 34: ...elect the channel in the list which you would like to sort 4 Press to perform your selection 5 Press and to select the location you would like to place the channel 6 Press to perform you selection Aft...

Страница 35: ...NS SETUP menu of HDMI input for setting the HDMI picture position NOTE SETUP menu will be unavailable if there is no HDMI signal input SETUP menu of YPbPr input for setting the YPbPr picture position...

Страница 36: ...t 4 When you are satisfied with your adjustment press the LCD MENU button to return to the previous menu or press the EXIT button to exit the main menu Sleep Timer Select the sleep time to put automat...

Страница 37: ...MENU button to return to the previous menu or press the EXIT button to exit the main menu Language This option allows you to select the language of OSD on screen display by pressing and Such as Engli...

Страница 38: ...to set the child lock You need to enter the PIN code if the Child lock is set on and the default PIN code is empty you can press ENTER button directly to enter NOTE The administrator s password is 471...

Страница 39: ...d PIN code you can not change the PIN code if you entered a wrong PIN code New PIN Code Press 0 9 buttons to enter the PIN code you entered in the New PIN Code menu again to confirm the new PIN code F...

Страница 40: ...ation menu will appear in the display Country Press and button and then use and to select the country Language Press and button and then use and to select the OSD language Delete Analog Program Press...

Страница 41: ...ime installation or select cancel to exit this menu If you cancelled the first time installation it will remind you whether to set the first time installation next time Please allow a few minutes for...

Страница 42: ...utton to open the Channel List then Press to select the channel you want to watch Favorite List options Press FAV button to open the Channel List then Press to select the channel you want to watch NOT...

Страница 43: ...n to adjust 4 When you are satisfied with your adjustment press the LCD MENU button to return to the previous menu or press the EXIT button to exit the main menu Press button to select Manual Search P...

Страница 44: ...The services be found Signal Quality The signal quality of current channel Signal Strength The signal strength of current channel Frequency The frequency of current channel Program Edit This function...

Страница 45: ...me Table 1 Different programs and stations Blue Button Open Time Table 2 One station and different programs Display Button Navigation information s Exit Exit EPG Time Table 1 Red Button 2 hours before...

Страница 46: ...teady Check if the connections with the external AV signal source are correct Correctly set the items in the picture menu Check if the video type input signal is not corresponding to the unit Make sur...

Страница 47: ...ICATIONS TFT LCD Screen Size 22 inches Power AC100 240V 50 60Hz DC 12V 5A Power Consumption 60 W 1W Standby Ambient temperature 5 35 C DESIGN AND SPECIFICATIONS ARE SUBJECT TO CHANGE WITHOUT NOTICE AX...

Страница 48: ...ve been activated do not cause the warranty period to be extended nor do they trigger a new warranty period The warranty period for any replacement parts installed ends with the warranty period for th...

Отзывы: