background image


POWERING ON 

– OFF / POWER SAVE 

TO POWER ON THE CAMERA: 

Press and hold the 


Power

 button for about 2 seconds and release when a beep is heard 

and the LCD screen turns on. 


TO POWER OFF THE CAMERA: 

1. Press and hold the 


Power

 button for about 3 seconds and release. 

2. The LCD displays 

“GOODBYE” and turns off.   


POWER SAVE: 

Your camera also has an auto power off feature that automatically turns off your camera after a 

specific period of time that your camera is left idle. The auto power off settings can be set from 

the 

‘Power Save’ Camera Settings menu. 


USING THE CAMERA 


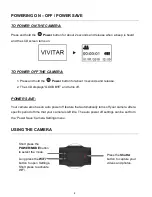
Short press the 

POWER/MODE

 button 

to select the mode. 
 
Long press the 

WiFi


button to open Settings. 
Short press to activate 
WiFi. 

Press the 

Shutter


button to capture your 
videos and photos. 

Содержание DVR 988HD

Страница 1: ...Dual Lens 360 View User Manual 2016 Sakar International Inc All rights reserved Windows and the Windows logo are registered trademarks of Microsoft Corporation All other trademarks are the property o...

Страница 2: ...Your Action Camera 13 POWERING ON YOUR CAMERA 13 CHANGING CAMERA MODE 13 Vivitar Experience Image Manager Software 14 COMPUTER SYSTEM REQUIREMENTS 14 INSTALLING THE SOFTWARE USING THE CD ROM 15 INSTA...

Страница 3: ...ing you need to take high definition digital videos and photos is included with your camera This unique ultraportable camera design is adapted specifically for this camera and can be used to capture s...

Страница 4: ...nsert the Micro SD Memory card before use Please format the Micro SD Memory Card before first use Micro SD Memory cards are not included and need to be purchased separately This camera is a plug and p...

Страница 5: ...1 Wi Fi Action Camera 2 USB Cable 3 Remote Control 4 Bicycle Mount 5 Helmet Mount with 3M Sticker 6 Tripod NOTE Class 6 Class 10 Micro SD Memory Card up to 32GB needed for normal use Micro SD Memory...

Страница 6: ...ton 3 Wi Fi Indicator red 4 Power Indicator red Charging Indicator blue 5 Wi Fi Menu Button 6 Busy Indicator red 7 Shutter OK Button 8 Lens X2 9 Tripod Socket 10 Interface Cover USB TF 11 Speaker 12 M...

Страница 7: ...ut power before use to ensure it is within 5V 0 5A 5V 2 0A While the device is charging it cannot be used to capture images Make sure the camera is powered off when recharging BATTERY INDICATOR Batter...

Страница 8: ...ro SD Card until you hear a slight clicking sound This indicates the memory card has been inserted correctly 4 To remove the card gently press on the edge of the card to release it and pull the card o...

Страница 9: ...lays GOODBYE and turns off POWER SAVE Your camera also has an auto power off feature that automatically turns off your camera after a specific period of time that your camera is left idle The auto pow...

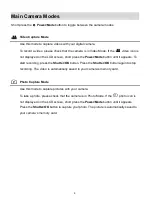
Страница 10: ...it appears To start recording press the Shutter OK button Press the Shutter OK button again to stop recording The video is automatically saved to your camera s memory card Photo Capture Mode Use this...

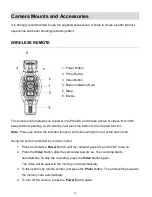
Страница 11: ...utton for the desired function Note Press any button the indicator lamps at both sides will light in red at the same time Using the action camcorder by remote control 1 Press and hold the Power Button...

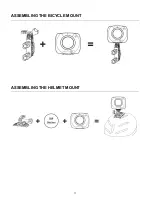
Страница 12: ...11 ASSEMBLING THE BICYCLE MOUNT ASSEMBLING THE HELMET MOUNT...

Страница 13: ...12 USING THE TRIPOD Screw the tripod nut attached into the tripod socket on the bottom of the camera It serves both as a hand held or fixed device Fix to use tripod Hold to use tripod...

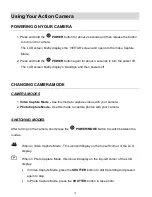
Страница 14: ...MODE CAMERA MODES 1 Video Capture Mode Use this mode to capture videos with your camera 2 Photo Capture Mode Use this mode to capture photos with your camera SWITCHING MODES After turning on the camer...

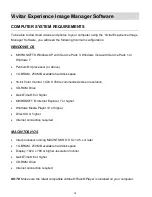
Страница 15: ...RAM 250 MB available hard disk space 16 bit Color monitor 1024 X 768 recommended screen resolution CD ROM Drive QuickTime 6 or higher MICROSOFT Internet Explorer 7 or higher Windows Media Player 10 o...

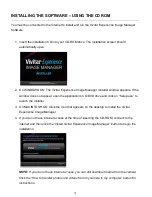
Страница 16: ...the application s CD DVD drive and click on Setup exe to launch the installer 3 On MACINTOSH OS Click the icon that appears on the desktop to install the Vivitar Experience Image Manager 4 If you do...

Страница 17: ...On MACINTOSH OS If needed please follow instructions to install the Adobe Flash Player This requires Internet connection 12 On WINDOWS OS Click the Close button when the installation is complete Clic...

Страница 18: ..._mac pkg 4 Double click on the downloaded application file to install the Vivitar Experience Image Manager Software 5 Follow all instructions 6 Once installation is complete the Vivitar Experience Ima...

Страница 19: ...evice connected then it will be selected automatically 5 Select a location on the computer where to place the new video files 6 Add the new video files to albums if desired 7 Select to remove the medi...

Страница 20: ...screen TRANSFERRING IMAGES MANUALLY FROM THE CAMERA TO THE COMPUTER WINDOWS OS 1 Use the supplied USB cable to connect your camera to your computer s USB port 2 Power on the camera 3 A window appears...

Страница 21: ...ibility with the iPad Apple iPad Camera Connection For models that are compatible with the iPad photos and videos can be imported from your digital camera to your iPad by following either one of the o...

Страница 22: ...memory card will get hot after long term use This is normal It is recommended to backup the important data from your memory card to other media such as soft disk hard disk or CD To ensure image quali...

Страница 23: ...sand particles blow them away gently Do not use cloth to wipe arbitrarily Otherwise it may scratch the surface of video camera or its lens Do not touch the lens surface with fingers If it is required...

Страница 24: ...se including but limited to repair by unauthorized parties tampering modification or accident What to Do When Service Is Required When returning your defective product postage pre paid for service you...

Страница 25: ...r What do I do First ensure that you have in fact taken photos Press the Shutter button to take some sample photos or videos and then try downloading them again If the photos are saved to the SD memor...

Отзывы: