background image

8

 ENGLISH


To avoid scorching food, switch the keep warm 
function  off  right  after  the  «Baking»  program 
ends. 


Attention! Do not move the multicooker dur-
ing operation in the «Yogurt» and «Cottage 
cheese» program.


The «Multicook» program is intended for advanced 
users with sufficient cooking experience.


See  recipes  of  dishes  in  the  recipe  book 
(supplied with the unit). All recipes are to be 
taken as recommendations as the required 
amount and proportions of the ingredients 
may vary depending on local peculiarities of 
the food and altitude above sea level.

USING THE MULTICOOKER

Notes:


Despite the unit keeps the ready dish warm 
for  24  hours,  it  is  not  recommended  to 
leave the cooked food in the bowl for a long 
time, because this may spoil the food.


Do  not  use  the  keep  warm  function  for 
heating up the products.

ATTENTION!


Never leave the operating unit unattended.


To avoid scalding, be careful when opening 
the lid (4). Do not bend over the steam valve 
(6) during operation of the multicooker and 
do not place open parts of your body above 
the bowl (11)! 


During  the  first  operation  of  the  multi-
cooker, some foreign smell from the heat-
ing element can appear. It is normal.


Watch the food during cooking and, if nec-
essary,  stir  the  products  with  the  plastic 
soup ladle (22) or spatula (23). Do not use 
metal  objects  that  can  scratch  the  non-
stick coating of the bowl (11).

Loading  the  products  and  connecting  to  the 
mains

Notes: 


Do  not  use  the  bowl  (11)  for  washing  cereals 
and do not chop products in it, this can dam-
age the non-stick coating;


Make  sure  that  there  are  no  foreign  objects, 
dirt or moisture in the process chamber and on 
the bottom of the bowl (11);


Wipe the outer surface and the bottom of the 
bowl (11) dry before use.


In the middle of the heating element (9) there is 
a temperature sensor (10). Make sure that the 
movement of the sensor is not limited.


Make sure that the level of ingredients and liq-
uids does not exceed the maximal mark «10» 
and  is  not  lower  than  the  minimal  mark  «2». 
The maximal level mark for porridges (except 
rice) is «8».

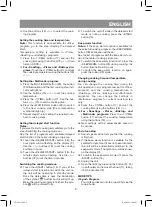
General example of rice loading 
Measure rice with the measuring cup (24), wash it 
and put into a casserole. 
The  water  level  required  for  a  certain  amount  of 
rice  is  given  on  the  scale  inside  the  bowl  (11): 
rice – «RICE», water level in cups – «CUP». Pour 
water up to the corresponding mark.
Example:  After  putting  four  measuring  cups  of 
cereal, pour water till the mark «4 CUP» (4 cups). 
For liquid porridges the recommended proportion 
of rice and water is 1:3.

1. 

Put the food into the bowl (11) following the rec-
ipe (see the recipe book). 

2. 

Install  the  bowl  (11)  in  the  process  chamber. 
Make  sure  that  the  outer  surface  of  the  bowl 
is  clean  and  dry,  and  the  bowl  itself  is  placed 
evenly and is in secure contact with the surface 
of the heating element (9).

3. 

If you steam products, pour water into the bowl 
(11) so that boiling water doesn’t reach the bot-
tom  of  the  basket  (21).  Put  the  food  into  the 
basket (21) and place it on the bowl (11).

4. 

Close the lid (4) until clicking. If you are using 
the «Roasting» program, leave the lid open.

5. 

Insert  the  power  cord  jack  into  the  connector 
(8)  and  the  power  cord  plug  into  the  socket. 
You’ll  hear  a  sound  signal,  the  button  (14) 
«START»  illumination  and  the  symbol 

  will 

be flashing.

Selecting the program from the upper part of 
the menu

6. 

Select  the  food  type  using  the  «+/-»  buttons 
(19): beef 

, lamb 

, pork 

, poultry

seafood 

  or  vegetables 

.  The  selected 

product icon will be flashing.

7. 

Touch the «MENU» button (15) and then use the 
buttons (19) «+/-» to select a cooking program: 
«Slow  cooking» 

  ,  «Boiling» 

,  «Steam 

cooking» 

,  «Roasting» 

  or  «Stewing» 

. The selected program icon will be flashing.

8. 

Go to the chapter «Setting the cooking time».

Selecting a program from the lower part  
of the menu

9. 

Consequently  press  the  button  (15)  «MENU» 
until the «Rice» program icon will start flashing. 

VT-4218.indd   8

11.08.2014   14:40:27

panatex.com.ua

Содержание VT-4218 BK

Страница 1: ...1 VT 4218 BK 3 11 20 29 38 Multi cooker VT 4218 indd 1 11 08 2014 14 40 22...

Страница 2: ...VT 4218 indd 2 11 08 2014 14 40 24...

Страница 3: ...ng connector on the unit body and the socket Use only the supplied power cord do not use the power cord of other units To avoid fire do not use adapters for connect ing the unit to the mains Place the...

Страница 4: ...ne bags used as packaging unattended Attention Do not allow children to play with poly ethylene bags or packaging film Danger of suf focation To avoid damages transport the unit in original package on...

Страница 5: ...ng programs Example If you set the delayed start time 2 00 and duration of the selected program is 50 minutes the unit will stay in standby mode for 1 hour 10 minutes and then the cooking process will...

Страница 6: ...Lamb 0 30 Pork 0 30 Poultry 0 25 Seafood 0 25 Vegetables 0 15 Steam cooking Beef 0 30 0 10 3 00 Lamb 0 30 Pork 0 30 Poultry 0 25 0 10 2 00 Seafood 0 25 Vegetables v 0 15 Roasting temperature from 135...

Страница 7: ...00 Cabbage rolls 0 20 0 15 1 00 Jelly 4 00 1 00 8 00 Baking Temperature from 120 to 140 0 20 0 15 2 00 Heating 0 30 0 15 1 00 Baby food 0 30 0 15 2 00 Canning 0 30 0 15 3 00 Multicook Temperature fro...

Страница 8: ...f the sensor is not limited Make sure that the level of ingredients and liq uids does not exceed the maximal mark 10 and is not lower than the minimal mark 2 The maximal level mark for porridges excep...

Страница 9: ...illumination of the symbol bottom sector will light up When the cooking program is finished the sym bol will be colored fully 21 To switch the unit off while in the delayed start mode or during cookin...

Страница 10: ...hen rinse under run ning water Do not place the bowl 11 in the dishwashing machine Wipe the surface of the heating element only when it is cold with a soft dry cloth do not allow water to get inside t...

Страница 11: ...20 VT 4218 BK 1 2 3 4 5 6 7 8 9 10 11 12 13 14 15 16 17 t 18 19 20 21 22 23 24 25 30 VT 4218 indd 20 11 08 2014 14 40 28...

Страница 12: ...21 8 8 VT 4218 indd 21 11 08 2014 14 40 29...

Страница 13: ...22 11 11 9 11 22 23 20 30 40 4 5 11 21 22 23 24 25 13 4 2 14 14 15 15 16 16 VT 4218 indd 22 11 08 2014 14 40 29...

Страница 14: ...23 2 00 50 1 10 17 t 17 18 24 20 19 19 20 6 20 4 00 1 00 6 00 4 00 4 00 1 00 1 00 1 00 0 30 0 10 5 00 0 30 0 30 VT 4218 indd 23 11 08 2014 14 40 29...

Страница 15: ...0 30 0 10 3 00 0 30 0 30 0 25 0 10 2 00 0 25 0 15 135 150 0 30 0 05 1 00 0 30 0 30 0 25 0 25 0 15 0 30 0 05 4 00 0 30 0 40 0 25 0 25 0 25 0 20 0 20 1 10 1 00 0 30 4 00 0 25 0 15 0 40 VT 4218 indd 24 1...

Страница 16: ...00 5 00 4 00 4 00 12 00 0 05 0 05 0 30 0 10 0 05 0 40 130 150 1 00 0 30 2 00 0 20 0 15 1 00 4 00 1 00 8 00 120 140 0 20 0 15 2 00 0 30 0 15 1 00 0 30 0 15 2 00 0 30 0 15 3 00 30 160 0 30 0 10 6 00 4...

Страница 17: ...26 4 6 11 22 23 11 11 11 11 9 10 10 2 8 24 11 RICE CUP 4 CUP 4 1 3 1 11 2 11 9 3 11 21 21 11 4 4 5 8 14 6 19 7 15 19 8 9 15 10 19 VT 4218 indd 26 11 08 2014 14 40 30...

Страница 18: ...27 11 17 t 19 00 00 12 17 t 19 13 20 20 14 19 15 17 t 19 16 20 17 2 4 18 16 3 19 19 16 19 20 14 21 14 18 22 18 23 18 24 17 t 19 25 17 t 19 26 5 27 28 3 b 29 14 VT 4218 indd 27 11 08 2014 14 40 30...

Страница 19: ...28 30 4 5 11 12 25 25 11 11 6 6 1 4 11 1 1 1 1 1 1 6 6 1 220 240 50 60 750 5 3 38 7 1070 VT 4218 indd 28 11 08 2014 14 40 30...

Страница 20: ...38 VT 4218 BK 1 2 3 4 5 6 7 8 9 10 11 12 13 14 15 16 17 t 18 19 20 21 22 23 24 25 30 VT 4218 indd 38 11 08 2014 14 40 31...

Страница 21: ...39 8 8 VT 4218 indd 39 11 08 2014 14 40 31...

Страница 22: ...40 11 11 9 11 22 23 20 30 40 4 5 11 21 22 23 24 25 13 4 2 14 14 15 15 16 16 2 00 50 1 10 17 t 17 VT 4218 indd 40 11 08 2014 14 40 32...

Страница 23: ...41 18 24 20 19 19 20 6 20 4 00 1 00 6 00 4 00 4 00 1 00 1 00 1 00 0 30 0 10 5 00 0 30 0 30 0 25 0 25 0 15 VT 4218 indd 41 11 08 2014 14 40 32...

Страница 24: ...0 10 2 00 0 25 0 15 135 150 0 30 0 05 1 00 0 30 0 30 0 25 0 25 0 15 0 30 0 05 4 00 0 30 0 40 0 25 0 25 0 25 0 20 0 20 1 10 1 00 0 30 4 00 0 25 0 15 0 40 0 30 0 20 2 00 0 30 0 20 4 00 2 00 1 00 5 00 VT...

Страница 25: ...0 05 0 05 0 30 0 10 0 050 40 130 150 1 00 0 30 2 00 0 20 0 15 1 00 4 00 1 00 8 00 120 140 0 20 0 15 2 00 0 30 0 15 1 00 0 30 0 15 2 00 0 30 0 15 3 00 30 160 0 30 0 10 6 00 4 24 4 6 11 VT 4218 indd 43...

Страница 26: ...44 22 23 11 11 11 11 9 10 10 2 8 24 11 RICE CUP 4 CUP 4 1 3 1 11 2 11 9 3 11 21 21 11 4 4 5 8 14 6 19 7 15 19 8 9 15 10 19 11 17 t 19 00 00 12 17 t 19 13 20 20 VT 4218 indd 44 11 08 2014 14 40 33...

Страница 27: ...45 14 19 15 17 t 19 16 20 17 2 4 18 16 3 19 19 16 19 20 14 21 14 18 I 22 18 I 23 18 24 17 t 19 25 17 t 19 26 5 27 28 3 b 29 14 30 4 5 11 12 25 VT 4218 indd 45 11 08 2014 14 40 33...

Страница 28: ...46 25 11 11 6 6 1 4 11 1 1 1 1 1 1 6 6 1 220 240 50 60 750 5 3 2004 108 2006 95 VT 4218 indd 46 11 08 2014 14 40 33...

Страница 29: ...2014 GOLDER ELECTRONICS LLC 2014 VT 4218 indd 48 11 08 2014 14 40 33...

Страница 30: ...Vitek 4218 http www panatex com ua...

Отзывы: