background image

13


CAUTION

Rotating Blades Can Cause Damage.

Lids and tampers are not interchangeable between 
different container styles, types, and sizes. Use the  
tamper that was supplied with your machine.

How to Determine the Tamper that Can Be Used with 

Your Container

Each type of tamper is designed to be used safely and effectively with a particular 
container. 

If a tamper came with your container, it is the correct tamper for the 

container.


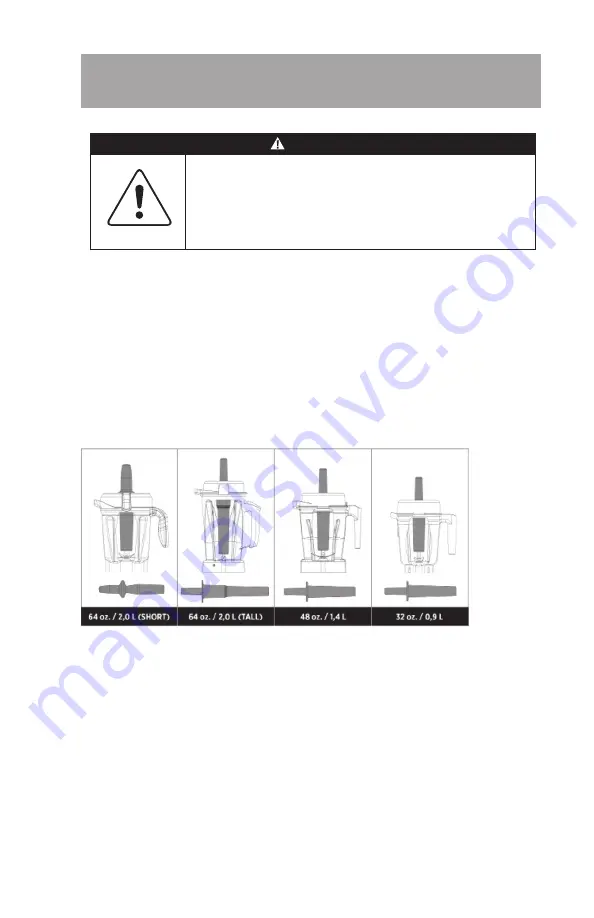
If a tamper did not come with your container, or you want to determine if a tamper 
that you already have can be used with your new container, please compare 
your container with the containers and matching tampers to the illustration 
below. Before using the tamper during the blending process, verify that it is the  
correct tamper. 

• 

64 oz. Short Containers use Tamper 016041 that is approximately 


9-¾ inches long.

• 

64 oz. Tall Containers uses Tamper 000760 that is approximately 


12-½ inches long.

• 

32 oz. and 48 oz. Containers use Tamper 015033 that is approximately  
11 inches long.

To verify that you are using the correct tamper, place the lid on an empty container, 
remove the lid plug and insert the tamper. If it is the correct tamper it should 
easily fit into the opening but will not come in contact with the blades no matter 
how you move the tamper inside the container. IF THE TAMPER TOUCHES THE 
BLADES AT ANY ANGLE - DO NOT USE THE TAMPER WITH YOUR CONTAINER.
If you do not have the correct tamper for your container, call Vitamix Customer 
services at 1.800.848.2649 or 1.440.235.4840 to order a new tamper.

TAMPER

Содержание TURBOBLEND TWO SPEED

Страница 1: ...Owner s Manual Read and save these instructions Vita Mix Corporation 8615 Usher Road Cleveland OH 44138 2103 U S A 1 800 848 2649 1 440 235 4840 vitamix com TURBOBLEND TWO SPEED ...

Страница 2: ...tion 4 Important safeguards 5 Parts and Features 8 Control Panel 11 About the Blades 12 Tamper 13 How to Use the Tamper 14 Hints for Setting Speeds 15 Operating Instructions 16 Care and Cleaning 18 Troubleshooting 20 Warranty 21 Specifications 24 CONTENTS ...

Страница 3: ...aterial found in this booklet before getting started Set your Vitamix machine on a dry level surface Make sure that the power switch is set to Off and that the machine is plugged into a grounded electrical outlet Then follow the cleaning instructions on page 19 to prepare your machine for use Always clean your machine before the first use LET S GET STARTED ...

Страница 4: ...rnational Distributor or Dealer in countries other than the United States Canada United Kingdom or Ireland your product is warranted through the International Distributor or Dealer and need not be registered with the Vita Mix Corporation Your machine is not yet registered with Vitamix if you 1 Purchased from a Dealer in the United States Canada United Kingdom or Ireland 2 Purchased from a military...

Страница 5: ... or mechanical adjustment If purchased outside the U S A or Canada contact your local Vitamix dealer 7 Alteration or modification of any part of the blender base or container including the use of any part or parts that are not genuine authorized Vitamix parts may cause fire electric shock or injury 8 The use of attachments not expressly authorized or sold by Vitamix for use with this blender inclu...

Страница 6: ...ign objects such as spoons forks knives or the lid plug in the container as this will damage the blades and other components when starting the machine and may cause injury 16 Never attempt to operate with damaged blades 17 Always operate blender with lid and lid plug firmly in place The lid plug should be removed only when adding ingredients and when using the tamper 18 When blending hot liquids o...

Страница 7: ...Y AND CREATE THE RISK OF SERIOUS INJURY IMPORTANT SAFEGUARDS WARNING Electrical Shock Hazard Use grounded outlet only DO NOT remove ground DO NOT use an adapter DO NOT use an extension cord Always unplug before cleaning the motor base or when not in use Do not put the motor base in water or other liquid Failure to follow instructions can cause death or electrical shock ...

Страница 8: ...8 PARTS AND FEATURES Lid Plug 2 Part Lid Lid Flaps Container Blade Assembly Retainer Nut Centering Pad Drive Socket Control Panel Motor Base Feet Tamper High Low Switch On Off Switch ...

Страница 9: ...r remove Lid Plug Insert through the lid and secure by turning clockwise Remove the lid plug to use the tamper or add ingredients Tamper While the machine is running and only through the lid plug opening use the tamper to press ingredients into the blades Refer to How to Use the Tamper on page 11 To Lock the Lid in Place Position lid on container with lid flaps midway between the spout and the han...

Страница 10: ...nplug the machine remove the container and blow air into the center section of the bottom with a hair dryer on the cool setting Power Cord Your machine is equipped with a long power cord Store the unused portion neatly underneath Bottom View Cord Wrap Plastic cord retainers hold the cord securely There is no need to unscrew the cord retainers to let out more cord They are flexible and return to po...

Страница 11: ...position make sure that the High Low Switch is set to Low Do not start your machine on High setting Push the On Off Switch up to turn On Push down to turn Off O 2 High Low Switch High is the fastest speed available Switch to Low to for a lower speed 1 2 Low TURBOBLEND TWO SPEED ...

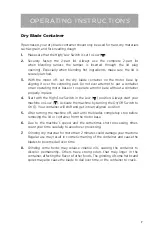
Страница 12: ...ials such as grains cereal and coffee and are also used for kneading bread dough The dry blades can NOT process liquids efficiently If you grind herbs on a regular basis you may wish to purchase a separate dry blade container and replace blades as needed D W D W The Vitamix machine comes standard with the wet blade container The blade is identified by a W for wet This blade is used for most of you...

Страница 13: ...ow Before using the tamper during the blending process verify that it is the correct tamper 64 oz Short Containers use Tamper 016041 that is approximately 9 inches long 64 oz Tall Containers uses Tamper 000760 that is approximately 12 inches long 32 oz and 48 oz Containers use Tamper 015033 that is approximately 11 inches long To verify that you are using the correct tamper place the lid on an emp...

Страница 14: ...ntainer should not be more than two thirds full when the tamper is used during blending To avoid overheating during blending DO NOT use the tamper for more than 30 consecutive seconds If the food does not circulate the machine may have trapped an air bubble Carefully remove the lid plug while making sure the lid stays firmly in place Release the air bubble by inserting the tamper through the lid p...

Страница 15: ... times will generally be less than one minute most take less than 30 seconds High speed provides the best quality of refinement breaking down ice frozen fruit whole fruits or vegetables and grains to a smooth lump free consistency TIP Blending too long at low speed will overheat the machine and cause the Automatic Overload Protection to turn the machine off Use the High speed as often as possible ...

Страница 16: ... Do not ever attempt to put a container on an operating motor base or to operate a motor base without a container properly in place Start with the High Low Switch in the Low position Always start your machine on Low Activate the machine by turning the On Off Switch to On Your container will shift and get into an aligned position 6 Take proper care when handling and processing hot ingredients and m...

Страница 17: ... Switch in the Low position Always start your machine on Low Activate the machine by turning the On Off Switch to On Your container will shift and get into an aligned position 5 After turning the machine off wait until the blades completely stop before removing the lid or container from the motor base 6 Due to the machine s speed and the sometimes short processing times count your time carefully t...

Страница 18: ... Cleaning instructions above 2 Fill the container half full with water and 1 teaspoons of liquid bleach 3 Snap or push the complete 2 Part lid into locked position 4 Start with the High Low Switch in the Low position Activate the machine by switching the On Off Switch to On The machine will start on Low then switch the High Low Switch to High 5 Run the machine on High for 30 to 60 seconds 6 Turn o...

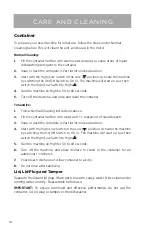
Страница 19: ...e removed for more thorough cleaning 4 Thoroughly clean the switches so they work freely They may become sticky from use Moisten a cotton swab with a household degreaser or cleaner and clean the grooves around the switches Immediately dry all surfaces 5 Polish with a soft cloth CARE AND CLEANING WARNING Electrical Shock Hazard Disconnect power before cleaning machine Failure to follow instructions...

Страница 20: ...oading your Vitamix machine Process only Vitamix recipes when learning to use the machine Do not process recipes at lower speeds than recommended Do not process recipes at higher speeds than recommended Do not process recipes longer than recommended Use your tamper to process thicker mixtures and keep ingredients moving around and through the blades Retainer Nut Loosening In the event that the ret...

Страница 21: ...ct in material or workmanship or as a result of normal wear and tear from ordinary household use Vitamix will within 30 days of receipt of the returned product repair the failed Machine or component part of the Machine free of charge If in Vitamix s sole discretion the failed Machine or component part of the Machine cannot be repaired Vitamix will elect to either A replace the Machine free of char...

Страница 22: ...authorized by Vitamix 6 HOW TO OBTAIN RETURN AUTHORIZATION UNDER THIS WARRANTY In the event that the Machine or any component part of the Machine needs service or repair please call Vitamix Customer Service at 1 800 848 2649 or 1 440 235 4840 You will be asked to provide a date of purchase and proof of purchase for any product that has not been registered with Vitamix For product subject to this W...

Страница 23: ...CTIONS If a machine was purchased within the U S A or Canada but is currently outside the U S A or Canada all shipping and resulting taxes and duties are at the owner s expense Call 1 440 235 4840 or email service vitamix com for more details ...

Страница 24: ... be reproduced or transmitted in any form or by any means or stored in a database or retrieval system without the written permission of the Vita Mix Corporation 104779 Rev A TurboBlend Two Speed When applicable Printed in the U S A SPECIFICATIONS Motor 2 peak output horsepower motor Electrical 120 V 50 60 Hz 11 5 A Uses a U S A three prong grounded cord Dimensions Height 20 3 in 51 4 cm Width 8 8 ...

Страница 25: ...Manuel d utilisation Veuillez lire et conserver ces instructions Vita MixMD Corporation 8615 Usher Road Cleveland OH 44138 2103 É U 1 800 848 2649 1 440 235 4840 vitamix com TURBOBLENDMD À DEUX VITESSES ...

Страница 26: ...ent 28 Consignes de sécurité importantes 29 Pièces et caractéristiques 32 Tableau de commande 35 À propos des couteaux 36 Pilon 37 Comment utiliser le pilon 38 Astuces pour le réglage des vitesses 39 Mode d emploi 40 Entretien et nettoyage 42 Dépannage 44 Garantie 45 Caractéristiques techniques 48 ...

Страница 27: ...vant dans ce guide avant de commencer Placez votre appareil Vitamix sur une surface plane et sèche Assurez vous que l interrupteur d alimentation est réglé en position Arrêt et que l appareil est branché dans une prise électrique mise à la terre Ensuite suivez les instructions de nettoyage à la page 43 pour préparer votre appareil à sa première utilisation Nettoyez toujours l appareil avant la pre...

Страница 28: ...rnational provenant d un pays autre que le Canada les États Unis le Royaume Uni ou l Irlande votre appareil est garanti par le distributeur ou le détaillant international et n a pas besoin d être enregistré auprès de Vita MixMD Corporation Votre appareil n est pas encore enregistré auprès de Vitamix si 1 Vous l avez acheté d un détaillant au Canada aux États Unis au Royaume Uni ou en Irlande 2 Vou...

Страница 29: ... ou mécanique est requis Si l achat a eu lieu dans un pays autre que le Canada ou les É U communiquez avec le détaillant Vitamix de votre région 7 L altération ou la modification de toute partie du socle ou du récipient du mélangeur y compris l utilisation de toute pièce qui n est pas une pièce d origine autorisée par Vitamix peut provoquer un incendie une décharge électrique ou des blessures 8 L ...

Страница 30: ...t car cela peut endommager les couteaux et autres composants lors du démarrage de l appareil et causer des blessures 16 N essayez jamais d utiliser l appareil lorsque les couteaux sont endommagés 17 Faites toujours fonctionner le mélangeur avec le couvercle et le bouchon du couvercle fermement en place Le bouchon du couvercle ne doit être retiré que pour ajouter des ingrédients et pour utiliser le...

Страница 31: ...NSIGNES DE SÉCURITÉ IMPORTANTES AVERTISSEMENT Risque de décharge électrique Utilisez seulement une prise mise à la terre N ENLEVEZ PAS la broche de mise à la terre N UTILISEZ PAS un adaptateur N UTILISEZ PAS une rallonge Débranchez toujours l appareil avant de nettoyer le socle moteur ou lorsqu il n est pas utilisé Ne placez pas le socle moteur dans l eau ou dans un autre liquide Le non respect de...

Страница 32: ...ouvercle Couvercle en 2 parties Rabats du couvercle Récipient Assemblage de couteaux Écrou de retenue Pièce de centrage Prise d entraînement Tableau de commande Socle moteur Pieds Pilon Interrupteur vitesse Haute Basse Interrupteur Marche Arrêt ...

Страница 33: ... tournant vers la droite Retirez le bouchon du couvercle pour utiliser le pilon ou ajouter des ingrédients Pilon lorsque l appareil fonctionne utilisez le pilon pour pousser les ingrédients vers les couteaux seulement par l ouverture du bouchon du couvercle Consultez Comment utilisez le pilon à la à la page 35 Pour verrouiller le couvercle en place placez le couvercle sur le récipient en vous assu...

Страница 34: ...irez le récipient et soufflez de l air dans la partie centrale du fond à l aide un sèche cheveux réglé pour produire un courant d air froid Cordon d alimentation votre appareil est muni d un long cordon d alimentation Rangez soigneusement la partie inutilisée sous l appareil Vue de dessous Enrouleur de cordon Des dispositifs de retenue de cordon en plastique retiennent le cordon Il n est pas néces...

Страница 35: ...pas votre appareil en marche lorsque l interrupteur est à la vitesse Haute Poussez l interrupteur Marche Arrêt vers le haut pour mettre l appareil en marche Abaissez le pour le mettre en position Arrêt O 2 Interrupteur vitesse Haute Basse la position Haute permet d obtenir la vitesse la plus rapide disponible La position Basse vous permet d obtenir une vitesse plus basse 1 2 Low TURBOBLEND TWO SPE...

Страница 36: ...et le café et sont également utilisés pour pétrir la pâte à pain Les couteaux secs NE peuvent PAS mélanger efficacement les liquides Si vous broyez des herbes régulièrement vous pourriez songer à acheter un récipient pour couteau sec séparé et remplacer le couteau si nécessaire D W D W L appareil Vitamix de base est vendu avec le récipient pour couteau humide Le couteau est identifié par un W prem...

Страница 37: ... assurez vous qu il s agit bel et bien du pilon approprié Les petits récipients de 64 oz utilisent le pilon 016041 qui a une longueur d environ 9 pouces Les grands récipients de 64 oz utilisent le pilon 000760 qui a une longueur d environ 12 pouces Les récipients de 32 oz et 48 oz utilisent le pilon 015033 qui a une longueur d environ 11 pouces Pour vérifier si vous utilisez le pilon approprié pla...

Страница 38: ...aux deux tiers lorsque le pilon est utilisé pendant le mélange Pour éviter de faire surchauffer l appareil pendant le mélange n utilisez le pilon pendant plus de 30 secondes consécutives Si les aliments ne circulent pas il se peut qu une bulle d air soit emprisonnée dans l appareil Retirez avec soin le bouchon du couvercle tout en vous assurant que le couvercle reste bien en place Faites sortir la...

Страница 39: ...mélange seront généralement de moins d une minute la plupart seront de moins de 30 secondes La vitesse Haute offre la meilleure qualité de raffinement permettant ainsi de concasser la glace les fruits congelés les fruits et légumes entiers et les grains pour obtenir une consistance lisse sans grumeaux CONSEIL le fait de mélanger trop longtemps à un réglage de vitesse trop bas peut faire surchauffe...

Страница 40: ... ni de mettre en marche le socle moteur lorsque le récipient n est pas correctement en place Commencez avec l interrupteur vitesse Haute Basse en position Basse Démarrez toujours votre appareil à la vitesse Basse Activez l appareil en mettant l interrupteur Marche Arrêt à la position Marche Votre récipient se repositionnera pour se centrer correctement 6 Prenez les précautions nécessaires lorsque ...

Страница 41: ...l interrupteur vitesse Haute Basse en position Basse Démarrez toujours l appareil à la vitesse Basse Activez l appareil en mettant l interrupteur Marche Arrêt à la position Marche Votre récipient se repositionnera pour être aligné correctement 5 Après l arrêt de l appareil attendez que le couteau s arrête complètement avant de retirer le couvercle ou le récipient du socle moteur 6 En raison de la ...

Страница 42: ...tié d eau et ajouter 1 1 2 cuillère à café d eau de Javel 3 Emboîtez ou enfoncez le couvercle en 2 parties au complet pour qu il soit en position verrouillée 4 Commencez avec l interrupteur vitesse Haute Basse en position Basse Activez l appareil en mettant l interrupteur Marche Arrêt en position Marche L appareil démarrera en position Basse puis mettez l interrupteur vitesse Haute Basse en positi...

Страница 43: ...sementlesinterrupteursafinqu ilsbougentsansobstruction Ils peuvent devenir collants à force d être utilisés Imbibez un coton tige avec un produit dégraissant ou un nettoyant domestique et nettoyez les rainures autour des interrupteurs Séchez immédiatement toutes les surfaces 5 Polissez le socle moteur à l aide d un chiffon doux ENTRETIEN ET NETTOYAGE AVERTISSEMENT Risque de décharge électrique Cou...

Страница 44: ...tamix Pour apprendre à utiliser l appareil ne préparez que des recettes Vitamix Ne réduisez pas les vitesses de préparation recommandées pour les recettes Ne dépassez pas les vitesses de préparation recommandées pour les recettes Ne dépassez pas les temps de mélange recommandés pour les recettes Utilisez votre pilon pour préparer des mélanges plus épais et gardez les ingrédients en mouvement autou...

Страница 45: ...0 jours suivant la réception du produit retourné à la réparation de l appareil ou du composant défaillant sans frais Si à la seule discrétion de Vitamix l appareil ou le composant défaillant ne peut pas être réparé Vitamix décidera soit A de remplacer l appareil sans frais ou B de rembourser le prix d achat total au propriétaire à moins que Vitamix reçoive un préavis écrit indiquant la préférence ...

Страница 46: ... ou un composant de l appareil doit être entretenu ou réparé veuillez communiquer avec le service à la clientèle de Vitamix en composant le 1 800 848 2649 ou le 1 440 235 4840 Si votre appareil n a pas été enregistré auprès de Vitamix vous devrez fournir une date d achat et une preuve d achat Si le produit est couvert par la présente garantie vous recevrez un numéro d autorisation de retour les in...

Страница 47: ...nis mais qu il se trouve actuellement à l extérieur du Canada ou des États Unis l expédition ainsi que les taxes et les droits d importation en découlant sont à la charge du propriétaire Veuillez appeler au 1 440 235 4840 ou envoyer un courriel à l adresse service vitamix com pour obtenir plus de détails ...

Страница 48: ...e sous quelque forme ou par quelque moyen ou stockée dans une base de données ou un système d extraction sans la permission écrite de Vita MixMD Corporation 104779 Rev A TurboBlendMD à deux vitesses Le cas échéant Imprimé aux États Unis CARACTÉRISTIQUES TECHNIQUES Moteur Moteur de puissance maximale de 2 hp Électrique 120 V 50 60 Hz 11 5 A Muni d un cordon à trois broches mis à la terre pour les É...

Отзывы: