background image

0150-0202G 

74 

Vista Columbus Triplex 

 RS232 

Event Generation/Text Insertion Protocol  


8.1  Message Structure 

Delimiter 

Class 

Command 

Data Length 

Data 

The 

Delimiter

 byte signals the start of a new message, and has a value of 0xFF. 

The 

Class

 and 

Command

 fields identify the type of message. 

The 

Data Length

 is a 16-bit value indicating the number of bytes in the 

Data

 portion of 

the message.  Data Length is sent using Intel byte ordering (Little Endian). 

The 

Check Sum

 byte is the result of XORing all the bytes in the message. 

Check Sum 

8.2  Message Type 

0xFF 

0x14 

0x40 

Data Length[0] 

Data Length[1] 

Camera 

Event 

String[0] 

String[1] 

String[n-1] 

One message is currently supported to store text along with recorded video. 

CMD_NEW_ADD_TEXT 

Class

 byte is 0x14. 

Command

 byte is 0x40. 

Data Length 

is the number of data bytes in the message (from 2 to 502). 

Camera

 byte indicates the camera associated with the text.  The valid range is from 

0 to 15. 

Alarm/Event

 byte usage is described in the following section. 

String

 field contains text characters.  The string can be from 0 to 500 characters in 

length. 

Check Sum 

8.3  Alarm/Event Field 

MSB 7 


LSB 0 

The two least significant bits are currently used for the 
event.  Bits 2 and 3 are used for Alarm  

0  0  0 

A  A  E 

A – Alarm/Event 0x00 

If both the start and end bits are clear, the associated text will be stored with the next recorded field for 
that camera.  That cameras record rate will not be changed. 

B – Alarm/Event 0x01 

If only the start bit is set, the associated text will be stored with the next recorded field for that camera.  

This will cause the selected camera, as well as any pre-event fields to be recorded at the Alarm or 
Event Record Rate. 

C – Alarm/Event 0x02 

If only the end bit is set, the associated text will be stored with the next recorded field for that camera.  

This will start the post-event timer** after which, the selected camera will resume recording at the 
normal record rate*. 

Содержание Columbus Triplex

Страница 1: ...1 9 2 10 3 11 4 12 5 13 6 14 7 15 8 16 R F M E N T E R n B A VC16Te V Vi is st ta a C Co ol lu um mb bu us s T Tr ri ip pl le ex x Digital Video Multiplexer Recorder User Manual...

Страница 2: ...y be illegal to dispose of this battery improperly under local state or federal laws Check with your local waste management officials for disposal and recycling options CAUTION Electrostatic Sensitive...

Страница 3: ...g 16 2 4 Playback 17 2 5 Recording 19 2 6 Display Options 20 2 7 Active Cameos 20 2 8 Sequencing 21 2 9 On screen Indicators 22 2 10 Triplex Mode 23 3 Menu System Overview 26 3 1 Menu Notation In This...

Страница 4: ...Disk Analysis Screen 61 5 2 Quick Archive to CD 61 5 3 Search Filters 62 5 4 Retail Search 63 5 5 Search Results 65 6 Web Interface 67 6 1 WaveBrowser Overview and Controls 68 6 2 Vista Columbus Tripl...

Страница 5: ...urpose is to furnish video multiplexing and recording Although the unit has alarm handling and motion detection functions they are considered secondary features This unit should not be the only alarm...

Страница 6: ...he administrator s secure files Default Passwords Four Channel Units Password Type Access Level Function Changeable by user Default Password Operator Operator Provides access to the Operator menu Yes...

Страница 7: ...box Package Contents The Columbus Triplex unit The Alarm Interface Circuit Board Accessory PCB Audio equipped models only The User Manual A WaveReader Software CD The WaveReader Software Manual The A...

Страница 8: ...RS 485 2 RS 232 2 1 2 3 4 5 6 7 8 9 10 11 12 13 14 15 16 12V DC 1 2 3 4 5 6 7 8 9 10 11 12 13 14 15 IEEE 1394 1 Camera Inputs BNC connector looping Auto Terminating 2 Composite Monitor A Output Compo...

Страница 9: ...13 for information about disabling unused camera jacks in the menu system Composite Monitor Output Monitor A Only When connecting directly from the Columbus Triplex to the monitor select the 75 Ohm i...

Страница 10: ...nputs 10 channel units VC10Te have 10 active alarm inputs Alarm Input An alarm condition can be activated by devices such as pressure pads passive infrared detectors door switches or other similar dev...

Страница 11: ...3 Ground Pin 4 Audio In Pin 5 Ground Pin 6 Not Used Pin 7 Ground Pin 8 Not Used Pin 9 Ground GND Ground 1 2 3 4 5 6 7 8 9 GND Accessory PCB RS485 Connector Wire Type 24 AWG twisted pair with shield 2...

Страница 12: ...SI 2 Gender on unit Female Compatible devices VAIDe RAID CD R CD RW SCSI ID 0 The unit is equipped with a SCSI port for connecting external archive devices The unit only supports a single SCSI device...

Страница 13: ...r Event Generation ASCII Text Insertion and proprietary dome control RJ 45 Pin Configuration For RS232 Port 2 Pin Use Pin Use 1 Ground 5 TXD 2 Reserved 6 Not Connected 3 Not Connected 7 Ground 4 RXD 8...

Страница 14: ...l begin its power up procedure The unit will begin by displaying the software version on Monitor A then the unit will begin recording automatically Check Video Input Quality Check the picture quality...

Страница 15: ...th Camera Buttons to run macros Also displays help screens in certain modes 5 Camera Selection Number Buttons Camera numbers 1 through 16 1 through 10 or 1 through 4 6 Zoom Button Provides a 2X digita...

Страница 16: ...the Sequence button to begin full screen sequencing The sequence list and dwell times are programmable For detailed information about programming the sequence list see section 2 8 Sequence Button Zoom...

Страница 17: ...urn to Play Forward operations press the Play Forward button The left and right arrows on the Arrow Button will also change the playback direction when in play mode Play Forward Button Reverse Play To...

Страница 18: ...of the cameras the remaining cameras can be sequenced in the bottom right cameo While in a multiscreen display press the Sequence button to begin sequencing For detailed information about sequencing s...

Страница 19: ...h for data on the internal hard disk or an external archive device The user may search the data for previous recording sessions text insertion or alarm conditions Because the search interface is so dy...

Страница 20: ...nd PIP The camera assignments for each multiscreen is retained in non volatile memory for both Live and Playback multiscreen mode on Monitor A as well as Live multiscreen mode on Monitor B PIP Use the...

Страница 21: ...fault sequence list displays each camera in numerical order Sequence Button Dwell Time The dwell time is the amount of time each camera is displayed on screen before advancing to the next camera The M...

Страница 22: ...e displayed on either the upper or lower corner of the left hand side of the screen The camera title can be changed in the menu system see section 3 13 The user can change display position and Colour...

Страница 23: ...reen All the above including Image Quality Setting High Medium Standard ATM POS Text Display Pressing the Camera Number a third time displays an ATM POS text display This feature can be used during li...

Страница 24: ...Button Rewind During playback press the Down Arrow button The unit will display images in reverse at a higher than normal rate There are 4 Rewind rates Repeated pressing of the Left Arrow button will...

Страница 25: ...gister ASCII text Number Button Sequenced Full Screen Display While in a Full Screen display press the Sequence button to begin full screen sequencing The sequence list and dwell times are programmabl...

Страница 26: ...he Menu System M Enter the menu system by pressing the Menu button A Password Box will appear on the primary monitor Enter either the Operator Password Providing limited access to the menu system Only...

Страница 27: ...ton to select the highlighted menu item Exiting Menus Press the Menu button to exit a menu From the menu bar press the Menu button to exit the menu system completely Main Time Date Record Alarms Macro...

Страница 28: ...navigate 4 Press the Enter button to confirm the selection and exit the edit mode 5 To save the changes and exit the menu Use the Up Down Arrow buttons to select OK then press the Enter button 6 To ex...

Страница 29: ...ving macros USA DST starts at 02 00 on the first Sunday in April DST ends at 02 00 on the last Sunday in October Includes United States except Hawaii American Samoa Guam Puerto Rico Virgin Islands par...

Страница 30: ...ing Region Time Zone must be set correctly Update Interval NTP Primary Server 3 37 8 26 NTP Backup Server 0 0 0 0 DISABLE CANCEL OK 3 9 Record Use this menu to Specify a schedule for recording Specify...

Страница 31: ...ate and change the values 4 To save changes and exit the menu Select OK then press the Enter button 5 Exit the menu without making changes Press the Menu button or select CANCEL and then press the Ent...

Страница 32: ...der normal conditions when there are no alarms events or activity present Record rates are measured in both Pictures Per Second pps and Seconds Per Picture spp The maximum record rate per camera is in...

Страница 33: ...2 0 29 pps 3 5 spp Camera 3 0 34 pps 2 9 spp Camera 4 0 57 pps 1 8 spp Camera 15 0 40 pps 2 5 spp Camera 16 0 40 pps 2 5 spp 0 40 pps 2 5 spp CANCEL OK 125 days 8 h EVENT 10 days 7 h Total Time 4 Esti...

Страница 34: ...row Button to navigate and change the values 2 To save changes and exit the menu Select OK and then press the Enter button 3 To exit the menu without making changes Press the Menu button or select CAN...

Страница 35: ...nk to Event 2 0 0 Interleaved Yes CANCEL OK Pre Alarm Duration The unit will record up to 5 seconds of data ahead of the alarm trigger at the Alarm Record Rate Select from 0 to 5 seconds Alarm Record...

Страница 36: ...The Test Periodically option runs the Disk Test at the specified frequency The Disk Tests run in the background and will not interfere with normal operations Test Frequency in hours From 0 to 1000 ho...

Страница 37: ...Notify Record email option is enabled in the Email Notification Setup Screen an email will be sent indicating that a disk failure occurred q Main Menu Record Record Lock The Record Lock feature preven...

Страница 38: ...Latch This feature determines how the unit latches alarm conditions Selecting from the following options Latched The alarm is activated until it is silenced and acknowledged by the user Transparent T...

Страница 39: ...and seconds The number of the camera input in alarm q Main Menu Alarms Link To A Macro Use this menu to link an alarm input to a macro If a link is created a macro will run each time that alarm is ac...

Страница 40: ...ion Time Zone setting must be set correctly for Email notification to time stamp messages accurately If the Notify Alarm or Notify Record fields are enabled you will be notified of the results of the...

Страница 41: ...tomatically exit the menu system and go to a starting point Macro Record mode is indicated as F and the Macro Number on screen 2 From this point begin recording the desired keystroke sequence Record u...

Страница 42: ...he macro number The user can cancel the macro at any time by pressing the Function button Function and Number Buttons Daylight Savings Time Alternate Method Fn To adjust the time one hour for daylight...

Страница 43: ...e All or Disable All from this menu will activate or deactivate motion detection on all cameras Selecting Individual Enable from this menu will bring up the following menu Individual Enable Menu Use t...

Страница 44: ...tton to change the motion detection sensitivity 10 being the most sensitive Rejection Configure the unit s false alarm rejection feature by selecting Low Medium or High These settings are based on the...

Страница 45: ...n button again to redisplay Sensitivity Scope Use the sensitivity scope to adjust the motion detection sensitivity for the scene The sensitivity scope is the bar located near the left hand corner of t...

Страница 46: ...elect the camera whose title you wish to configure and then press the Enter button The Camera Title Edit menu will appear Camera Title Edit SEQ key selects character bank 1 key inserts blank character...

Страница 47: ...put signal level for cameras whose level is outside the normal range The default gain setting is 100 Use the Arrow Button to navigate and change the values Save changes and exit the menu Select OK the...

Страница 48: ...etup Camera Scope Use this menu to view a live luminance histogram of the currently displayed camera Luminance Histogram A Luminance Histogram is a graphical representation of how many times each grey...

Страница 49: ...p Erase Archive Medium Use this feature to erase all of the recorded data on an archive device With Erase Archive Medium highlighted press the Enter button If a compatible archive device is connected...

Страница 50: ...cameras Telemetry Enable Telemetry Preset Mode Select AC DC q Main Menu Telemetry Telemetry Enable Use this menu to Enable or Disable telemetry of each camera individually Telemetry Enable Telemetry...

Страница 51: ...When all presets are stored press the Telemetry button to exit the telemetry mode Current Mode Procedure 1 Press the Telemetry button to enter the telemetry mode 2 Pan and Tilt the camera to the desir...

Страница 52: ...ions Consult with the modem manual before attempting to make any changes It is strongly recommended that the modem initialization string only be modified by a qualified technician POTS Setup SEQ key s...

Страница 53: ...e Enter button Exit the menu without making changes Press the Menu button Port 2 Use this menu to configure the baud rate for Port 2 Rotate the Jog to select a baud rate from the menu Save changes and...

Страница 54: ...m TCP MTU Size Select from Standard 1400 and 1200 The MTU describes the maximum possible TCP packet size Standard 1500 is optimal for most ethernet network environments HTTP Port Select the HTTP Port...

Страница 55: ...reboot returning all settings except the time and date to the factory defaults Due to the large size of the hard disk the reboot may take several minutes Change Language Language Password 4 10 and 16...

Страница 56: ...y and changed Deactivate The Ethernet Password Ethernet Access Reset Password To return the unit to No Ethernet Password Protection enter the Ethernet Access Reset Password in the password box shown a...

Страница 57: ...u Item Primary Menu Location Section In Manual Time Date Display Main Menu Time Date Time Date Display 3 8 Titles Display Main Menu Camera Titles Title Display 3 13 Alarm History Main Menu Alarm Alarm...

Страница 58: ...e for the duration of the alarm Macro Activation Unit can be configured in the menu system to activate a macro when an alarm is detected see Link to Macro in section 3 10 Record Rate Record Rate can b...

Страница 59: ...the Alarm button is lit for the duration of the alarm Monitor A Multiscreen Each camera in alarm is indicated on screen by a flashing red A in its cameo Alarm LED lights to indicate an alarm conditio...

Страница 60: ...10 0 00 08 56 006 01 24 2002 20 07 10 0 00 00 06 007 01 25 2002 20 07 10 0 05 57 31 008 01 26 2002 20 07 10 0 00 46 43 000 01 21 2002 20 07 10 0 04 35 15 PLAY REV FWD to page up down ENTER to play ev...

Страница 61: ...esponding disk time is indicated in the upper right of the screen The video representations are colour coded by category Using the Up Down arrows expands Zooms the display The Lowest level most detail...

Страница 62: ...amera 1 2 3 4 5 6 7 8 9 10 11 12 13 14 15 16 Hit ZOOM to edit retail text list Hit ENTER to toggle EDIT Mode X X X X X X X X X X X X X X X X X X CANCEL START SEARCH EDIT MODE The following options are...

Страница 63: ...until another category appears The creator of the retail text file is responsible to put the categories and sub levels into correct order The Triplex will not sort the strings A category has to have a...

Страница 64: ...gained through the Search Filters Menu Press the Search button one or more times until the Search Filters Screen appears then select the Retail radio box and press the Zoom key Search Filters Operatio...

Страница 65: ...ot _Beer It is not possible to do a normal text search and a retail search at the same time The characters and are meta characters and are not to be used in the text string It is not possible to searc...

Страница 66: ...tedly play event 10 matches found Activity Text Alarm Search Results Follow the directions on screen to select archive playback etc Search Results 3 19 06 11 02 3 20 18 51 02 3 19 21 42 02 3 20 21 54...

Страница 67: ...nload unsigned ActiveX controls and Initalize and Script ActiveX controls not marked as Safe are set to Prompt 6 Click the OK button 7 Click on the Yes button in the Warning message 8 Click the OK but...

Страница 68: ...The Drop Down Volume List Allows the selection of available Disk volumes The Main Viewing Area Pictures are displayed in this area in Multi Camera and Single Camera formats Picture display order is a...

Страница 69: ...before connecting 12 Connect Disconnect button Click on this button s to connect to the unit 13 Number buttons Press any of these buttons to call up individual cameras for display When connected to a...

Страница 70: ...er wrcontrollite and before ssi In the following example the options are in bold Example http 3 18 172 230 wrcontrollite_c 1s 2a 3t 1361959858 ssi The following table specifies the supported options N...

Страница 71: ...l connection play back at 2 27 2003 10 53 32 displaying camera 1 in medium size Email Links The Vista Columbus Triplex is able to send emails when certain events occur like videoloss alarms etc When i...

Страница 72: ...ort 2 RJ 45 Connector Camera Inputs BNC connectors Auto Terminating Colour Mono Monitor A Output Y C 4 pin Mini DIN Connector Monitor A Output Composite BNC Connector Monitor B Output Composite BNC Co...

Страница 73: ...rs Relay Outputs On screen Indicators Status Retrievable via RS232 port Motion Detection Zones Per Camera 256 16 x 16 grid Sensitivity Settings 10 levels Grey Levels Per Zone 256 levels Motion Detecti...

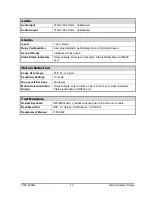
Страница 74: ...s the camera associated with the text The valid range is from 0 to 15 Alarm Event byte usage is described in the following section String field contains text characters The string can be from 0 to 500...

Страница 75: ...0x03 If both the start and end bits are set the associated text will be stored with the next recorded field for that camera The post event timer will be started after which the selected camera will re...

Страница 76: ...5 49 Monitor B 50 Camera Power 51 Wash 52 Auto Pan 53 Camera Lights 54 Wipe 55 Preset 56 Focus Far 57 Focus Near 58 Iris Close 59 Iris Open 60 Zoom In 61 Zoom Out 62 Telemetry 63 Left Arrow 64 Right A...

Страница 77: ...55 must be set to 0 iii Requesting data from the DVR When a message of type 0xBB is sent to the Columbus Triplex it will respond by sending 16 bytes of requested data a Read Alarm History List Byte 1...

Страница 78: ...his page and use it to keep a record of the programmed macro functions 10 1 Macro Functions Table Macro Number Description 1 2 3 4 5 6 7 8 9 10 11 12 13 14 15 16 Function Sequence Daylight Savings Tim...

Страница 79: ...turer of the unit as detailed below and request a Return Material Authorization number RMA The unit s serial number must be provided before a RMA number can be issued Units returned to the factory for...

Страница 80: ...0150 0202G...

Отзывы: