18
Timer Recording
Select a TV channel as source
Timer Recording Setup
Record executes only on the date set
Timer Recording Setup
Source
Record To
Quality
Mode
Date
Start
End
Title
VPS
OK Cancel
0 6 / 0 1 / 0 5
0 0 : 2 4
0 0 : 5 4
Ch029
My Title
OFF
0 6 / 0 1 / 0 5
0 0 : 2 4
0 0 : 5 4
HDD
SP
SP+
LP
EP
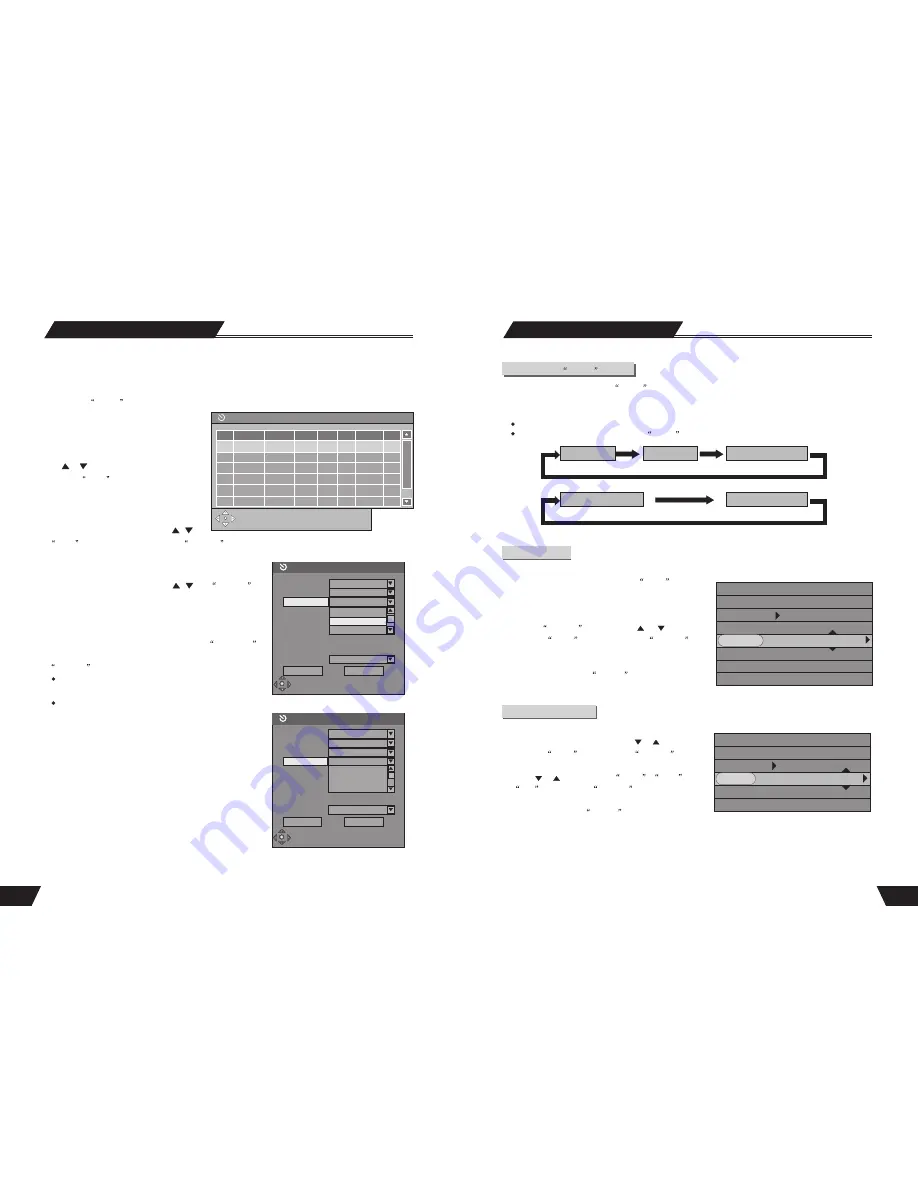
Timer Recording
You can set-up the product to schedule recordings to begin and end at a specific time. The recording can be onto
HDD or DVD. This feature is useful if the specific quality, time, date and channel of a program you want to
record is known in advance.
1. Press the
TIMER
button to enter the timer recording schedule setup menu, as shown in the chart to the
right. There are 8 records in this menu. Each
record represents a recording schedule.
2. In the timer recording setup menu, use
the or button to select a record, and
press the
Select
button.
3. Set up the input source
In the Item Editor dialog box, use the , and
Select
buttons to select the value of
SOURCE
.
4. Set up the recording quality
In the Item Editor dialog box, use the , and
SELECT
buttons to select the quality value. For more in formation about
recording quality, for reference: HQ, SP, SP+, EP, LP, SLP.
5. Set up the recording mode
This setting is done with the third control unit in
Item Editor
dialog box. Move the cursor, select the row, and press the
SELECT
button to initiate the drop-down menu.
The setting may arrange a timer recording everyday, or on
some day of every week, or on a certain day of the year.
There are three options in the list. Their meanings are as
follows.
Weekly:
recording every week.
Daily:
recording everyday
Once:
recording on a certain date
Source
Record To
Quality
Mode
Date
Start
End
Title
VPS
Ch029
HDD
SP
Once
Once
Daily
Weekly
35
DVD
VCD
Play Mode
The Use of the
GOTO
Button
1. In the playing status, press the
GOTO
button to cycle through various options in the play control bar menu.
With the above-mentioned operations, you can use the remote control to enter the corresponding value and skip
to the corresponding location directly.
The following is an example of DVD playing. The operation of VCD playing is similar to this case.
For CD discs, it is no use pressing the
GOTO
button.
CHAPTER:--
TITLE:--
TIME:--:--:--
TR-TIME:--:--:--
Audio Selection
Some DVD discs may have more than one OSD language. You may select one of them as the output.
1. In the play control bar menu, select the Audio
item.
There are some digits under the icon. The number on the
right is the total number of OSD languages; the one on the
left is the number of the current mode.
2.Press the
SELECT
button, use the or button
to select the
Audio
item, and press the
SELECT
button of the remote control to confirm.
3.This function enables you to switch between different
languages by pressing the
AUDIO
button directly.
DVD
MODE Normal
Trick mode:
CHAPTER 02/14
AUDIO 01/03-OTH
SUBTITLE 01/01-OTH
ANGLE 01/01
T- TIME 00:02:48-00:51:25
This function is available for CD, VCD discs.
1.In the play control bar menu, press the or button
to select the
Audio
item, press the
SELECT
button to confirm and enter the input mode.
2.Use the or button to select
Stereo
,
Right
or
Left
, and press the
SELECT
button to confirm.
3.This function enables you to switch between different
channels by pressing the
AUDIO
button directly.
Audio Channel Selection
VCD
MODE: Normal
Trick mode:
AUDIO: Stereo
PBC: ON
TIME: 00:02:48-00:51:25
D-TIME:--
OK Cancel
M y T i t l e
O F F
Source
Quality Date Start End
1
2
3
4
5
6
Timer Recording
Record VPS
Press Select to review a scheduled recording or
create a new one. Press functions for other options


