background image

www.visioneng.com/support 

CamZ handheld digital magnifier

1

OPERATION 

Operation

Initial operation


X

We recommend you fully charge your 

CamZ

 magnifier before its first use.  The charger is supplied 

with a range of international power connectors and you should choose the appropriate one for your 
country.


X

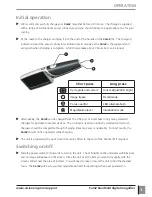
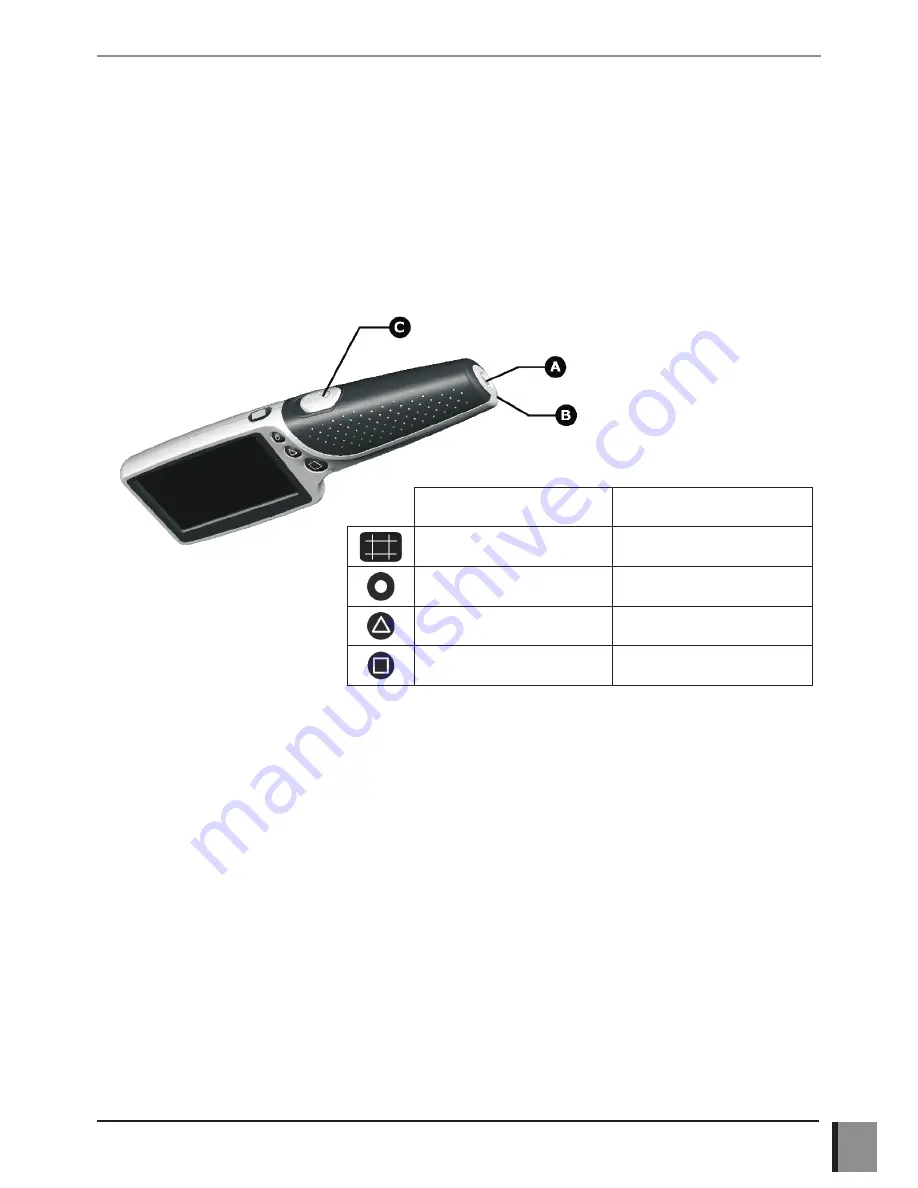
Fit the cable to the charger and plug it into the end of the handle on the 

CamZ

 (A).  The charging 

indicator around the power connector will illuminate in orange as the 

CamZ

 is charging and will 

extinguish when charging is complete.  A full charge takes about 3 hours but can be longer.


X

Alternatively, the 

CamZ

 can be charged from the USB port of a computer or by many standard 

chargers for portable consumer devices.  The connector used is an industry standard and all such 
chargers should be compatible though charging times may vary considerably.  For best results, the 

CamZ

 should not be operated while charging.


X

The unit is supplied with a neck strap that can be fitted to the end of the handle (B) if required.

Switching on/off


X

Slide the power switch (C) forwards to turn on the unit.  The LED lights on the underside will illuminate 
and an image will appear on the screen.  Place the unit over the item you want to magnify with the 
screen centred over the area of interest.  You will need to raise or lower the unit to find the sharpest 

focus.  The 

CamZ 

will re-use your last magnification and focus settings when next powered on.

Short press

Long press

Cycle grids and cursors 

Cursor Adjust/LED bright

Image freeze

Recall mode

Focus near/far

LED alternate flash

Magnification level

Illumination mode

Содержание CamZ

Страница 1: ...User Guide Handheld digital magnifier...

Страница 2: ......

Страница 3: ...with the following standards or other normative documents EN55022 2006 and EN55024 2010 EN61000 3 2 2006 EN61000 3 3 2008 Equipment classification Residential and Industrial EN62471 2008 Classificatio...

Страница 4: ......

Страница 5: ...ning Cursors and Grids 2 Adjusting the grids 2 Adjusting the Dimensioning Cursors 2 Illumination Mode 2 LED alternate flash 2 LED Brightness 2 Setting the Clock 3 Clearing All Saved Images 3 Battery l...

Страница 6: ......

Страница 7: ...ble consumer devices The connector used is an industry standard and all such chargers should be compatible though charging times may vary considerably For best results the CamZ should not be operated...

Страница 8: ...the Image Recall mode described below Image Recall X X From the live image a long press of will enter the image recall mode The last stored image will be shown and a picture number in the form 10 for...

Страница 9: ...ensional objects When the button is released the unit will return to the previously used illumination mode LED Brightness X X The LED s can be set to one of three brightness levels If the cursors or g...

Страница 10: ...cally installs the correct drivers A message will appear on the PC when the installation has been completed The CamZ will now appear as a drive on the PC and the saved images can be viewed Supported o...

Страница 11: ...in transit damage caused by misuse neglect or carelessness or damage resulting from either improper servicing or modification by other than Vision Engineering approved service personnel Further this...

Страница 12: ...g com For more information Vision Engineering has a network of offices and technical distributors around the world For more information please contact your Vision Engineering branch local authorised d...

Отзывы: