background image

Viscount CANTICUS I - II 


  53 

7. MIDI 


7.1 GENERAL INTRODUCTION 
 

MIDI stands for Musical Instrument Digital Interface.  
 
This interface allows electronic instruments, even of different makes and types, to dialogue with each other or with a 
computer, in order to exchange a large number of items of information by means of a clearly defined, detailed protocol of 
codes.  
This allows different functions to be obtained from the connected machines, without necessarily having to touch them at all. 
Electronic musical instruments equipped with MIDI interface have one or more DIN 5 pin connectors which are the MIDI 
connectors.  
There are normally three MIDI connectors, as follows: 
 
- MIDI IN: Connector through which the machine receives the MIDI data transmitted by other units 
- MIDI OUT: Connector through which the machine transmits the MIDI data it has generated 
- MIDI THRU: Used for series connection of a number of receiver units, this connector transmits the MIDI data exactly as 

they are received by the MIDI IN port. 

 
In the Canticus organ, these connectors are located in the connection panel on the left under the first manual.  
 
Transmission and reception of MIDI data are subdivided into channels, so that given one transmitter unit, of all the receiver 
units connected, only the one tuned to the transmitter channel will respond. 
 
The MIDI protocol includes 16 channels, so given one transmitter instrument, separate control of up to 16 instruments 
connected to it is possible.  
When the MIDI transmission channel is selected, we will connect only to the unit with the same receiver channel. 
Naturally, if two MIDI units are tuned to different channels they are unable to exchange data. 


The Canticus organ is equipped with a MIDI interface which can be TRIPHONIC, meaning that every single manual is 
able to transmit and receive on 3 indipendent MIDI channels, one a base channel and two auxiliary channels (A and 
B). 

 
7.2 SENDING PROGRAM CHANGE MESSAGES 

 
The MIDI Program Change message allows a given program (e.g. timbre) to be recalled on the connected unit through 
direct use of the organ central unit.


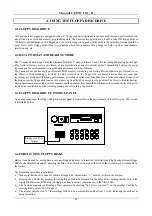
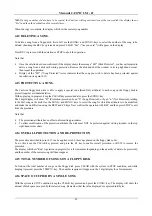
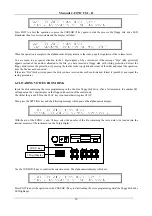
When pushing the MIDI tab, the display will show the numbers of the Program change and of the Bank Select for both 
channels MIDI A and B according to its shown correspondance.  
The default value are at 0 (values valid from 0 to 127) for both number and Program Change Bank. 


MIDI Key 

Содержание Canticus I-II

Страница 1: ...viscount Manuale Operativo Owner s Manual Mode d Emploi Canticus I II ...

Страница 2: ... alimentazione o che esso sia compresso specialmente in corrispondenza della spina della presa di corrente e del punto di uscita dall apparecchio 12 Usate solo i dispositivi di collegamento e gli accessori specificati dal produttore 13 Usate l apparecchio con carrelli sostegni treppiedi staffe o tavoli specificati dal produttore o venduti insieme all apparecchio stesso Se usate un carrello fate at...

Страница 3: ...istiche dell unità di controllo 9 3 2 Regolazione dei volumi 9 3 3 Impostazione dell effetto di riverbero 10 3 4 Impostazione dell effetto di tremolo 11 4 GESTIONE DEL FLOPPY DISK DRIVER 4 1 Floppy disk driver 12 4 2 Formato dei dati e tipo di lettura 12 4 3 Pannello di controllo del floppy disk driver 12 4 4 Formattazione di un floppy disk 12 4 5 Registrare un brano 13 4 6 Esecuzione dei brani re...

Страница 4: ...tenuto delle memorie da disco 22 7 MIDI 7 1 Nozioni generali 23 7 2 Invio dei messaggi di Program Change 23 7 3 Abilitare i canali MIDI di trasmissione e ricezione 24 7 4 MIDI Filter 25 7 5 Regolazione dei valore di dinamica MIDI 26 7 6 Trasposizione MIDI del codice nota 26 8 PROCEDURE DI INIZIALIZZAZIONE 8 1 Premessa 26 8 2 Inizializzazione generale dello strumento 26 8 3 Inizializzazione della s...

Страница 5: ...e etc Le combinazioni ammesse sono le seguenti I P voci del primo manuale sulla pedaliera II P voci del secondo manuale sulla pedaliera II I voci del secondo manuale sul primo 2 Interruttore On Off questo interruttore è situato sotto il primo manuale ATTENZIONE in caso di temporale si consiglia di disinserire comunque la spina dalla presa di corrente 1 2 COMANDI DEL PANNELLO SINISTRO 3 Sezione Ped...

Страница 6: ... 3 4 5 6 Tutte le selezioni effettuate sui registri possono venire memorizzate in 6 memorie generali Fare riferimento al capitolo 2 per le operazioni relative al salvataggio Le memorie includono anche un tasto denominato HR Conosciuta anche col nome zero la memoria HR memorizza automaticamente la configurazione presente quando il relativo pistoncino è acceso 10 Enclosed ENC Premendo questo pulsant...

Страница 7: ...questo pedale si attiverà un sempre maggior numero di registri su tutte le sezioni dell organo al suo rilascio il numero dei registri verrà gradualmente ridotto Gli step del Crescendo sono programmabili per maggiori informazioni consultare il cap 2 16 Pedale Man II tramite questo pedale sarà possibile gestire il volume del secondo manuale Se il pulsante ENC posizionato sotto il primo manuale è in ...

Страница 8: ...e Queste prese vengono generalmente usate per effettuare delle registrazioni su apparati di registrazione analogica come registratori a nastro In caso di unità ricevente monofonica utilizzare solo la presa L MONO Vaschetta laterale sinistra 1 Pitch General Consente di regolare la regolazione fine dell accordatura di tutto lo strumento Alla consegna l organo viene intonato dal costruttore con LA 44...

Страница 9: ...ENERAL 1 2 Uscita Generale Quando utilizzata sola da questa uscita sarà possibile prelevare il suono generale dell organo monofonico Quando invece essa viene utilizzata in coppia con la presa 3 essa emetterà il suono inerente alla pedaliera 2 Da utilizzarsi in coppia alla uscita 1 per ottenere la stessa situazione proposta però in panorama stereofonico 3 4 Uscita monofonica da cui si preleverà il ...

Страница 10: ...ionato verrà visualizzato sulla barra dei led posta sul pannello destro Aggiungere o spegnere i registri desiderati Salvare questa nuova configurazione mantenendo premuto il pulsante S set e premere il pulsante HR A tal proposito accertatevi che non sia inserito il registro del TUTTI altrimenti la nuova configurazione non sarà salvata come nuovo step del Crescendo ma bensì sarà memorizzata come co...

Страница 11: ...Al momento dell accensione dell organo sul display alfanumerico apparirà quindi L L 23 0 4 1 0 2 0 Durante la visualizzazione di questo messaggio il Canticus effettua delle procedure di autodiagnosi e si predispone per il funzionamento Se nel floppy disk driver non vi è inserito alcun dischetto sul display 3 digit posizionato nella sezione di controllo dedicata al floppy disk driver appariranno tr...

Страница 12: ...ne aggiornato durante il movimento del suddetto pedale Per modificare i valori premere i tasti cursor Õ e Ö fino a quando il cursore lampeggiante non si posiziona in corrispondenza del valore che si intende modificare ruotare quindi l encoder nei due sensi fino al raggiungimento del valore desiderato 3 3 IMPOSTAZIONE DELL EFFETTO DI RIVERBERO Per impostare l effetto di riverbero bisogna premere l ...

Страница 13: ...ti a ciascun manuale come rappresentato in figura P 9B 9B Tramite i tasti cursor Õ e Ö sarà possibile muovere il cursore lampeggiante in corrispondenza del valore che si intende modificare e ruotando l encoder sarà possibile inserire l appropriato valore Si tenga presente che relativamente ad ogni manuale il primo valore rappresenta la profondità di modulazione depth mentre il secondo la velocità ...

Страница 14: ... della registrazione che vengano incisi durante l esecuzione ciò a tutto vantaggio di un alta praticità di gestione e velocità di esecuzione Per quanto sopra descritto si raccomanda di non rimuovere il dischetto dal driver se non in posizione di stop La tecnologia direct to disk permette la registrazione in contemporanea di tutti i manuali e della pedaliera e proprio per la sua caratteristica di s...

Страница 15: ... La memorizzazione dei dati avviene in modo del tutto automatico DURANTE la registrazione stessa Questa è la caratteristica fondamentale del sistema di lettura scrittura direct to disk utilizzato dal Canticus che utilizza direttamente il dischetto come unità di carico e scarico dei dati Canticus organizza anche il riconoscimento dei brani sul disco assegnando loro una numerazione progressiva autom...

Страница 16: ...g in corso per poi visualizzare il numero di battuta raggiunto che coinciderà con il numero totale di battute contenute nel brano 4 9 FUNZIONE AUTOPLAY Il parametro Autoplay permette di specificare se all inserimento del disco il lettore dell organo debba procedere o meno all avvio dell esecuzione del primo brano contenuto nel disco La funzione Autoplay prevede due condizioni AUTOPLAY ON Il lettor...

Страница 17: ...lazione di un brano contenuto in un disco protetto dalla scrittura occorre quindi estrarre il disco e chiudere la finestrella posta in alto a destra del disco stesso e ripetere l operazione La visualizzazione dell errore SPr Song Protected sta a significare che il brano che intendete cancellare è stato protetto dalla cancellazione vedi par 4 13 4 13 PROTEZIONE DI UN BRANO Il floppy disk driver di ...

Страница 18: ...esta funzione determina la risoluzione con la quale Canticus registra i dati in arrivo al lettore Esso è settato per default su 96 parti per quarto quindi si ha a disposizione una risoluzione di 1 96 ma questo valore può essere innalzato in caso di registrazioni di brani aventi virtuosismi particolari o in tutti quei casi ove il risultato della registrazione non è ben definito errori in fase di pl...

Страница 19: ...ce viene indirizzata unicamente al canale sinistro R Right La voce viene indirizzata unicamente al canale destro C L Do a Left Partendo dalla nota Do della prima ottava la quale viene indirizzata al canale destro tutte le note seguenti nella scala cromatica verranno indirizzate alternativamente su ogni canale Do Ödestro Do Ösinistro Re Ödestro etc C R Do a Right Partendo dalla nota Do della prima ...

Страница 20: ...i desidera modificare Ruotando l Encoder sarà possibile scorrere tutte le voci contenute nella sezione prescelta fino a fare apparire sul display il nome della voce da sottoporre a modifica A questo punto si prema il tasto PAGE e sulla prima riga del display appariranno tutti i parametri di modifica descritti al paragrafo 5 1 sotto ciascun parametro sarà riportato il valore attualmente attribuito ...

Страница 21: ...i programmazione delle memorie e delle voci dell organo Inserire nel floppy disk driver un dischetto 3 5 formattato e non protetto dalla scrittura dei dati la finestrella in alto a destra del floppy deve essere chiusa A questo punto premere il tasto SETTING posizionato sulla unità di controllo La prima videata che si presenta riguarda il caricamento delle voci da disco Premere dunque il tasto PAGE...

Страница 22: ...disco che avete inserito non è formattato procedete quindi con la formattazione par 4 4 e ripetete le operazioni di salvataggio 6 2 CARICAMENTO DELLE VOCI DA DISCO Inserire il dischetto contente la programmazione delle voci sul floppy disk driver di Canticus dopo qualche istante sul display 3 digit dell unità centrale dedicata al floppy disk apparirà il numero 001 Controllate che il led verde posi...

Страница 23: ...uò essere salvato su floppy disk e ricaricato all occorrenza Per fare ciò dopo aver inserito un floppy disk formattato nel drive si prema il tasto SETTING e quindi il tasto PAGE fino a quando sul display non appare la scritta 2 C 1 2 1 31 R Occorre ora abilitare la registrazione sulla sezione del pannello di controllo dedicata al floppy disk driver Per fare ciò tenendo premuto il tasto PAUSE preme...

Страница 24: ...1 31 R Con l ausilio dei tasti SONG Õ e Ö selezionare sul display 3 digit il numero di registrazione file che contiene i dati delle memorie da caricare all interno dello strumento Tramite il tasto CURSOR Ösi darà conferma dell avvenuta selezione Sul display alfanumerico apparirà 0 C 30 T 31 R 2 0 0 2 02 Premendo il tasto EXIT si abbandona l operazione mentre la pressione del tasto CURSOR Ö avvierà...

Страница 25: ...sione e la ricezione dei dati MIDI sono suddivise in canali in modo che data una unità trasmittente di tutte le riceventi collegate risponderà solo quella che risulterà sintonizzata sul canale della trasmittente Il protocollo MIDI prevede 16 canali quindi dato uno strumento trasmittente è possibile controllare in maniera distinta fino a 16 strumenti diversi ad esso collegati Selezionando il canale...

Страница 26: ...isce altri 4 canali GLOBALI utilizzati per scambi di informazioni MIDI generali o di sistema Detti canali risultano essere il 5 il 6 9 il 10 il 13 il 15 ed il 16 N B La disposizione dei canali MIDI non è modificabile Per abilitare un determinato canale MIDI di trasmissione si prema sull unità di controllo il tasto MIDI seguito dal tasto PAGE Sul display apparirà 1 L L 9 LL 9 9 A B 9 9 L 99 Come si...

Страница 27: ...e Note Note Messaggio di nota MIDI Control Change CC Messaggio di controllo volume espressione etc Program Change PG Messaggio di cambio programma Sistemi esclusivi SYS EX Messaggi esclusivi dell organo programmazione Real Time REAL Messaggi di sincronizzazione di tempo ecc Active Sensing ACT S Messaggio di avvenuta connessione Per attivare un filtro e quindi escludere il messaggio occorre innanzi...

Страница 28: ...iante in corrispondenza del parametro che si intende modificare e ruotare l encoder per selezionare il valore appropriato Premere EXIT per uscire o i tasti PAGE e Øper scorrere le altre videate inerenti le altre impostazioni MIDI 7 6 TRASPOSIZIONE MIDI DEL CODICE NOTA Il valore MIDI della nota trasmessa può essere trasportata in alto o in basso di una o due ottave Dopo aver visualizzato la videata...

Страница 29: ...n I e man II su ciascuna colonna è riportato il nome della sezione in alto e in basso il nome della prima voce presente nella sezione Tramite i tasti cursor Õ e Ö posizionare il cursore sotto la sezione contenente la voce che desiderate inizializzare Ruotando l encoder diviene possibile scorrere tutte voci contenute nella sezione prescelta fino a fare apparire sul display il nome della voce da ini...

Страница 30: ...azioni degli step del CRESCENDO al loro contenuto originale scorrere le pagine di inizializzazione con il tasto PAGE tante volte fino a quando sul display non appare la videata L 4 L 31 9 230 2 5 0 Spegnere quindi lo strumento e riaccenderlo tenendo premuto il pistoncino 1 posizionato nella sezione delle memorie generali A riaccensione avvenuta tutta la configurazione degli step del CRESCENDO sarà...

Страница 31: ...ono per garantire una misura di protezione contro interferenze con altri dispositivi elettronici nell ambiente residenziale Questo apparecchio genera ed usa frequenze radio e se non viene installato ed utilizzato secondo le istruzioni contenute in questo manuale può provocare interferenze L osservazione delle norme FCC non garantisce che le interfe renze non si manifestino in tutte le installazion...

Страница 32: ...ith one wider than the other A grounding type plug has two blades and a third grounding prong The wider blade or the third prong are provided for your safety If the provided plug does not fit in to your outlet consult an electrician for replacement of the obsolete outlet 11 Protect the power cord from being walked on on pinhead particularly at plugs convenience receptacles and the point where they...

Страница 33: ...E CENTRAL CONTROL UNIT 3 1 Characteristics of the control unit 39 3 2 Regulating the volumes 39 3 3 Setting the Reverb effect 40 3 4 Setting the Tremolo efffect 41 4 USING THE FLOPPY DISK DRIVE 4 1 Floppy disk drive 42 4 2 Data format and reading mode 42 4 3 Floppy disk drive control panel 42 4 4 Formatting floppy disks 42 4 5 Recording a song 43 4 6 Playing songs recorded on floppy disk 43 4 7 Va...

Страница 34: ... 7 1 General introduction 53 7 2 Sending Program Change messages 53 7 3 Enabling the MIDI transmission and reception channels 54 7 4 MIDI Filter 55 7 5 Regulating the MIDI dynamics value 56 7 6 MIDI transposition of the note code 56 8 INIZIALIZATION PROCEDURES 8 1 Introduction 57 8 2 General initialization of the instrument 57 8 3 Initializing an individual voice 57 8 4 Voice Local Off 57 8 5 Init...

Страница 35: ... etc The combinations available are I P The voice of the first manual in the pedal section II P The voice of the second manual in the pedal section II I The voice of the second manual in the first manual 2 On off switch This switch is on the left of the 1st manual CAUTION in case of thunder storms you are advised always to disconnect the plug from the power socket 1 2 LEFT HAND PANEL CONTROLS 3 Pe...

Страница 36: ... 1 2 3 4 5 6 All register settings made can be saved in six general memories See chapter 2 for memory programming Memories include push buttons marked HR Also known as 0 the HR memory memorize temporarely the last configuration present at time when the piston was switched on 10 Enclosed ENC After this button has been pressed the third manual expression pedal can be used to control the general volu...

Страница 37: ...t low volumes CANTICUS II 15 Crescendo pedal When this pedal is pressed more and more registers are activated on all sections of the organ when it is rerouted the number of registers will gradually be reduced The Crescendo steps can be programmed See chapt 2 for futher informations 16 Man II pedal This pedal can be used to control the volume of the second manual If the ENC button under the first m...

Страница 38: ...an output connectors These connectors are generally used for making recordings on analogue recording equipment such as cassette recorders In case of a monophonic receiver unit use the L MONO connector only Left hand side panel 1 Pitch General Allows fine adjustment of the tuning of the entire instrument On delivery the organ has been tuned by the manufacturer to A 440Hz pitch knob in central posit...

Страница 39: ...s section subdivided as follows GENERAL 1 2 General Output When used alone this output will provide the overall sound of the organ monophonic When used in combination with connector 3 it will emit the sound relating to the pedal section 2 For use in combination with output 1 to obtain the same situation but in stereophonic panorama 3 4 Monophonic output providing the sound of the first and second ...

Страница 40: ...will be displayed on the LED meter located on the right panel Add or switch off the required registers Save this new configuration by pressing the S SET button and press the HR button relating to the general memories section Make sure that the TUTTI register is not on otherwise the new configuration will not be saved as a new Crescendo step but will be saved as the register configuration for the T...

Страница 41: ...sposition value When the organ is switched on the alphanumeric display shows and then L L 23 0 4 1 0 2 0 During display of this message the Canticus carries out self testing procedures and pre sets for operation If there is no disk in the floppy disk drive three horizontal dashes appear on the 3 digit display in the floppy disk drive control section 3 2 REGULATING THE VOLUMES When the self testing...

Страница 42: ...st value can be modified using the control unit since the second is updated during operation of the pedal themselve To modify the values press the cursor Õand Ö keys until the flashing cursor locates on the value to be modified then turn the encoder both ways until the desired value is reached 3 3 SETTING THE REVERB EFFECT To set the reverb effect press the REVERB key in the general functions sect...

Страница 43: ...he parameters mentioned above for each manual as illustrated below P 9B 9B Use the cursor Õ and Ö keys to move the flashing cursor to the value to be modified then turn the encoder to enter the appropriate value Remember that for each manual the first value represents the modulation DEPTH and the second the modulation SPEED When the operation is complete press the EXIT key to return to display of ...

Страница 44: ...cedures Because of the mode used the floppy disk must never be removed from the drive except in stop position The direct to disk technology allows simultaneous recording of all the manuals and the pedal section Since the performance is recorded on the disk as it is received no modification of the recording made or over recording is possible 4 3 FLOPPY DISK DRIVE CONTROL PANEL As already mentioned ...

Страница 45: ...ers each song will be identified by a number higher than that of the last song on the disk The Canticus does not have functions as such for processing and correcting the material stored on floppy disk In case of performance errors the entire recording process has to be repeated after the whole song has been cancelled See point 4 12 for the cancellation function 4 6 PLAYING SONGS RECORDED ON FLOPPY...

Страница 46: ...AY key The 3 digit display will show the current status of the autoplay function On or Off Use the REW and FF keys to vary the status of the function Press SET to confirm the modification will be maintained even after the organ has been switched off or STOP to exit aborting the modifications made 4 10 AUTOREW FUNCTION The AUTOREW auto rewind function allows the STOP key to be configured in two dif...

Страница 47: ...eded by an S Song Protected or by an n Not Protected relating to the first song on the disk Use the SONG and SONG keys to select the song for which the attribute is to be modified and make the modification using the REW and FF keys Now confirm the operation with REC and then press STOP to exit from the procedure Note that The protection attribute has no effect on formatting procedures To allow mod...

Страница 48: ...g particularly virtuoso pieces or in all cases where the result of the recording is not clearly defined poor linearity or loss of data The time base values available are 96 default 120 192 and 240 ticks per quarter note To set this value keep the SET key pressed and press REC the TIME BASE value currently selected will appear on the display Use the REW and FF keys to select the required value 96 1...

Страница 49: ... to the stereophonic panorama of the organ with the following possibilities L Left The voice is addressed to the left hand channel only R Right The voice is addressed to the right hand channel only C L C to the Left Starting from the note C of the first octave which is addressed to the right hand channel all the following notes in the chromatic scale will be addressed to each channel alternately C...

Страница 50: ... under the section containing the voice to be modified Turn the Encoder to scroll through all the voices in the chosen section until the name of the voice for modification appears on the display At this point press the PAGE key and all the modification parameters described in point 5 1 will appear on the first line of the display with the current value of each parameter below 4 0 0 32 2 O O M O9 M...

Страница 51: ...ing the organ memories and voices Insert a formatted 3 5 floppy disk not protected against data writing the window in the top right hand corner of the disk must be closed in the drive Now press the SETTING key on the control unit The first video page which appears relates to the loading of voices from disk Press the PAGE key and the following will appear on the display 2 C 1 2 1 31 R Now enable re...

Страница 52: ...disk error appears the disk you have inserted has not been formatted format it point 4 4 and repeat the saving procedures 6 2 LOADING VOICES FROM DISK Insert the disk containing the voice programming in the Canticus floppy disk drive after a few moments the number 001 will appear on the 3 digit display on the floppy disk section of the central unit Check that the green LED on the PLAY key is out a...

Страница 53: ...o floppy disk and reloaded as necessary To do this after inserting a formatted floppy disk in the drive press the SETTING key and then the PAGE key until the display shows 2 C 1 2 1 31 R Now enable recording on the floppy disk drive section of the control panel by keeping the PAUSE key pressed and pressing REC The consecutive number of the recording file will appear on the 3 digit display and the ...

Страница 54: ... Ö keys select the number of the file containing the memory data to be loaded into the instrument on the 3 digit display Use the CURSOR Ökey to confirm the selection made The alphanumeric display will show 0 C 30 T 31 R 2 0 0 2 02 Press EXIT to abort the operation or the CURSOR Ökey to start the procedure for loading the memory data The drive LED will illuminate and for few moments the display wil...

Страница 55: ...on the left under the first manual Transmission and reception of MIDI data are subdivided into channels so that given one transmitter unit of all the receiver units connected only the one tuned to the transmitter channel will respond The MIDI protocol includes 16 channels so given one transmitter instrument separate control of up to 16 instruments connected to it is possible When the MIDI transmis...

Страница 56: ... organ also controls 4 OVERALL channels used for exchanging general MIDI or system information These channels are numbers 5 6 9 10 13 15 and 16 N B The arrangement of the MIDI channels CANNOT be modified To enable a given MIDI transmission channel press the MIDI key on the control unit followed by the PAGE key The display will show 1 L L 9 LL 9 9 A B 9 9 L 99 As the diagram shows the display is di...

Страница 57: ...OUT port Message Abbreviation Description Note Note MIDI Note messages Control Change CC Control messages volume expression etc Program Change PG Program change messages Sistemi esclusivi SYS EX Exclusive organ messages programming Real Time REAL Tuning time messages Active Sensing ACT S Connection active messages To activate a filter and thus exclude the message first press the MIDI key to access...

Страница 58: ...r you wish to change and turn the Encoder for selecting the value The two values located under each manual refer to MIDI A the one to the left and yo MIDI B the one to the right Press EXIT to exit or the PAGE and Økeys to scroll through the other MIDI setting video pages 7 6 MIDI TRASPOSITION OF THE NOTE CODE The MIDI value of transmitted note can be transposed one or two octaves lower or higher T...

Страница 59: ...the organ pedal section man I and man II the name of the section appears at the top of each column and the name of the first voice in the section at the bottom Use the Õand Öcursor keys to locate the cursor under the section containing the voice to be initialized Turn the Encoder to scroll through all the voices in the chosen section until the name of the voice for modification appears on the disp...

Страница 60: ...RESCENDO step settings to the original values scroll through the initialization pages using the PAGE until the following video page appaers on the display L 4 L 31 9 230 2 5 0 Switch the instrument off and back on keeping the memory 1 push button in the general memories section pressed When the instrument switches back on the CRESCENDO step configuration will have returned to the factory settings ...

Страница 61: ...tem since this version of the manual was completed The information contained in this version of the owner s manual supercedes all previous version NOTE This equipment has been tested and found to comply with the limits for a Class B digital Device persuant to Part 15 if the FCC Rules These limits are designed to provide reasonable protection against harmful interference in a residential installati...

Страница 62: ...ourant et au point de sortie de l appareil 12 Utiliser uniquement les accessoires spécifiés par le fabricant 13 Utiliser uniquement avec un chariot un pied un trépied un support ou une table spécifié par le fabricant ou vendu avec l appareil Si un chariot est utilisé déplacer l ensemble chariot appareil avec pré caution afin de ne pas le renverser ce qui pourrait entraîner des blessures 14 Débranc...

Страница 63: ...E 3 1 Caractéristiques de l unité centrale de contrôle 69 3 2 Réglage des volumes 69 3 3 Réglage de l effet de Réverbération 70 3 4 Réglage de l effet de Tremblant Trémolo 71 4 UTILISATION DU LECTEUR DE DISQUETTE 4 1 Le lecteur enregistreur de disquette 72 4 2 Format des données et mode de lecteure 72 4 3 Panneau de contrôle du lecteur de disquette 72 4 4 Formatage des disquette 72 4 5 Enregistrem...

Страница 64: ...er le contenu des combinasions depuis une disquette 82 7 MIDI 7 1 Présentation générale 83 7 2 Envoi de messages de Program Change 83 7 3 Activer les canaux d émission et de rèception MIDI 84 7 4 Fonction MIDI Filter 85 7 5 Réglage des nuances 86 7 6 Transposition MIDI des notes 86 8 PROCEDURES D INITIALISATION 8 1 Introduction 87 8 2 Initialisation générale de l instrument 87 8 3 Initialisation d...

Страница 65: ...auche sous le clavier du Grand Orgue Attention en cas d orage nous vous recommandons de déconnecter le câble d alimentation secteur de la prise murale 1 2 LES PARTIES GAUCHE ET DROITE DE LA CONSOLE 3 La section de la Pédale Cette section regroupe les registres de la Pédale Elle est répartie à gauche et à droite de la console 4 A gauche la section du clavier manuel du Grand Orgue Cette section regr...

Страница 66: ...6 N importe quelle registration peut être sauvegardée Sous le clavier du Grand Orgue sont disposés six boutons poussoirs pistons Pour plus de détail sur leur utilisation veuillez vous reporter au chapitre 2 L un de ces boutons est repéré HR Il permet de rétablir la dernière registration manuelle effectuée avant l utilisation d une combinaison 10 Le piston ENC Si vous pressez ce piston la pédale de...

Страница 67: ...us d authenticité par rapport à l orgue traditionnel vous pouvez constater que lorsque vous fermez la Boite d Expression les harmoniques aiguës sont étouffées Canticus II uniquement 15 La tirasse d appel du Tutti Cette tirasse réversible permet l activation ou l annulation du Tutti 16 Les tirasses d appel des accouplements Elles permettent l activation ou l annulation des accouplements 17 La Pédal...

Страница 68: ...trument externe Dans le cas d une source monophonique utilisez le connecteur L MONO 3 Les sorties ligne gauche MONO et droite R Output L MONO R Le signal audio retransmis par ces sorties n est pas amplifié Ces connecteurs sont principalement utilisé pour l enregistrement analogique type magnétophone à bande ou à cassette Dans le cas d un dispositif monophonique utilisez le connecteur L MONO Le pan...

Страница 69: ...iés peuvent être connectés à cette section GENERAL 1 2 Sortie générale Lorsqu elle est utilisée seule cette sortie regroupe tous les plans sonores de l instrument monophonique Lorsqu elle est utilisée en association avec le connecteur 3 elle reproduit les plans sonores de la Pédale 2 Pour obtenir la même configuration qu avec 1 en stéréophonie 3 4 Sortie monophonique du Positif et du Grand Orgue 4...

Страница 70: ... sera affiché par la colonne de diodes en face avant sous le mot CRESCENDO Ajoutez ou éteignez les registres nécessaires Sauvegardez votre nouvelle configuration en maintenant enfoncé le bouton S et en appuyant sur le piston HR de la section des combinaisons générales Veillez à ce que le registre TUTTI ne soit pas activé sinon la nouvelle configuration ne sera pas sauvegardée comme une nouvelle pr...

Страница 71: ... sont terminées l écran LCD affiche la page servant au réglage des niveaux de volume L orgue Canticus permet le réglage du volume général de l instrument paramétre MASTER et le réglage du volume de chaque clavier L écran doit indiquer cela M M M Comme nous l avons mentionné précédemment le paramétre MASTER régle le volume général de l amplification interne de l orgue en tournant la molette vous po...

Страница 72: ...GE DE L EFFET DE RÉVERBÉRATION Pour régler l effet de Réverbération appuyez sur la touche REVERB située dans la section des fonctions globales de l unité de contrôle Le message DIGITAL REVERB apparaît sur l écran suivi de l état ON ou OFF et du niveau LEVEL général de l effet 4 Ensuite utilisez les touches curseur pour le déplacer sur les paramétres à modifier la molette servira à modifier la vale...

Страница 73: ...nés ci dessus pour chaque clavier de la maniére suivante P 9B 9B Utilisez les touches curseur et pour déplacer le curseur clignotant sur les valeurs à modifier puis à l aide de la molette entrez la valeur appropriée N oubliez pas que pour chaque clavier le premier nombre représente la modulation en profondeur DEPTH et le second la modulation en vitesse SPEEÙ Lorsque le réglage est terminée appuyez...

Страница 74: ... re jouées au fur et à mesure qu elles sont lues Les enregistrements sont effectués directement lorsque vous jouez ce qui implique des procédures trés conviviales et trés rapides En raison de ce mode de fonctionnement la disquette ne doit jamais être retirée du lecteur sauf en position Stop La technologie Direct to Disk permet 1 enregistrement simultané de tous les claviers et du pédalier Etant do...

Страница 75: ...pparaît sur l afficheur à trois chiffres Appuyez à nouveau sur la touche PAUSE pour démarrer l enregistrement Avant de commencer à jouer rappeler la combinaison générale contenant la registration précédemment élaborée ainsi l orgue mémorisera la registration sélectionnée au début du morceau Appuyez sur la touche STOP pour interrompre l enregistrement N oubliez pas que Les données sont sauvegardées...

Страница 76: ...e positionnement automatique de la tête de lecture au début ou à la fin du morceau sélectionné Pour positionner la tête de lecture au début du morceau arrêtez la lecture et appuyez sur la touche REW tout en appuyant sur la touche STOP Si vous appuyez sur la touche FF à la place de la touche REW la tête de lecture se placera automatiquement à la fin du morceau sélectionné cela prendra un petit mome...

Страница 77: ...inée l afficheur indique le numéro du morceau en cours 4 12 EFFACER UN MORCEAU Pour effacer un morceau de la disquette utilisez d abord les touches SONG et SONG pour sélectionner le numéro du morceau à effacer puis en maintenant enfoncée la touche REC appuyez sur CLEAR Le message Sur Etes vous sûr apparaîtra sur l afficheur Appuyez sur REC pour procéder à l effacement ou sur STOP pour abandonner l...

Страница 78: ...foncée la touche CLEAR et appuyez sur la touche SONG L afficheur indiquera la quantité d espace disque occupé par le morceau sélectionné Cette valeur est exprimée en Kilo octets 4 17 RÉSOLUTION TIME BASE Cette fonction définit la résolution dans laquelle l orgue Canticus enregistre les données reçues par le lecteur Par défaut ce paramétre est réglé sur 96 tics par noire rendant possible une résolu...

Страница 79: ...auche sa reproduction est dirigée uniquement vers la voie gauche R Right Droite sa reproduction est dirigée uniquement vers la voie droite C L Do vers gauche En partant de la note Do C de la premiére octave qui est dirigée vers la voie droite toutes les notes suivantes de la gamme chromatique seront dirigées alternativement vers chaque voie Do à droite Do à gauche Ré à droite etc C R Do vers droit...

Страница 80: ...à modifier Tournez la molette pour faire défiler tous les registres dans la section choisie jusqu à ce que le nom du registre à modifier apparaisse sur l écran Appuyez alors sur la touche PAGE tous les paramétres concernant la modification des registres décrits au paragraphes 5 1 apparaissent alors sur la premiére ligne de l écran la valeur de chaque paramétre s affichant en dessous 4 0 0 32 2 O O...

Страница 81: ...théques de disquettes séparées une ne contenant que les enregistrements de morceaux et une autre pour les données programmant les mémoires et les registres de l orgue Insérez une disquette 3 5 formatée non protégée contre l écriture encoche en haut à droite fermée dans le lecteur de disquette Puis appuyez sur la touche SETTING de l unité de contrôle La premiére page écran qui apparaît concerne le ...

Страница 82: ...e fichier n a pas été sauvegardé Si le message d erreur Der erreur disque apparaît c est que la disquette que vous avez insérée n a pas été formatée formatez la point 4 4 et répétez les procédures de sauvegarde Si elle a été correctement formatée c est qu elle est peut être endommagée dans ce cas utilisez une autre disquette 6 2 CHARGEMENT DE REGISTRES DEPUIS UNE DISQUETTE Insérez la disquette con...

Страница 83: ...VEGARDE DU CONTENU DES COMBINAISONS SUR DISQUETTE Comme pour les registres le contenu des combinaisons générales peut aussi être sauvegardé sur disquette et rechargé si nécessaire Pour cela aprés avoir inséré une disquette formatée dans le lecteur appuyez sur la touche SETTING puis sur la touche PAGE jusqu à ce que l écran indique 2 C 1 2 1 31 R Il faut ensuite activer l enregistrement dans la sec...

Страница 84: ...dique 0 C 1 2 1 31 R A l aide des touches SONG et sélectionnez le numéro du fichier contenant les données de combinaison à charger dans l instrument ce numéro apparaît sur l afficheur à trois chiffres Appuyez sur la touche curseur pour confirmer la sélection effectuée L écran indique 0 C 30 T 31 R 2 0 0 2 02 Appuyez sur EXIT pour abandonner l opération ou sur la touche curseur pour démarrer la pro...

Страница 85: ...itué à gauche sous le positif L émission et la réception de données MIDI est répartie sur plusieurs canaux afin que parmi tous les appareils récepteurs connectés seul celui réglé sur le même canal que l émetteur reçoive les informations et réponde Le protocole MIDI comporte 16 canaux A partir un instrument émetteur le contrôle séparé de 16 instruments connectés est ainsi possible Lorsque le canal ...

Страница 86: ...2 De plus l orgue contrôle également 4 canaux généraux servant à l échange d informations MIDI générales ou systéme Ces canaux sont les numéros 5 6 9 10 13 15 et 16 L ordre des canaux MIDI ne peut pas être modifié Pour activer un canal d émission MIDI spécifique appuyez sur la touche MIDI de l unité de contrôle puis sur la touche PAGE L afficheur indique 1 L L 9 LL 9 9 A B 9 9 L 99 Comme l indique...

Страница 87: ...a fois en réception par la prise MIDI IN et en émission par la prise MIDI OUT Message Abréviation Description Notes MIDI Note Message de note MIDI Control Change CC Message de contrôle volume expression etc Program Change PG Message de changement de registre Systéme Exclusif SYS EX Message de Systéme Exclusif de l orgue registration Real Time REAL Messages de synchronisation tempo Active Sensing A...

Страница 88: ...le curseur clignotant sur le paramétre à modifier puis tournez la molette pour sélectionner la valeur adéquate Appuyez sur EXIT pour sortir ou sur les touches PAGE et Ø pour faire défiler les autres pages écrans de réglages MIDI 7 6 TRANSPOSITION MIDI DES NOTES La valeur MIDI de la note transmise peut être transposée d une ou deux octaves plus haut ou plus bas En pressant la touche PAGE l écran vo...

Страница 89: ...e écran principale appuyez sur la touché TAB L afficheur est alors divisé en 4 colonnes correspondant aux quatre claviers de l orgue Pédale Grand Orgue Man I et Récit Man II le nom de chaque clavier apparaît en haut de la colonne et le nom du premier registre correspondant s inscrit en bas Utilisez les touches curseur et pour placer le curseur sous la section contenant le registre à initialiser To...

Страница 90: ...e piston HR des combinaisons générales 8 6 CANTICUS II INITIALISATION DE LA PROGRESSION DU CRESCENDO Pour revenir aux réglages d origine de progression Crescendo faites défiler les différentes pages d initialisation en appuyant sur la touche PAGE jusqu à ce que vous obteniez cette page écran L 4 L 31 9 230 2 5 0 Puis éteignez et rallumez votre orgue tout en maintenant enfoncé le piston de la mémoi...

Страница 91: ...CHANGE CC11 CC 90 CC 91 CC 92 O O O O O O O O O O Volume Expression 4 Tremolo Depth Reverb Level Tremolo Speed PROGRAM CHANGE True X X SYSTEM EXCLUSIVE O O SYSTEM Song Pos COMMON Song Sel Tune O O X O O X SYSTEM Clock REAL TIME Commands O O X O AUX Local On Off MESSAGES All note Off Active Sense Reset X O O X X O O X NOTES 1 see chapt 7 3 for more informations 2 MIDI note can be transposed 3 Veloc...

Страница 92: ......

Страница 93: ...de la Classe B selon les normes de protection contre les interférences avec d autres dispositifs électroniques environnants Cet appareil produit et utilise des fréquences radio S il n est pas installé et utilisé selon les instructions contenues dans le mode d emploi il peut générer des interférences L observation des normes FCC ne garanti pas qu il y aura aucune interférence Si cet appareil est la...

Страница 94: ...ectronics S p A P O BOX 5 Mondaino RN Italy From Italy TEL 0541 981700 FAX 0541 981052 From all other countries TEL 39 0541 981700 FAX 39 0541 981052 E MAIL viscount omniway sm WEB http www viscount organs com http www viscount it ...

Отзывы: