Viscount CANTICUS I - II
43
•
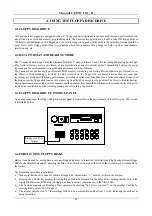
When track number 80 is reached, the drive returns to rest status and the message "NoS" (disk empty) appears to
confirm that the operation is complete.
•
It may be necessary to format a used floppy disk, or one which has been utilized by other equipment; in this case, the
procedure remains the same.
ATTENTION !!: Remember that when a disk is formatted, all the data it contains will be lost.
4.5 RECORDING A SONG
Before starting the recording process as such, a floppy disk (3.5", 2DD or 3.5" HD) ready for writing, i.e. formatted and
with the protective window in the top right-hand corner closed, must be inserted in the drive.
Starting from the CANCEL state (all organ registers disabled), obtained by pressing the HR button of the general memories,
build up the required sound and save it in one of the organ's general memories following the procedure described in chapter
2 of this manual.
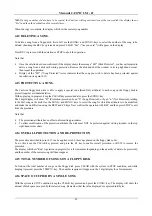
Then press the PAUSE key, and keep it pressed while pressing the REC key; the LED indicators of the respective keys will
light up and the consecutive number attributed to the song will appear on the 3 digit display.
Press the PAUSE key again to start recording. Before starting to play, recall the organ general memory containing the sound
set previously, to allow the organ to memorize the selected register configuration at the beginning of the song.
Press the STOP key to interrupt recording.
Always remember that:
•
The data are saved in fully automatic mode DURING the recording process itself. This is the fundamental characteristic
of the "direct to disk" reading/writing system used by the Canticus, which uses the disk itself directly as data uploading
and downloading unit.
•
The Canticus also organizes recognition of the songs on the disk by automatically assigning them consecutive numbers;
each song will be identified by a number higher than that of the last song on the disk.
•
The Canticus does not have functions as such for processing and correcting the material stored on floppy disk. In case
of performance errors, the entire recording process has to be repeated after the whole song has been cancelled. See
point 4.12 for the cancellation function.
4.6 PLAYING SONGS RECORDED ON FLOPPY DISK
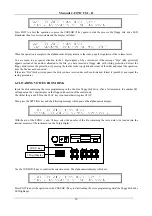
Insert the floppy disk containing the song to be played in the floppy disk drive, taking care to position it correctly. After a
few moments, the display will show the number 01, corresponding to the first song on the disk.
If the AUTOPLAY parameter (see point 4.9) is on ON, the start of playback will be fully automatic; otherwise, press the
PLAY key. Playback can be stopped temporarily by pressing the PAUSE key and restarted from the same point by pressing
the same key again. Press the STOP key to halt the playback and return the reader to the beginning of the song.
To select a different song number, use the SONG> (next song) or SONG< (previous song) keys.
4.7 VARYING THE METRONOME TEMPO
When the Canticus accesses the recorded song, it immediately identifies a code included in the base, which selects the
correct metronome tempo value.
However, this value can be varied using the TEMPO> and TEMPO< keys.
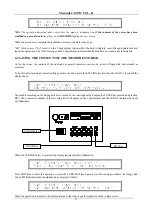
When one of the TEMPO keys is pressed, playback of the song in progress will be speeded up (TEMPO> key) or slowed
down (TEMPO< key), and whenever the chosen key is pressed, the display will show the metronome tempo value currently
selected.
The values available range from 32 to 250 b.p.m. Remember that the time selected will be maintained until the song is
changed, and that the original value can be restored by keeping the CLEAR key pressed and simultaneously pressing the
TEMPO< key.
Display of the current tempo value can be frozen on the 3 digit display by pressing the two TEMPO keys simultaneously.
To return to display of the current song number, press the two SONG keys simultaneously.
Содержание Canticus I-II
Страница 1: ...viscount Manuale Operativo Owner s Manual Mode d Emploi Canticus I II ...
Страница 92: ......


