background image

USER’S MANUAL

15

digital satellite meter

16

THE PROFESSIO NAL EQUIPMENT

digital satellite meter

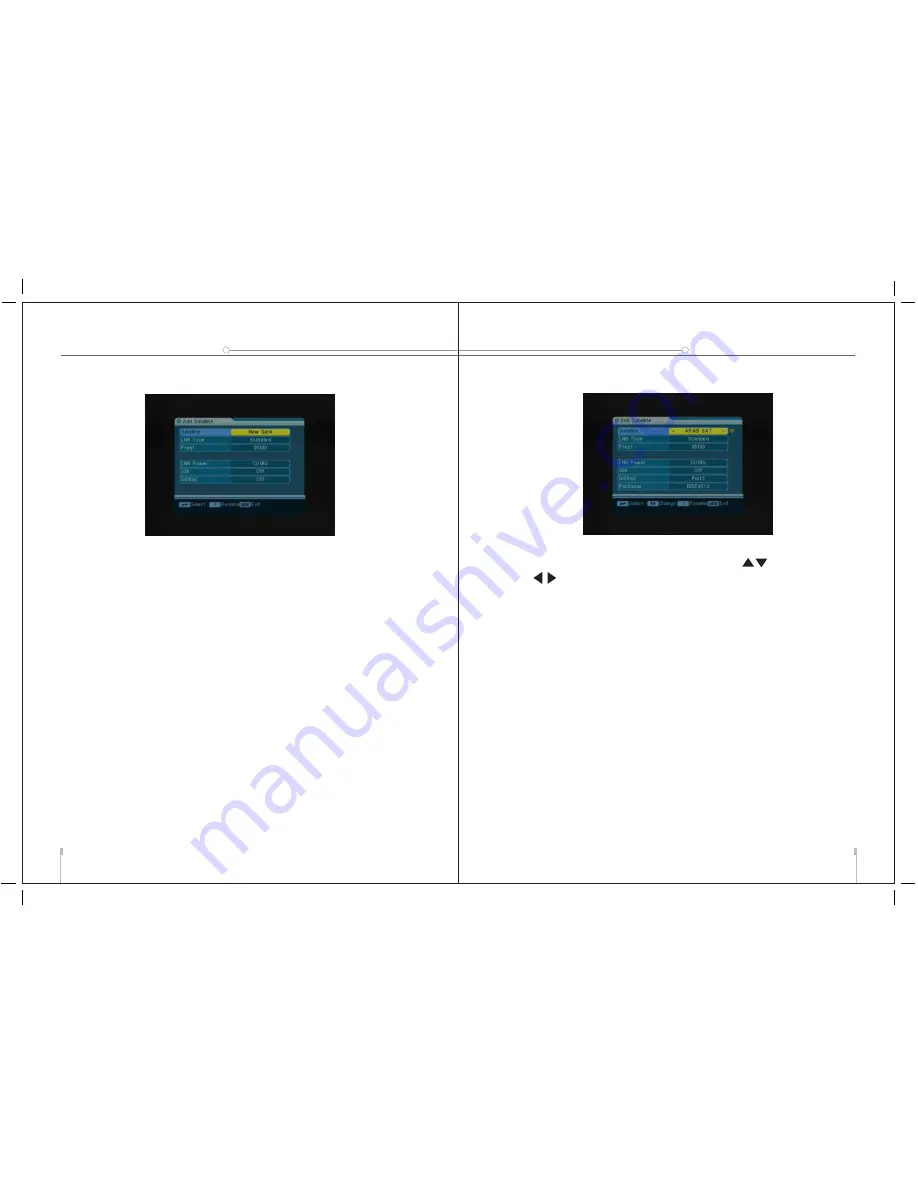
2.2 Add Satellite

(1). Satellite: Press OK to enter the submenu, and rename
the name of the new satellite.Press MENU to exit this menu.
(2). LNB Type: Select proper LNB type using the arrow keys
according to your physical LNB type.
(3). LNB Freq(1,2): Enter the proper LNB frequency referring
to oyur LNB using the numeric keys on the Keypad.
(4). LNB Power: Select the desired option. If oyur STB is
connected to another rceiver through LOOP THROUGH
suppor ,you shoule check which receiver is connected directly
to the LNB. In case the other receiver is directly connected
to the LNB,the select OFF.
(5). 22K: 22KHzcontrol is automatically set for each LNB
alternative.If "universal" is connected directly to the LNB.In
case the other receiver is directly connected to the LNB,the
select OFF.
(6). DiSEqC: Select the port number to get the RF signal
from the LNB, which is connected, to DiSEqC switching box.

2.3 Edit Satellite

(1). Satellite: Press OK to display the satellite list.Select the
satellite you want to check with pressing        . You can also
press        to select the satellite.
(2). LNB Type: Select proper LNB type using the arrow keys
according to your physical LNB type.
(3). LNB Freq(1,2): Enter the proper LNB frequency referring
to your LNB using the numeric keys on the Keypad.
(4). LNB Power: Select the desired option.If your STB is
connected to another receiver through LOOP THROUGH
support, you should check which receiver is connected directly
to the LNB.In case the other receiver is drectly connected
to the lNB, then select OFF.
(5). 22K: 22KHz control is automatically set for each LNB
alternative.If "universal" is selected, 22KHz control should
be "off state".
(6). DiSEqC: Select the port number to get the RF signal
from the LNB, which is connected, to V swiching box.
(7). Positioner: To set satellite position.

USER’S MANUAL

Содержание 300 ESP

Страница 1: ...USER S MANUAL THE PROFESSIONAL EQUIPMENT...

Страница 2: ...please contact the manufacturer Please charge the battery before using your meter for the first time Recommend 5 hours Contents Chapter I Introduction 2 Chapter II Function 2 A Front Panel 2 B Quick o...

Страница 3: ...is locked 6 Exit Press to return to the previous menu or escape from the item 7 Move cursor up down left right Page up down volume 8 Mute Press to temperarity cut off the sound of the program 9 Scan...

Страница 4: ...r go on the next step otherwise direly to the step B2 1 Press Menu button to display main menu go to the Channel sub menu and select the option Add Channel and press OK Use or to select edit satellite...

Страница 5: ...ge 5 Pressing the arrow keys select option OK and press OK to confirm the deletion or select cancel and press OK to cancel To move a channel 1 In the edition channels menu press 2 in the Keypad 2 Pres...

Страница 6: ...the sub menu in screen 3 You can press the arrow keys to select and use the numeric keys to input the value of parameter 4 Select save to confirm them otherwise select EXIT to to back To delete the ch...

Страница 7: ...e satellite list Selet the satellite you want to check with pressing You can also press to select the satellite 2 LNB Type Select proper LNB type using the arrow keys according to your physical LNB ty...

Страница 8: ...g point for the satellite search function can be selected by pressing the OK button Add TP Add a new transponder for the current satellite Delete TP Delete the current transponder 2 Installation 2 1 A...

Страница 9: ...to the LNB the select OFF 6 DiSEqC Select the port number to get the RF signal from the LNB which is connected to DiSEqC switching box 2 3 Edit Satellite 1 Satellite Press OK to display the satellite...

Страница 10: ...with those satellite you want to delete 4 To confirm the deletion press EXIT to exit the edition satellite menu You will see a confirmation message 5 Pressing the arrow keys select option OK and press...

Страница 11: ...From 0 to 80 3 5 Parent Lock This function allows you to lock the channel with a password in order to prevent children from accessing the channel You can also protect your installed data and informati...

Страница 12: ...ngitude of the current satellite 4 Start Press OK The orientation and elevation of the antenna will be display on the screen 4 3 Default Value This option allows you to restore the parameters to the o...

Страница 13: ...ative terminals with a metal objects such as necklaces hair pins etc Notice The battery is only applicable to the charger which supplied or appointed by the manufacturer of this machine The charging t...

Отзывы: