Using the Printer
35
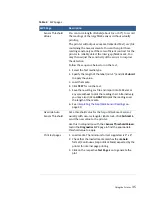
Sensor Threshold
Values
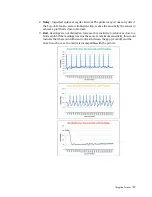
You can run a length of labels (about 1m or 40”) to record
the readings of the Gap/Mark sensor without actually
printing.
The printer will output a Comma Delimited Text (.csv) file
containing the measurements. You can then plot these
readings and analyze if there is sufficient contrast for the
printer to reliably detect the inter‐gap/black mark. You
may then adjust the sensitivity of the sensor to improve
the detection.
Follow the sequence below to run the test,
1. Select the Test media type.
2. Specify the length of the label (min. 1”) and click
Submit
to apply the value.
3. Load the media.
4. Click
TEST
for run the test.
5. Save the resulting .csv file and import into MS Excel or
any spreadsheet to plot the reading chart. Alternatively,
you may also click on
GRAPH
to plot the readings over
the length of the media.
6. See
Interpreting the Gap/Mark Sensor Readings
Override Auto
Sensor Threshold
Set a threshold value for the Gap or Black mark sensor,
usually with non‐rectangular label stock. Click
Submit
to
send the new value to the printer.
Use this in conjunction with the
<Sensor Threshold Values>
test in the
Diagnostics
EWS page
to find the appropriate
threshold value to apply.
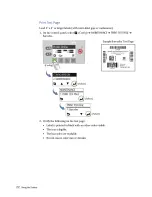
Print test pages
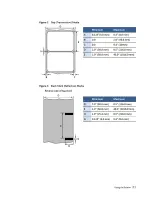
1. Load media. The minimum format supported is 4” x 4”.
2. Check that the loaded media matches the
<Labels>
format (Continuous, Gap or Black Mark) expected by the
printer for internal page printing.
3. Click on the respective
Test Page
icon to generate the
plot
Table 4
EWS pages
EWS Page
Description
Содержание VP7 Series
Страница 1: ...VIPColor U s e r G u i d e VP7xx Printer Series ...
Страница 8: ......
Страница 9: ......
Страница 10: ......
Страница 11: ......
Страница 12: ......
Страница 16: ......
Страница 17: ......
Страница 18: ......
Страница 19: ......
Страница 20: ......
Страница 21: ......
Страница 22: ......
Страница 24: ......
Страница 26: ......
Страница 27: ......
Страница 28: ......
Страница 29: ......
Страница 45: ......
Страница 46: ......
Страница 47: ......
Страница 48: ......
Страница 49: ......
Страница 50: ......
Страница 52: ......
Страница 53: ......
Страница 54: ......
Страница 55: ......
Страница 56: ......
Страница 57: ......
Страница 58: ......
Страница 59: ......
Страница 60: ......
Страница 61: ......
Страница 62: ......
Страница 63: ......
Страница 64: ......
Страница 70: ......
Страница 73: ......
Страница 75: ......
Страница 76: ...76 Troubleshooting ...
Страница 78: ......
Страница 83: ......
Страница 86: ...86 Appendix 8 NC 9 NC Table 7 GPIO Pin Assignment D sub 9 pin Connector Pin Signal Description ...

