© 2009 Viking Preferred Service
25
Removing Drain Valve
1. Drain water in the reservoir by removing the
drain plug or switching to the “CLEAN” switch
position and then to the “OFF” position.
Replace the drain plug, if this method is used,
after the water has been drained.
2. Disconnect power, water line, and drain line.
If a drain pump is used, it will need to be
disconnected and removed.
3. Remove the back panel and lower shroud
(see
Figure 6
).
4. Remove the brown wire and white wire at the
drain valve terminals.
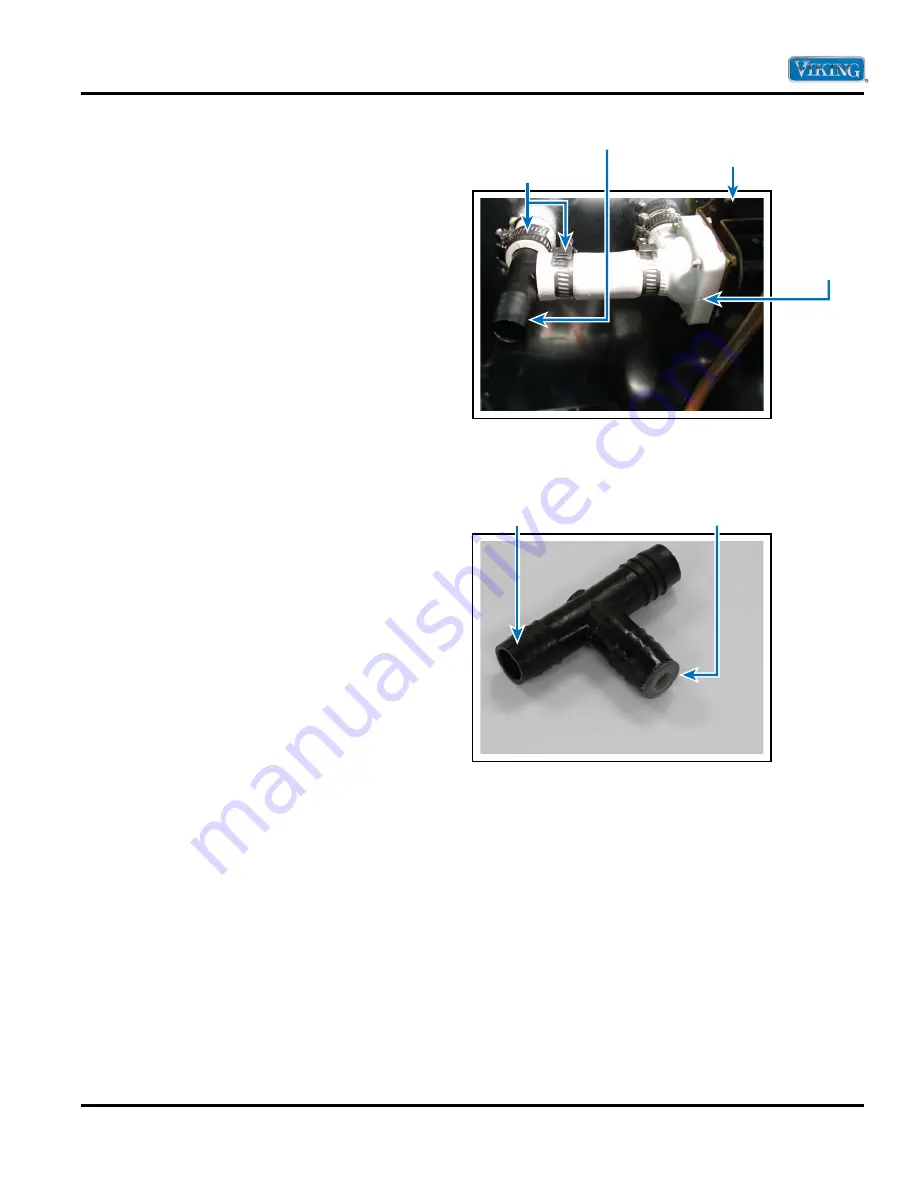
5. Loosen the hose clamps on each side of the
drain valve (see
Figure 12
).
6. Remove the two screws securing the drain valve
(see
Figure 12
).
7. Remove the drain valve.
Installing Drain Valve
Reverse the removal procedure for installation
(see above). It is important to keep the valve clean
during installation to assure proper performance.
After installation, make certain the hose clamps are
secure and that the valve or tubing does not leak.
This can be done by adding water to the reservoir
and observing for any leaks from the tubing
connections or the valve itself. Also, at this time,
make certain that the drain tee-fitting flow restrictor
is in place (see
Figure 13
). Reposition as needed or
order replacement.
Hose clamps
Figure 12
Screw
Drain fitting tee
Drain valve
Figure 13
Drain fitting tee
Drain flow restrictor
in this location
Service Diagnostics and Procedures
(Valves)


