3/29
No.
Name
Function Description
1
RESET Button
Press and hold this button (about 10 seconds) until Status
LED starts flashing, Controller will be reset automatically.
2
POWER LED
The red LED will light on when the Controller is powered on.
3
STATUS LED
The status LED will flash in yellowish-green every 1 second
until Controller boots up completely and Control LAN is
ready, then it becomes solid.
4
UPDATE
Firmware update port.
Note: Must keep no connection on this port when Controller
works in normal mode.
5.2
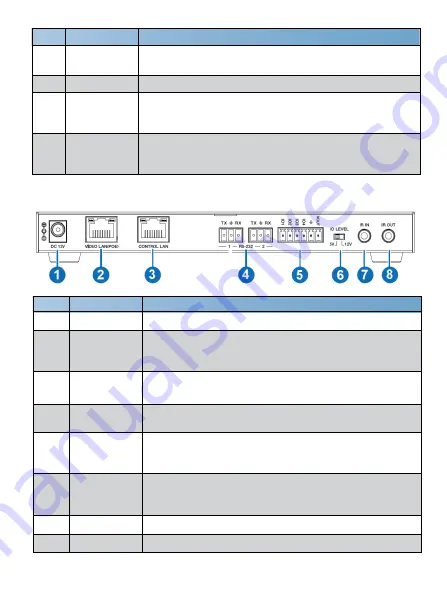
Rear Panel
No.
Name
Function Description
1
DC 12V
DC 12V/1A power input port.
2
VIDEO LAN
(POE)
1G Video LAN port, supporting POE function.
Note: When POE is enabled, DC 12V/1A power supply is
not required.
3
CONTROL
LAN
The TCP/IP control network port.
4
3-pin Phoenix
Connectors
Two identical RS-232 serial communication ports.
5
6-pin Phoenix
Connector
4 channel I/O level outputs, 1 channel grounding,
1 channel power supply (supports up to 12V/0.5A) to the
outside.
6
IO LEVEL
DIP Switch
Used to control I/O level output and VOUT voltage.
Switch to left: 5V I/O level output, VOUT is 5V.
Switch to right: 12V I/O level output, VOUT is 12V.
7
IR IN
12V IR signal input port.
8
IR OUT
IR signal output port. (Reserved for future use.)
Содержание VL-IPSC-1
Страница 1: ...VL IPSC 1 AVoIP controller for EB100AT VER 1 0...
Страница 11: ...9 29...
Страница 29: ...27 29...
Страница 30: ...28 29...


