background image

29

Hot Keys

When the On-Screen Display (OSD) Menu is off, you can quickly access special 

functions by using the control panel keys.

Key

Description

2 + 3

Press and hold the keys to lock/unlock the OSD Menu.
When the menu appears on the screen, continue holding both 

keys for 10 seconds to lock/unlock the OSD Menu.

1

OSD Lock/Unlock

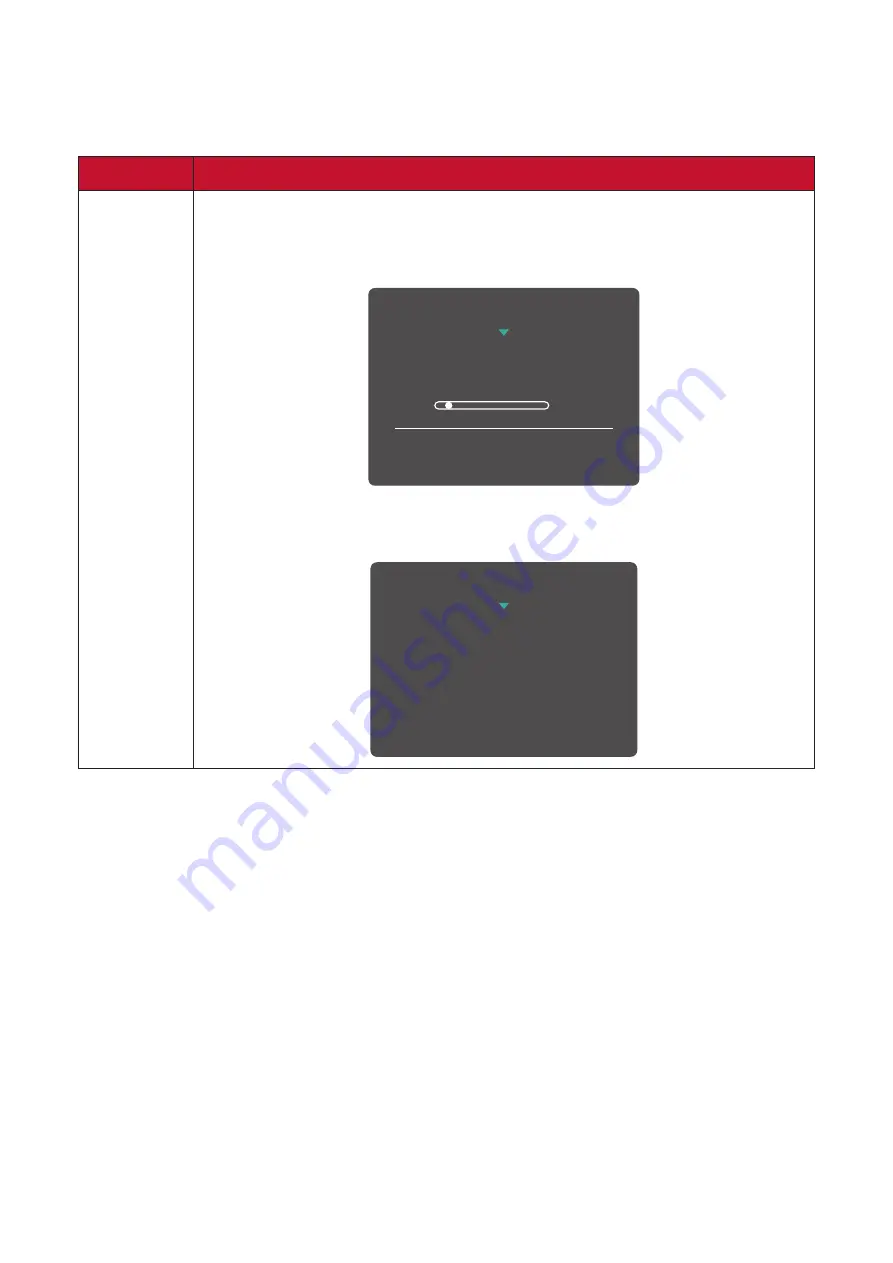
Locking OSD

Press and hold for 10s

to lock OSD

If the OSD Menu is locked, the below message will appear on the 

screen:

OSD Lock/Unlock

OSD Locked 

Содержание VG2440V

Страница 1: ...ing your product for future service Warranty information contained in this User Guide will describe your limited coverage from ViewSonic Corporation which is also found on our web site at http www vie...

Страница 2: ...eding the world s expectations for technological evolution innovation and simplicity At ViewSonic we believe that our products have the potential to make a positive impact in the world and we are conf...

Страница 3: ...to the Maintenance section on page 56 Oil may collect on the screen as you touch it To clean the greasy spots on the screen refer to the Maintenance section on page 56 Do not touch the screen surface...

Страница 4: ...d for a long period of time Refer all servicing to qualified service personnel Service will be required when the unit has been damaged in any way such as if the power supply cord or plug is damaged if...

Страница 5: ...A Connection 18 USB Connection 19 Audio Connection 20 Using the Monitor 21 Adjusting the Viewing Angle 21 Height Adjustment 21 Tilt Angle Adjustment 22 Screen Orientation Adjustment Monitor Pivot 22 S...

Страница 6: ...57 Regulatory and Service Information 58 Compliance Information 58 FCC Compliance Statement 58 Industry Canada Statement 58 CE Conformity for European Countries 58 Declaration of RoHS2 Compliance 59...

Страница 7: ...ontents IPS display Power cord Video cable USB cable Quick start guide NOTE The power cord and video cables included in your package may vary depending on your country Please contact your local resell...

Страница 8: ...Up 3 Speaker Mute 4 Microphone Mute 5 OSD Menu key and its functions refer to Hot Keys on page 29 Rear View 1 2 3 4 5 6 7 8 1 AC IN 2 Audio In 3 Audio Out 4 DisplayPort 5 HDMI 6 VGA 7 USB Upstream 8...

Страница 9: ...talling the Stand 1 Place the box on a flat stable surface and open the front flap of the box to reveal the contents Remove the top tray 2 Remove the monitor stand s base and neck Align and connect th...

Страница 10: ...Align and slide the upper hooks of the monitor stand into the stand mounting slots as shown in the illustration below NOTE Ensure the stand is secure and the quick release tab positively clicks into p...

Страница 11: ...the device out of the box and into its upright position on a flat stable surface NOTE Always place the device on a flat stable surface Failure to do so may cause the device to fall and damage the devi...

Страница 12: ...Loading Hole pattern W x H Interface Pad W x H x D Pad Hole Screw Specification Quantity 14 kg 100 x 100 mm 115 x 115 x 2 6 mm 5 mm M4 x 10 mm 4 pieces NOTE Wall mount kits are sold separately 1 Turn...

Страница 13: ...ing bracket to the VESA mounting holes at the rear of the device Then secure it with four 4 screws M4 x 10 mm 100 mm 100 mm 6 Follow the instructions that come with the wall mounting kit to mount the...

Страница 14: ...device to secure the device to a fixed object Additionally fastening the monitor to a wall or fixed object using a security cable can help support the weight of the monitor in order to prevent the mo...

Страница 15: ...ns This section guides you on how to connect the monitor with other equipment Connecting to Power 1 Connect the power cord to the AC IN jack at the rear of the device 2 Connect the power cord plug to...

Страница 16: ...nal Devices HDMI Connection Connect one end of an HDMI cable to the HDMI port of your monitor Then connect the other end of the cable to the HDMI port of your computer NOTE The monitor is equipped wit...

Страница 17: ...end of the cable to the DisplayPort or mini DP port of your computer NOTE To connect the monitor to the Thunderbolt port v 1 2 on your Mac connect the mini DP end of the mini DP to DisplayPort cable...

Страница 18: ...18 VGA Connection Connect one end of a VGA cable to the VGA port of your monitor Then connect the other end of the cable to the VGA port of your computer VGA VGA...

Страница 19: ...tion s observe the following guidelines Three 3 USB Type A ports Connection for your Type A peripheral device s e g storage device NOTE To activate the USB Type A port ensure your computer is also con...

Страница 20: ...tion Plug the audio jack of the ear headphones into the Audio Out port of the monitor Additionally you can connect the monitor to a sound bar using an audio cable NOTE The monitor is also equipped wit...

Страница 21: ...ng Angle For optimal viewing you can adjust the viewing angle using any of the following methods Height Adjustment Lower or raise the monitor to the desired height 0 to 130 mm NOTE When adjusting pres...

Страница 22: ...he stand firmly with one hand while tilting the monitor forwards or backwards with the other hand The monitor must be lifted to the highest position then it can support 40 tilt Screen Orientation Adju...

Страница 23: ...e or counter clockwise from landscape to portrait orientation NOTE To rotate the screen image manually change the system s display orientation settings When adjusting make sure to hold both sides of y...

Страница 24: ...24 Swivel Angle Adjustment Swivel the monitor to the left or right for the desired viewing angle 60...

Страница 25: ...o turn on the monitor 3 To turn the monitor off press the Power button again NOTE The monitor will still consume some power as long as the power cord is connected to the power outlet If the monitor is...

Страница 26: ...26 Using the Webcam NOTE To activate the webcam ensure the monitor is connected to your computer via the USB Upstream port Uncovering and Covering the Webcam Uncovered Covered...

Страница 27: ...27 Tilting the Webcam Tilt the slider door forwards or backwards to adjust the viewing angle 5 to 5...

Страница 28: ...d navigate the On Screen Display OSD Menu 1 3 5 4 2 Quick Menu Volume Down Volume Up Press the 1 or 2 key to adjust the speaker volume Speaker Mute Press the 3 key to mute unmute the speaker Microphon...

Страница 29: ...scription 2 3 Press and hold the keys to lock unlock the OSD Menu When the menu appears on the screen continue holding both keys for 10 seconds to lock unlock the OSD Menu 1 OSD Lock Unlock Locking OS...

Страница 30: ...onds to lock unlock the Power button 3 Power Lock Unlock Locking Power Button Press and hold for 10s to lock power If the Power button is locked the below message will appear on the screen Power Lock...

Страница 31: ...t ViewMode Manual Image Adjust Input Select Audio Mic D Sub HDMI DisplayPort 2 Press the 1 or 2 key to select the main menu Then press the 3 key to enter the selected menu 1920 X 1080 60Hz Setup Menu...

Страница 32: ...u Color Adjust ViewMode Manual Image Adjust Input Select Audio Mic Volume Speaker Mute Microphone Mute On Off 4 Press the 1 or 2 key to adjust select the setting Then press the 3 key to confirm 1920 X...

Страница 33: ...elect the option or make adjustments Key Guide Key Guide 1920 X 1080 60Hz Setup Menu Color Adjust ViewMode Manual Image Adjust Input Select Audio Mic Volume Speaker Mute Microphone Mute On Off 1920 X...

Страница 34: ...ViewMode Off Office Web Text CUSTOM 1 2 3 Low Input Lag On Off Black Stabilization 0 10 20 30 40 50 60 70 80 90 100 Advanced DCR 0 25 50 75 100 Response Time Standard Advanced Ultra Fast Hue Red 0 100...

Страница 35: ...arm User Color Red 0 100 Green 0 100 Blue 0 100 Color Space Auto RGB YUV Color Range Auto Full Range Limited Range Gamma 1 8 2 0 2 2 2 4 2 6 2 8 Manual Image Adjust Auto Image Adjust Horizontal Size 0...

Страница 36: ...Espa ol Italiano Suomi T rk e esk Svenska Resolution Notice On Off Information OSD Timeout 5 15 30 60 OSD Background On Off OSD Pivot 0 90 90 Power Indicator On Off Auto Power Off On Off Sleep 30 Min...

Страница 37: ...DisplayPort 1 2 On Off DDC CI On Off Auto Detect On Off All Recall If a D Sub connection is detected it will be grayed out If no D Sub connection is detected it will be grayed out If no DisplayPort c...

Страница 38: ...to select Input Select Then press the 3 key to enter the Input Select menu 1920 X 1080 60Hz Setup Menu Color Adjust ViewMode Manual Image Adjust Input Select Audio Mic D Sub HDMI DisplayPort 3 Press t...

Страница 39: ...udio Mic Volume Speaker Mute Microphone Mute 3 Press the 1 or 2 key to select the menu option Then press the 3 key to enter its sub menu 4 Press the 1 or 2 key to adjust select the setting Then press...

Страница 40: ...e 3 key to confirm the selection NOTE Some sub menu options may have another sub menu To enter the respective sub menu press the 3 key Follow the key guide that appears on the bottom of the screen to...

Страница 41: ...y to select the menu option Then press the 3 key to enter its sub menu 4 Press the 1 or 2 key to select the setting Then press the 3 key to confirm the selection NOTE Some sub menu options may have an...

Страница 42: ...ld like to use for monitor color output Auto Automatically recognizes the color format and black and white levels RGB The input signal color format is RGB YUV The input signal color format is YUV Colo...

Страница 43: ...confirm if applicable Menu Option Description Auto Image Adjust Automatically adjust the screen image position Horizontal Size Stretch or shorten the screen on its horizontal axis H V Position Adjust...

Страница 44: ...SD Timeout OSD Background OSD Pivot Power Indicator Auto Power Off Sleep ECO Mode DisplayPort 1 2 3 Press the 1or 2 key to select the menu option Then press the 3 key to enter its sub menu 4 Press the...

Страница 45: ...t 90 Sets the OSD Menu with a 90 pivot 90 Sets the OSD Menu with a 90 pivot Power Indicator Set the power indicator on or off If the setting is set to On the power indicator lights blue when the devic...

Страница 46: ...ewable Color Filter RGB vertical stripe Glass Surface Anti Glare type 3H hard coating Haze 25 Input Signal Video Sync Separate Sync VGA fh 16 83 Khz fv 50 75 Hz TMDS digital 100 HDMI v1 4 fh 15 90 Khz...

Страница 47: ...800 x 600 56 60 72 75Hz 720 x 576 50Hz 720 x 480 60Hz 720 x 400 70Hz 640 x 480 50 60 66 72 75Hz 640 x 400 60 70Hz 640 x 350 70Hz Power Adapter2 Input Voltage AC 100 240 V 50 60 Hz auto switch Display...

Страница 48: ...52 W Max3 Blue LED Off 0 3W Do not set the graphics card in your computer to exceed these timing modes doing so may result in permanent damage to the display Please use the power adapter from ViewSon...

Страница 49: ...cations of this manual NOTE Exception This control does not affect changes made with the Language Select or Power Lock setting Audio Adjust Adjusts the volume mutes the sound or toggles between inputs...

Страница 50: ...hich color space they would like to use for monitor color output RGB YUV Color Temperature Allows users to select specific color temperature settings to further customize their viewing experience Pane...

Страница 51: ...the tint of each color red green blue cyan magenta and yellow I Information Displays the timing mode video signal input coming from the graphics card in the computer the LCD model number the serial nu...

Страница 52: ...hange the energy consumption and may increase energy consumption beyond the limits required for ENERGY STAR qualification as applicable ENERGY STAR is a set of power saving guidelines issued by the U...

Страница 53: ...ght are added together to reproduce a broad array of colors S Saturation Adjusts the color depth of each color red green blue cyan magenta and yellow Setup Menu Adjusts On Screen Display OSD settings...

Страница 54: ...settings Make sure the correct input source is selected Wrong or abnormal colors If any colors red green or blue are missing check the video cable to make sure it is properly and securely connected Lo...

Страница 55: ...put source Reset the monitor to factory settings Control panel keys do not work Press only one key at a time Restart the computer No audio output If using ear headphones make sure the mini stereo jack...

Страница 56: ...ot clean apply a small amount of non ammonia non alcohol based glass cleaner onto a clean soft lint free cloth then wipe the screen Cleaning the Case Use a soft dry cloth If the case is still not clea...

Страница 57: ...laceable Main Processor s or SOC No No Yes Memory N A N A N A HDD N A N A N A Wireless Networking Capability N A N A N A Graphics Card N A N A N A Rechargeable Battery N A N A N A Fan Assembly N A N A...

Страница 58: ...t installed and used in accordance with the instructions may cause harmful interference to radio communications However there is no guarantee that interference will not occur in a particular installat...

Страница 59: ...elow Substance Proposed Maximum Concentration Actual Concentration Lead Pb 0 1 0 1 Mercury Hg 0 1 0 1 Cadmium Cd 0 01 0 01 Hexavalent Chromium Cr6 0 1 0 1 Polybrominated biphenyls PBB 0 1 0 1 Polybrom...

Страница 60: ...s exceeding 0 1 weight and 0 01 weight for cadmium except for the exemptions set in Schedule 2 of the Rule Product Disposal at End of Product Life ViewSonic respects the environment and is committed t...

Страница 61: ...ble future Criteria in TCO Certified have a life cycle perspective and balance environmental and social responsibility Conformity is verified by independent and approved verifiers that specialize in I...

Страница 62: ...Protection Agency EPA As an ENERGY STAR partner ViewSonic Corporation has determined that this product meets the ENERGY STAR guidelines for energy efficiency Disclaimer ViewSonic Corporation shall no...

Страница 63: ...www viewsonic com my Middle East www viewsonic com me Myanmar www viewsonic com mm Nepal www viewsonic com np New Zealand www viewsonic com nz Pakistan www viewsonic com pk Philippines www viewsonic...

Страница 64: ...s Please refer to What the warranty excludes and does not cover section How long the warranty is effective ViewSonic displays are warranted for between 1 and 3 years depending on your country of purch...

Страница 65: ...display through inappropriate cleaning as described in the product User Guide Removal installation and set up service charges including wall mounting of the product How to get service For information...

Страница 66: ...by anyone not authorized by ViewSonic Effect of state law This warranty gives you specific legal rights and you may also have other rights which vary from state to state Some states do not allow limit...

Страница 67: ...r purchase Who the warranty protects This warranty is valid only for the first consumer purchaser What the warranty excludes and does not cover Any product on which the serial number has been defaced...

Страница 68: ...ainer packaging to an authorized ViewSonic service center Round trip transportation costs for in warranty products will be paid by ViewSonic Limitation of implied warranties There are no warranties ex...

Страница 69: ...4136954 E Mail Cefeo soluglobales com Cuernavaca Compusupport de Cuernavaca SA de CV Francisco Leyva 178 Col Miguel Hidalgo C P 62040 Cuernavaca Morelos Tel 01 777 3180579 01 777 3124014 E Mail aquev...

Страница 70: ...C0 M91 Y72 K24 Process Color C0 M0 Y0 K100 Process Color C0 M91 Y72 K24 Process Color Pantone Black C Spot Color Pantone 187 C Spot Color...

Отзывы: